

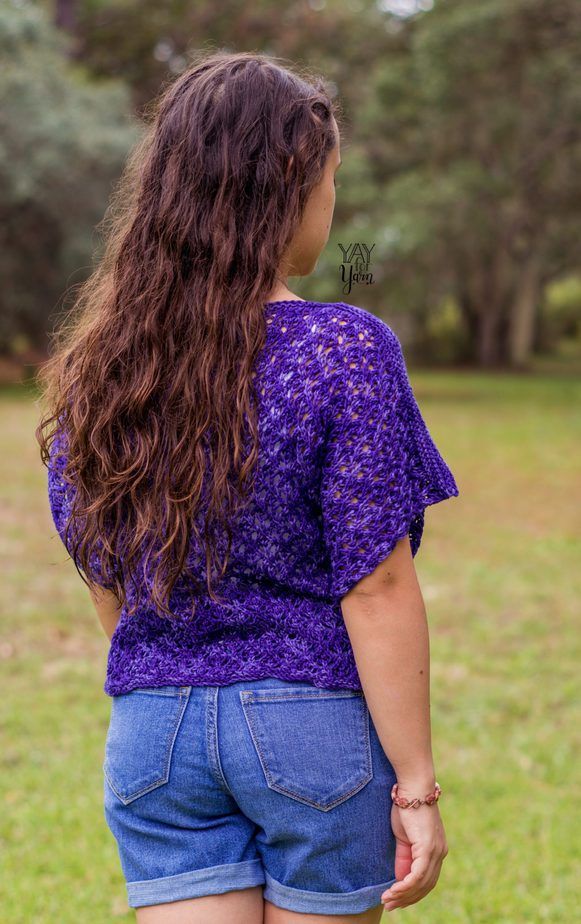
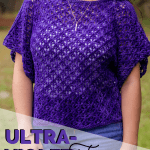
This size-inclusive women’s tee is knit in a simple, delicate lace stitch with no shaping! Knit your own with this free knitting pattern and video tutorial.
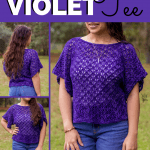
Have you tried lace knitting yet? I love the delicate fabric it creates, and it’s not as difficult as it may seem. The UltraViolet Tee features an oversized fit and wide sleeve that really showcase the lovely drape of the lace-knit fabric. I knit my tee from a cotton yarn that is perfect for summer, but this top can also be a versatile multi-season piece.

Table of Contents
How to Choose the Best Yarn for a Knitted Tank Top
This women’s top knitting pattern calls for #3 Light / DK Weight yarn. I wanted my tee to be suitable for summer as well as fall and spring, so I chose a pure Organic Pima Cotton yarn in a tonal hand-dyed colorway.
The yarn I used is URU.Yarn Cotton Basic, from the July 2020 KnitCrate subscription. (I used the colorway called “Stardust”.) This Organic Pima Cotton yarn has a soft, smooth, fuzz-free texture, which makes a soft and comfy tee. (This limited-edition yarn is available in the KnitCrate shop while supplies last. KnitCrate Members get a 50% discount, too!) If you prefer, you can use a yarn with a different fiber content, as long as it is soft and comfortable against the skin.
When selecting the yarn you want to use for this pattern, make sure the yarn label says it is #3 Light or DK Weight. Then, purchase enough skeins of the yarn you want to use so that you have at least the total number of yards required in the pattern for the size and length you are making.

How do I Choose a Size?
The UltraViolet Tee knitting pattern includes instructions for 9 sizes, from women’s Extra Small to 5X. To decide which size you want to make, you’ll need to measure around the fullest part of the bust. Then, follow the instructions in the “Sizing” section of the pattern to select the size according to the wearer’s bust measurement.
This tee is designed with an oversized fit, so the finished tee will measure about 6″-8″ larger than the wearer’s bust measurement. If you would like a closer-fitting tee, you can size down.
The UltraViolet Tee pattern includes instructions for two different lengths, a cropped length version and a full-length version. You can also make your tee a custom length according to the pattern instructions.
Please compare the finished length of the tee given in the instructions to the wearer’s body to see which version of the tee you would like to make. The cropped version of the tee is shown in the photos on a petite model.
Can I knit this if I am a beginner?
This free lace tee knitting pattern uses simple construction, with a few special stitches added for the lace. If you’re comfortable with the basic knitting techniques, and familiar with reading a written pattern, you can make this project. (See the Special Stitches section for instructions on the special stitches used.) Plus, there’s a full video tutorial for this project, which will walk you through the written instructions and help you follow along.
Ready to get started? Let’s knit the UltraViolet Tee!
UltraViolet Tee Knitting Pattern
by Yay For Yarn
Skill Level: Advanced Beginner
Sizing:
- Sizing follows the Craft Yarn Council’s standards for Women’s sizes.
- This tee has a loose, oversized fit, with about 6” to 8” (about 15-20 cm) of positive ease. If you are between sizes, size up if you want a looser-fit tee, or size down if you want a more fitted tee. Measure the bust of the wearer, and choose the size that is closest to the wearer’s bust measurement, under the title “To Fit Bust”.
- Pattern includes instructions for two lengths, a slightly cropped version and a full length version. Please compare the finished length of the tee given in the instructions to the wearer’s body to see which version of the tee you would like to make. Cropped version is shown in pattern photos on a petite model.
- Length of Tee is adjustable. If you want to add length, you will need more yarn than the pattern requires.
- Instructions and yarn requirements for size X-Small are given outside the parentheses, with Small, Medium, Large, X-Large, 2X, 3X, 4X, and 5X given inside the parentheses, like this: X-Small (Small, Medium, Large, X-Large, 2X, 3X, 4X, 5X).
- When only one number is given, it applies to all sizes. To follow pattern more easily, circle or highlight all numbers that apply to your size before beginning.
To Fit Bust:
30 (34, 38, 42, 46, 50, 54, 58, 62) inches OR 76 (86, 96.5, 107, 117, 127, 137, 147, 157.5) cm
Finished Bust:
38 (41, 43.5, 49.5, 52.5, 58, 61, 64, 69.5) inches OR 96.5 (104, 110.5, 125.5, 133, 147.5, 155, 162.5, 176.5) cm
Finished Back Length:
Cropped Version:
16.5 (16.5, 16.5, 17.5, 17.5, 17.5, 18.5, 18.5, 18.5) inches OR 42 (42, 42, 44.5, 44.5, 44.5, 47, 47, 47) cm
Full Length Version:
21 (21, 21, 22, 22, 22, 23, 23, 23) inches OR 53 (53, 53, 56, 56, 56, 58.5, 58.5, 58.5) cm
Yarn:
For Cropped Version: 611 (646, 679, 808, 845, 919, 1024, 1064, 1142) yards of #3 Light / DK Weight Yarn
For Full Length Version: 733 (777, 820, 967, 1014, 1105, 1220, 1269, 1365) yards of #3 Light / DK Weight Yarn
I used URU.Yarn Cotton Basic in Stardust, 100% Unmercerized Organic Pima Cotton, DK Weight, 266 yds / 242 m per 100 g / 3.5 oz skein (now discontinued, see recommended substitutes below), 3 (3, 3, 3, 4, 4, 4, 4, 5) skeins for cropped version, 3 (3, 4, 4, 4, 5, 5, 5, 6) skeins for full length version
You Will Also Need:
- US Size 7 / 4.5 mm Circular Knitting Needles, at least 30” (76 cm) long
- Scissors
- Measuring Tape
- Yarn Needle or Blunt Tapestry Needle
Shop Supplies for this Project
 Buy Now →
  Buy Now →
  Buy Now →
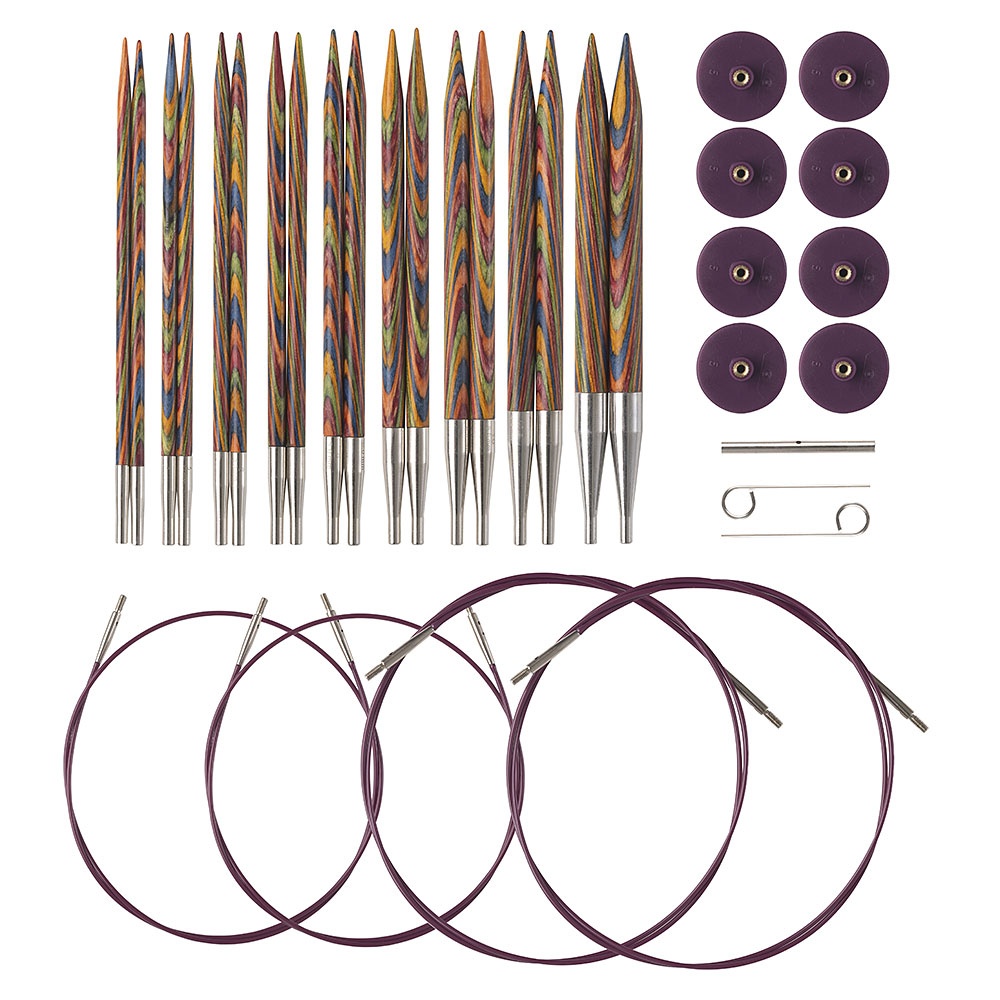
KnitPicks Options Rainbow Interchangeable Knitting Needles
Buy Now →
Chibi Metal Yarn Needles – Amazon
Buy Now →
Knitter’s Pride Rainbow Folding Scissors
Buy Now →
Gauge: 25 stitches = 6” (15.2 cm); 44 rows = 6” (15.2 cm) in main stitch pattern, after blocking
Abbreviations:
CO: cast on
K: knit
P: purl
st(s): stitch(es)
*YO: yarn over
*K2tog: knit 2 stitches together
*SSK: slip, slip, knit
*SK2P: slip one, knit 2 together, pass slipped stitch over
BO: bind off
*This is a special stitch. See instructions below to learn how to work this stitch.
Special Stitches:
YO: Bring the yarn to the front, and wrap it over the right needle from front to back. This stitch is worked into as normal on the following row. It creates the little holes or eyelets in the lace.
K2tog: Insert the needle from front to back into the next 2 sts at the same time. Knit through both stitches as though they were one.
SSK: Insert right needle into next st as if to knit it, but just slip the stitch over to the right needle without working into it. Slip the next st to the right needle in the same manner. Then, insert the left needle into the front of both slipped stitches, so your needles are making an X through both stitches. (The left needle should be in front of the right needle.) Wrap the yarn around the right needle tip, and knit through both stitches.
SK2P: Insert right needle into next st as if to knit it, but just slip the stitch over to the right needle without working into it. Then, knit 2 together. Insert the left needle tip into the front of the stitch you slipped, and lift it up, over the K2tog, and off the tip of the right needle. (This creates a double decrease.)
How to work the Knitted Cast On
Make a Slip Knot and place it on the left needle. Insert the right needle into that slip knot as if to knit. Knit through the slip knot as normal, but do not lift the slip knot off of the left needle. Stretch the loop that is on the right needle, lift it up, and slide it down onto the left needle so the right needle appears to be inserted into the loop as if to knit.
For all following stitches:
Step 1: The right needle is already inserted into the first loop on the left needle as if to knit. Knit through the stitch as normal, but do not lift the old stitch off of the left needle.
Step 2: Stretch the loop that is on the right needle, lift it up, and slide it down onto the left needle so the right needle appears to be inserted into the loop as if to knit.
Repeat steps 1 and 2 until you have cast on the correct number of stitches.
Pattern for Gauge Swatch:
CO 31 sts.
Row 1: *K1, YO, SSK, K1, K2tog, YO.* Repeat from *to* until 1 st remains, K1. You should have 31 sts.
Row 2, 4, 6, and 8: P across.
Row 3: *K1, YO, K1, SK2P, K1, YO.* Repeat from *to* until 1 st remains, K1.
Row 5: *K1, K2tog, YO, K1, YO, SSK.* Repeat from *to* until 1 st remains, K1.
Row 7: K2tog. *(K1, YO) twice, K1, SK2P.* Repeat from *to* until 5 sts remain, (K1, YO) twice, K1, SSK.
Repeat Rows 1-8 six more times. BO, block, and measure gauge. Finished swatch should measure 7.5” by 8” (19 cm by 20.5 cm).

UltraViolet Tee Instructions
This tee is made in two pieces, one for the front and one for the back. Each piece is knit from the bottom up. When we reach the base of the armhole, we cast on extra stitches for each sleeve to make the panel wider for the sleeves. We will then continue knitting in our stitch pattern until we have finished the panel. The front and back panels will be seamed together to finish the tee.
Front / Back (make 2)
Leave a long tail for seaming, then with the Knitted Cast On, CO 79 (85, 91, 103, 109, 121, 127, 133, 145) sts.
Rows 1-4: K across.
Row 5: *K1, YO, SSK, K1, K2tog, YO.* Repeat from *to* until 1 st remains, K1.
Row 6, 8, 10, and 12: P across.
Row 7: *K1, YO, K1, SK2P, K1, YO.* Repeat from *to* until 1 st remains, K1.
Row 9: *K1, K2tog, YO, K1, YO, SSK.* Repeat from *to* until 1 st remains, K1.
Row 11: K2tog. *(K1, YO) twice, K1, SK2P.* Repeat from *to* until 5 sts remain, (K1, YO) twice, K1, SSK.
Repeat Rows 5-12 five more times for the cropped version, or nine more times for the full-length version. (Note: If you would like to add length, repeat rows 5-12 more times than the pattern says here.)
We will now cast on extra stitches for the sleeve.
Row 13: *K1, YO, SSK, K1, K2tog, YO.* Repeat from *to* until 1 st remains, K1. With the Knitted Cast On, CO 24 sts. To do this, turn the work so the needle with the stitches on it is in your left hand. Begin by inserting your right needle into the first stitch on the left needle and cast on the extra stitches with the Knitted Cast On. You should now have 103 (109, 115, 127, 133, 145, 151, 157, 169) sts.
Row 14: P across. With the Knitted Cast On, CO 24 sts. To do this, turn the work so the needle with the stitches on it is in your left hand. Begin by inserting your right needle into the first stitch on the left needle and cast on the extra stitches with the Knitted Cast On. You should now have 127 (133, 139, 151, 157, 169, 175, 181, 193) sts.
Rows 15-20: Repeat Rows 7-12.
Repeat Rows 5-12: 7 (7, 7, 8, 8, 8, 9, 9, 9) more times.
Repeat Rows 1-4 once more. BO, leaving a long tail for seaming.
To Block: (video tutorial here)
For natural fibers, pin project out on foam blocking mats. Spray with water until fully saturated, allow to dry.
OR
For acrylic fibers, pin project out on an ironing board or several layers of towels. Hold a steaming iron 2-3” over the surface of the fabric, making sure all of the fabric is penetrated by the steam. Allow to cool / dry.
Block to Approximate Finished Measurements:
Width at Cast On edge: 19 (20.5, 22, 25, 26, 29, 30.5, 32, 35) inches OR 48 (52, 55.5, 63, 66.5, 73.5, 77.5, 81.5, 88) cm.
Width at Bind Off edge: 31 (32.5, 34, 36.5, 38, 41, 42.5, 44, 46.5) inches OR 79 (82.5, 86, 93, 97, 104, 108, 112, 118.5) cm.
Length from Cast on Edge to Bind Off edge: 16.5 (16.5, 16.5, 17.5, 17.5, 17.5, 18.5, 18.5, 18.5) inches OR 41.5 (41.5, 41.5, 44.5, 44.5, 44.5, 47, 47, 47) cm for cropped version, 21 (21, 21, 22, 22, 22, 23, 23, 23) inches OR 52.5 (52.5, 52.5, 55.5, 55.5, 55.5, 58, 58, 58) cm for full-length version.

Assembly:
Lay your front and back pieces out in front of you, with the wrong sides together, making sure both cast on edges are at the bottom.
Side Seams:
Thread one of the long yarn tails from the bottom corner of the piece through your yarn needle, and mattress stitch the front and back of one side of the tee together at the side seam. (Mattress Stitch Video here) (You can use a whip stitch instead of the mattress stitch if you prefer.) When you reach the top of the side edge, continue whip stitching the horizontal edges of the sleeve from both the front and the back together. Tie off, weave in the yarn tail.
Repeat seaming instructions for other side seam.
Shoulder Seams:
Thread one of the yarn tails from the bind off edge of the piece through your yarn needle. Starting at the top corner, begin whip stitching the two panels together across the top edge. Stop when your seam is about 10 (10.5, 11, 12, 12, 13.5, 13.5, 14.5, 15.5) inches OR 25.5 (26.5, 28, 30.5, 30.5, 34.5, 34.5, 37, 39.5) cm long. Take one more stitch in the same place as the previous stitch, wrap the yarn around the needle, and pull the needle through to make a knot. Weave in the yarn tail.
Thread the other yarn tail at the other top corner through your yarn needle. Repeat the same instructions for the previous shoulder seam with that tail on the other side, and weave in all remaining yarn tails.
Enjoy your finished UltraViolet Tee!
This pattern is intended for your personal use only. You may not share it, copy it, sell it, give it away, or mass-produce the finished product. However, you may sell the finished items on a small scale, as long as you convey in your item description that you used a Yay For Yarn pattern.
Yay For Yarn Copyright© 2020 – Current. All patterns and photos are owned by Yay For Yarn.
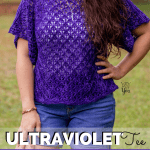
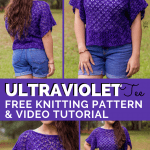
Pin the image below to save this project for later!

")


I cannot find the video for row 11.
the pattern is 7 sts bet markers
row 11 requires more ss bet markers??
In the video, the instructions for Row 11 start at 25:00. The pattern doesn’t call for any stitch markers. Are you referring to the stitches between the * and * in the pattern?
Hi! Since the tee is made in 2 panels and then seamed, do you think I could manage with straight needles instead of circular? Thank you!
Hi Cristina. It may be possible to knit this on straight needles, depending on which size you’re making and how long your needles are. The widest part of the panel is the upper portion with the sleeves, so just keep in mind that you will have to scrunch all of that fabric onto the length of your straight needle. Please refer to the finished measurements under the heading “Block to Finished Measurements” and compare the “Width at Bind Off Edge” for the size you are making to the length of your straight needle. I hope this helps!
What’s the name of the stitch for the Ultra Violet top? Really like it but want to make top in round and row 11 has me a bit stumped…5 stitches per motif instead of 6.
Hi Lynn. I don’t know the name of this stitch. The stitch multiple does not change on Row 11. The K1 before the SK2P is not part of the SK2P. SK2P is slip as if to knit, knit 2 together, pass slipped stitch over. So in the repeat between *and* is K1, YO, K1, YO, K1, SK2P (6 stitches per repeat). I hope this helps!
Nice tee!
It’s very pretty.
Hi! I love your tee! It’s really nice! I love your stitch! I never try to make that stitch before!