

This simple, size inclusive knitted summer top is made from rectangles! Knit your own with this free knitting pattern and video tutorial.
A summer top like this is one of the easiest knitted garments you can make. All you have to do is knit two rectangles in a simple stitch pattern, and sew the rectangles together to create your own knitted top. It’s kind of like a knitted tank top, but with a slight cap sleeve.
This project uses fingering-weight yarn on large needles, which creates an open, breathable fabric that is super light and airy. I love how the easy knit-and-purl stitch pattern adds a bit of delicate texture to the tee.
Table of Contents
 How to Choose the Best Yarn for a Knitted Tank Top
This women’s top knitting pattern calls for #1 Superfine / Fingering Weight yarn. But don’t worry, it doesn’t take forever to knit! We’re working this thin, lightweight yarn on larger needles to make the knitting quicker, and to create an open, breathable fabric.
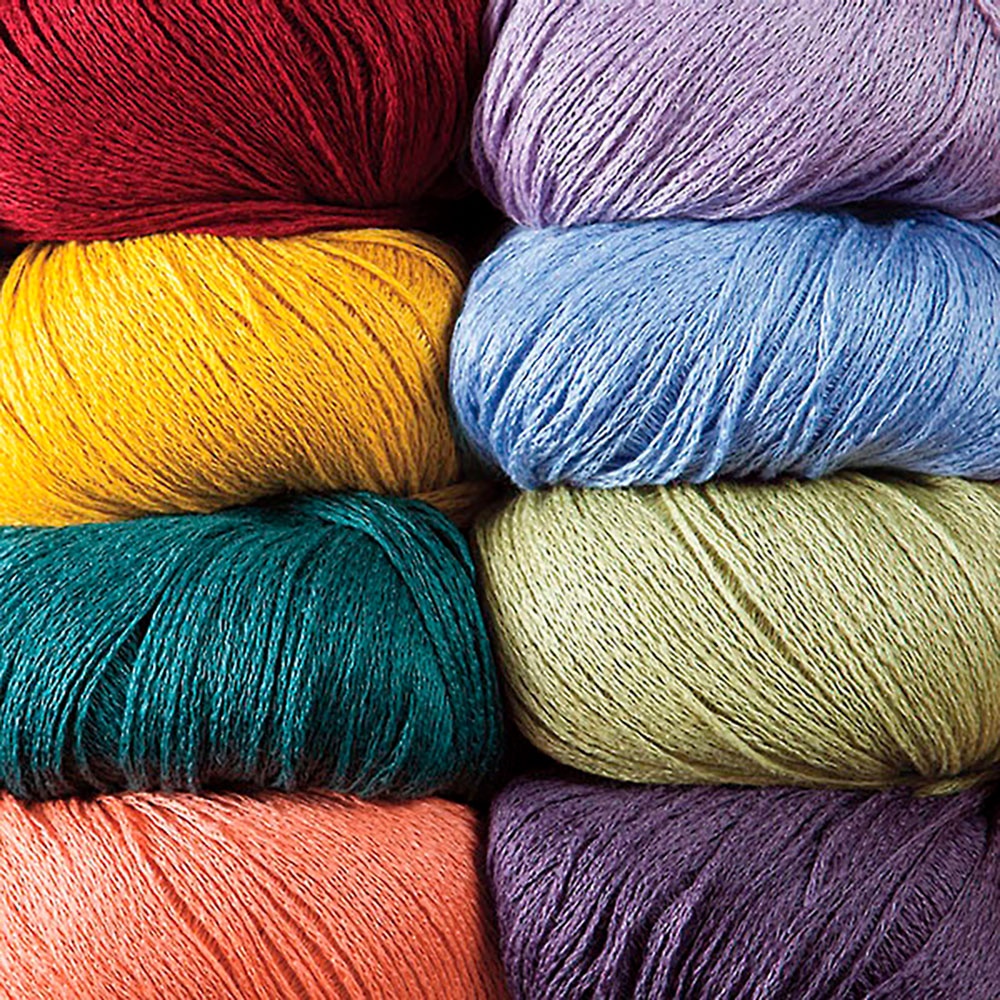
Natural plant fiber yarns are great for summer garment projects. For the Seaspray Tee, I chose to use KnitPicks Lindy Chain, a fingering-weight blend of linen and pima cotton. This yarn is made with a chainette construction. That means the strands are not twisted together, but are made into a chain or tiny knitted i-cord.
When selecting the yarn you want to use for this pattern, make sure the yarn label says it is #1 Superfine or Fingering Weight. Then, purchase enough skeins of the yarn you want to use so that you have at least the total number of yards required in the pattern for the size you are making.

How do I Choose a Size?
The Seaspray Tee knitting pattern includes instructions for 9 sizes, from a women’s Extra Small to a 5X. To decide which size you want to make, you’ll need to measure around the fullest part of the bust. Then, follow the instructions in the “Sizing” section of the pattern to select the size according to the wearer’s bust measurement.
If you’d like to make the tee longer, you can do so by working more stitch pattern repeats on each panel. The pattern includes instructions for adding length to the tee. But if you plan on adjusting the length, be sure to purchase more yarn than the pattern says you’ll need. It’s never fun to run out of yarn in the middle of a project!
Ready to get started? Let’s knit the Seaspray Tee!
Seaspray Tee Knitting Pattern
by Yay For Yarn
Skill Level: Advanced Beginner
Sizing:
- Sizing follows the Craft Yarn Council’s standards for Women’s sizes.
- This tee has a classic fit, with about 3-5” of positive ease. If you are between sizes, size up if you want a looser-fit tee, or size down if you want a more fitted tee. Measure the bust of the wearer, and choose the size that is closest to the wearer’s bust measurement, under the title “To Fit Bust”.
- Length of Tee is adjustable. If you want to add length, you will need more yarn than the pattern requires.
- Instructions and yarn requirements for size X-Small are given outside the parentheses, with Small, Medium, Large, X-Large, 2X, 3X, 4X, and 5X given inside the parentheses, like this: X-Small (Small, Medium, Large, X-Large, 2X, 3X, 4X, 5X).
- When only one number is given, it applies to all sizes. To follow pattern more easily, circle or highlight all numbers that apply to your size before beginning.
To Fit Bust:
- X-Small: 30” (76 cm)
- Small: 34” (86 cm)
- Medium: 38” (96.5 cm)
- Large: 42” (107 cm)
- X-Large: 46” (117 cm)
- 2X: 50” (127 cm)
- 3X: 54” (137 cm)
- 4X: 58” (147 cm)
- 5X: 62” (157.5 cm)
Finished Bust / Back Length from Top of Shoulder to Hem:
- X-Small: 33” (83.8 cm) / 19.7” (50 cm)
- Small: 37” (94 cm) / 20.5” (52 cm)
- Medium: 41” (104 cm) / 22” (56 cm)
- Large: 45” (114.3 cm) / 23” (58.4 cm)
- X-Large: 49” (124.5 cm) / 23.7” (60 cm)
- 2X: 53” (134.6 cm) / 24.5” (62 cm)
- 3X: 57” (144.8 cm) / 26” (66 cm)
- 4X: 61” (155 cm) / 27” (68.5 cm)
- 5X: 65” (165 cm) / 27.7” (70.4 cm)
You Will Need:
- 540 (645, 750, 860, 977, 1100, 1230, 1370, 1512) Yards of #1 Fingering Weight Yarn (I used KnitPicks Lindy Chain in Sagebrush, 70% Linen / 30% Pima Cotton, 1.76 oz / 50g / 180 yds per skein, 3 (4, 5, 5, 6, 7, 7, 8, 9) skeins)
- US Size 8 / 5 mm Knitting Needles
- Scissors
- Measuring Tape
- Yarn Needle or Blunt Tapestry Needle
Shop Supplies for this Project
 Buy Now →
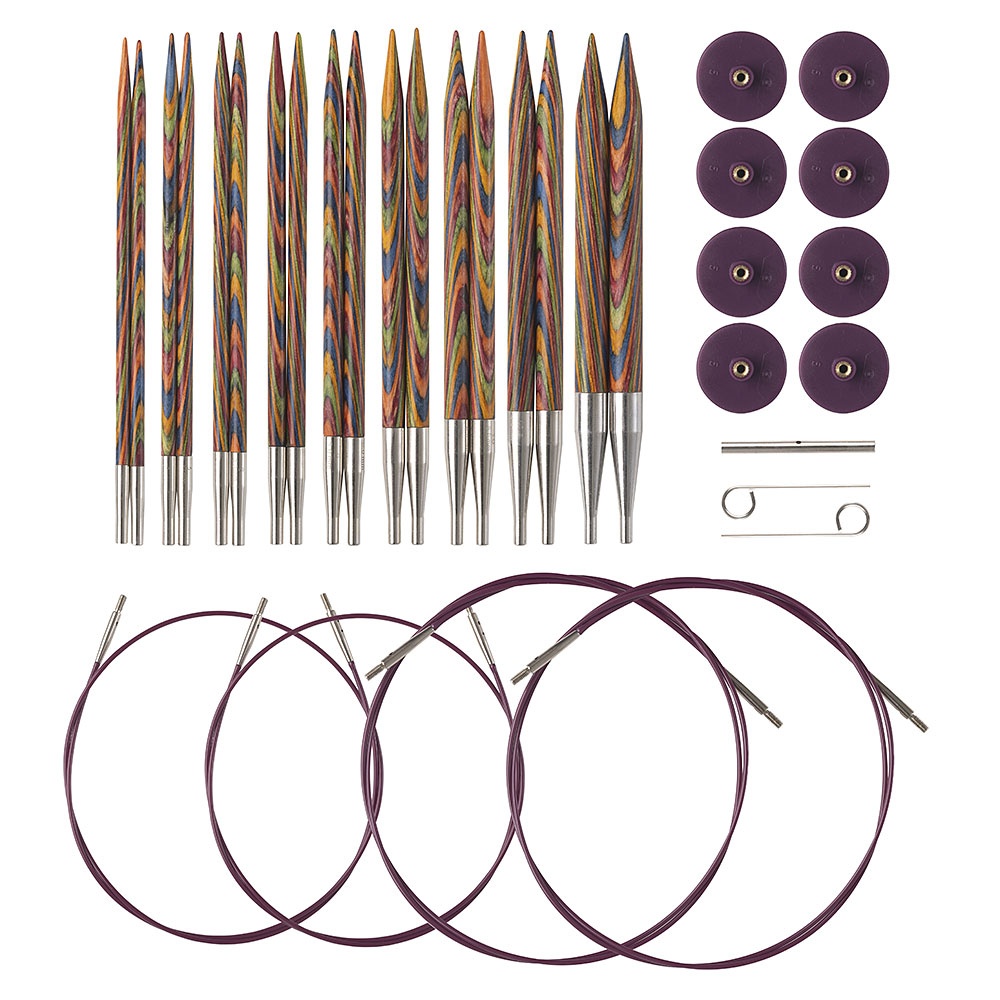
KnitPicks Options Rainbow Interchangeable Knitting Needles
Buy Now →
Chibi Metal Yarn Needles – Amazon
Buy Now →
Knitter’s Pride Rainbow Folding Scissors
Buy Now →
Gauge: 20 stitches = 4” (10 cm); 30 rows = 4” (10 cm) in main stitch pattern, after blocking

Abbreviations:
CO: cast on
K: knit
P: purl
st(s): stitch(es)
nxt: next
BO: bind off
Pattern for Gauge Swatch
CO 30 sts.
Rows 1-6: K across.
Row 7: K across.
Row 8: K1, P across to last st, K1.
Row 9: Repeat Row 7.
Row 10: Repeat Row 8.
Row 11: K1, (K1, P1) across to last st, K1.
Row 12: K1, (P1, K1) across to last st, K1.
Repeat Rows 7-12 four more times. Repeat Rows 7-10 once more. Repeat Rows 1-6 once more. BO. Block swatch and check gauge.
Seespray Tee Instructions
Front / Back Panel (make 2)
CO 84 (94, 104, 114, 124, 134, 144, 154, 164) sts, leaving a long tail for seaming.
Rows 1-6: K across.
Row 7: K across.
Row 8: K1, P across to last st, K1.
Row 9: Repeat Row 7.
Row 10: Repeat Row 8.
Row 11: K1, (K1, P1) across to last st, K1.
Row 12: K1, (P1, K1) across to last st, K1.
Repeat Rows 7-12; 21( 22, 24, 25, 26, 27, 29, 30, 31) more times.
Note: To add length to the tee, repeat rows 7-12 a few extra times.
Repeat Rows 7-10 once more.
Repeat Rows 1-6 once more. BO, leave a tail for seaming shoulder.

To Block: (video tutorial here)
For natural fibers, pin project out on foam blocking mats. Spray with water until fully saturated, allow to dry.
OR
For acrylic fibers, pin project out on an ironing board or several layers of towels. Hold a steaming iron 2-3” over the surface of the fabric, making sure all of the fabric is penetrated by the steam. Allow to cool / dry.
Assembly:
Lay your front and back pieces out in front of you, with the wrong sides together, making sure both cast on edges are at the bottom.
Beginning at one bottom corner, line up the side edge of the front with the side edge of the back. We will be stitching the side edges together, leaving an opening at the top for the armhole.
1st Side Seam:
Thread one of the long yarn tails through your yarn needle. Starting at that bottom corner, begin stitching the two panels together up one side, using either a whip stitch or the mattress stitch. (Mattress Stitch Video here) Stop when you have 6.5 (7, 7.5, 8, 8.5, 9, 9.5, 10, 10.5) inches OR 16.5 (17.8, 19, 20.3, 21.6, 22.9, 24.1, 25.4, 26.7) cm left before you reach the top edge of the panels. (This leaves an opening for the armhole.) Take one more stitch in the same place as the previous stitch, wrap the yarn around the needle, and pull the needle through to make a knot. Weave in the yarn tail.
2nd Side Seam:
Thread the other long yarn tail at the other bottom corner through your yarn needle. Repeat the same instructions for the previous seam with that tail on the other side, and weave in the yarn tail.

Shoulder Seams:
Thread one of the shorter yarn tails through your yarn needle. Starting at that top corner, begin whip stitching the two panels together across the top edge. Stop when your seam is about 4 (4.5, 5, 5.5, 6, 6.5, 7, 7.5, 8) inches OR 10 (11.4, 12.7, 14, 15.2, 16.5, 17.8, 19, 20.3) cm long. Take one more stitch in the same place as the previous stitch, wrap the yarn around the needle, and pull the needle through to make a knot. Weave in the yarn tail.
Thread the other short yarn tail at the other top corner through your yarn needle. Repeat the same instructions for the previous shoulder seam with that tail on the other side, and weave in the yarn tail.
This pattern is intended for your personal use only. You may not share it, copy it, sell it, give it away, or mass-produce the finished product. However, you may sell the finished items on a small scale, as long as you convey in your item description that you used a Yay For Yarn pattern.
Yay For Yarn Copyright© 2020 – Current. All patterns and photos are owned by Yay For Yarn.
Pin the image below to save this project for later!

")


Is 570 yds for the med the total yds I need to make the sea spray tee? Thank you
Hi Lisa. The size Medium calls for 750 yards of #1 Superfine / Fingering weight yarn. I hope this helps!
Yes it does thank you working on it now. . Where can I send a photo when done?
You can send a photo to blogger{at}yayforyarn.com if you like. I hope your project turns out great!
Hi,
I don’t understand the various new sizes measurements for yarn. I wondered if you should advise.
I have 10 balls of the grundi cotton quick yarn.
Unfortunately, I can’t read as the text is too small.
Firstly, would this yarn work with the pattern,
Secondly, do I have sufficient wool to create the tee, I would be making for a UK size 14. I have 10 balls, so that is 500gms.
Tour assistance in this matter would be much appreciated.
Hi. It looks like your yarn falls into the #3 DK / Light yarn weight category according to the US yarn weight system. This pattern calls for a #1 Superfine / Fingering weight yarn, which is thinner. I would not recommend using the Grundl Cotton Quick yarn unless you are comfortable altering patterns. It sounds like you would have enough quantity of yarn, but you may need to recalculate the stitch counts and row counts to make the pattern work at a different gauge. If you would like to make this project without altering the pattern, I would suggest trying a yarn that is more similar to the yarn called for in the pattern. Here is a YarnSub link for the yarn in the pattern, offering suggestions for other yarns that could work as a substitute: https://yarnsub.com/yarns/knit_picks/lindy_chain
I hope this helps!
Love the Seaspray pattern, but would like to add short sleeves. If you would explain how to do this it would be greatly appreciated. Love all your easy two piece tops but would like to know how to make the sleeves longer. Thank you for your advice and for your blog.
Hi Mary Ann! If you’d like to add sleeves, then first you’d need to decide how deep you want the armholes to be. I recommend measuring the armhole depth of an existing shirt that fits well for a guidelines. Subtract the armhole depth from the total length of the finished tee to determine how far to knit the lower part of the panel before adding the sleeves. Then, since the pieces of the tee are knit from the bottom up, you’ll stop knitting when your piece matches the length you need for the lower part of the panel.
To add the sleeves, you would cast on some extra stitches at the beginning of each of the next 2 rows (to add stitches to both sides). The knitted cast on works well for this. The stitch pattern of the Seaspray Tee requires an even number of stitches, so cast on an even number of stitches on each side (both sides should add the same number of stitches, of course).
You would then finish the panel by continuing the pattern instructions in the stitch pattern until you have reached the finished length for your tee. This makes a t-shaped top, with a boxy type of sleeve. I hope this helps! If you have any more questions, please let me know. Happy Yarning!