

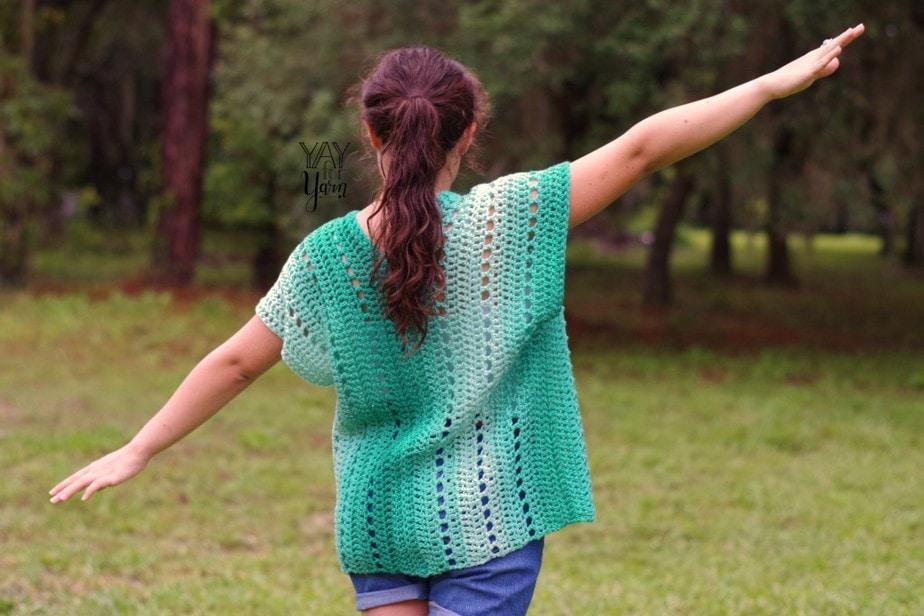
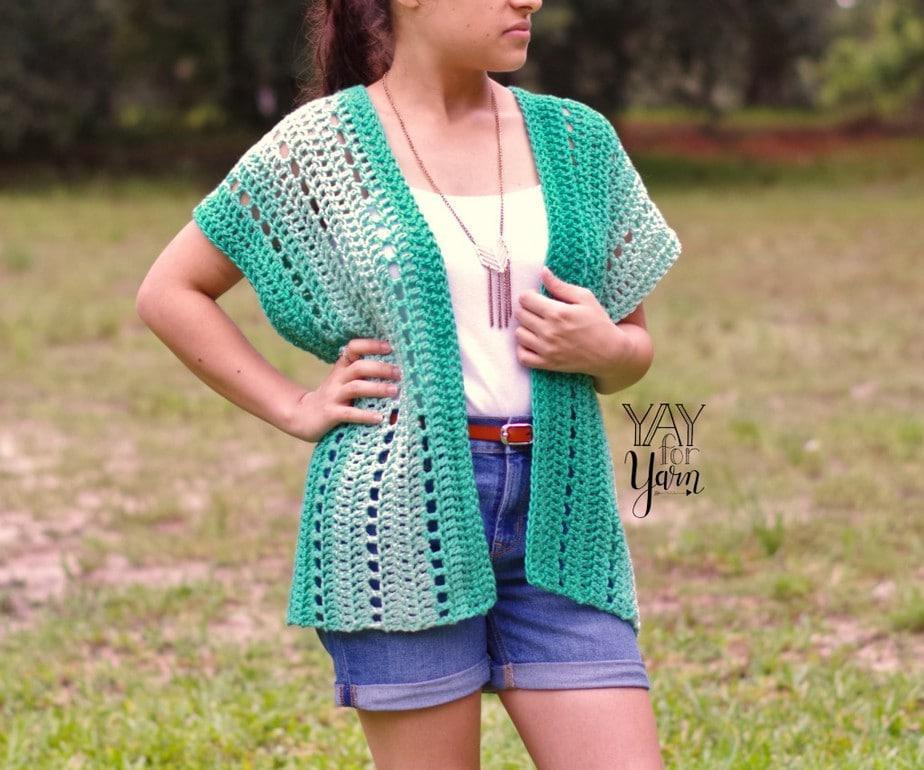
This breezy, lightweight cardigan is perfect for summer! It’s an easy, beginner-friendly project you can make today, from just two crocheted rectangles.
Table of Contents
As I’ve said before, I love summer crochet projects. It’s pretty hot here in Florida, and it stays that way for most of the year. So I am always excited to try a new summer garment project.
This one is definitely a winner!
Even though I used a #4 Worsted Weight yarn, this cardigan is worked at a loose gauge, making it breathable and lightweight. You get the best of both worlds – a breezy, lightweight fabric, with the speed of a worsted weight yarn. The flowy, over-sized style looks great on every body type. And best of all, it’s made from just two rectangles! If you’ve never crocheted a garment before, this is the perfect place to start!
Seafoam Cardigan Crochet Pattern
by Yay For Yarn
Skill Level: Advanced Beginner
For the Knitted version of this cardigan, click here.
Sizing:
Sizing follows the Craft Yarn Council’s standards for Women’s sizes.
– This sweater is designed to be over-sized and loose-fitting. Sizes are combined into size groups.
– Instructions and yarn requirements for Size 1 are given outside the parentheses, with Size 2 and Size 3 given inside the parentheses, like this: Size 1 (Size 2, Size 3).
– When only one number is given, it applies to all sizes. To follow pattern more easily, circle or highlight all numbers that apply to your size before beginning.
To choose a size, measure around the fullest part of the bust.
Size 1: Fits sizes X-Small, Small, and Medium (30” – 38” OR 76 cm – 97 cm bust)
Size 2: Fits sizes Large, X-Large, and 2X (40” – 50” OR 102 cm – 127 cm bust)
Size 3: Fits sizes 3X, 4X, and 5X (52” – 62” OR 132 cm – 158 cm bust)
Finished Bust: 45” (57”, 69”) OR 114 cm (145 cm, 175 cm)
Finished Length: 23” (24”, 25”) OR 58 cm (61 cm, 63.5 cm)

You Will Need:
Approx. 450 (600, 750) yards of #4 Worsted Weight Yarn (I used Red Heart Super Saver Ombre, 1 (2, 2) skeins)
US Size L (8.0 mm) Crochet Hook
Scissors
Measuring Tape
Yarn Needle or Blunt Tapestry Needle
Shop Supplies for this Project

Red Heart Super Saver Ombre – Amazon
Buy Now →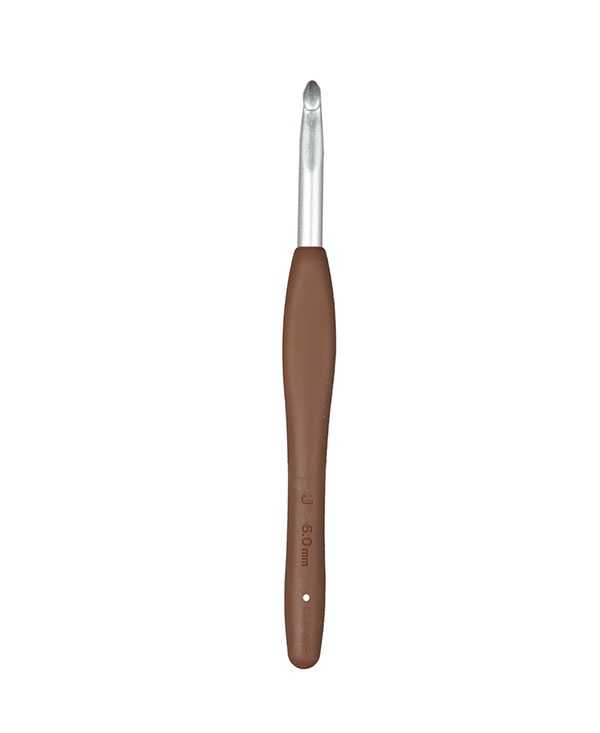 Buy Now →
Chibi Metal Yarn Needles – Amazon
Buy Now →
Knitter’s Pride Rainbow Folding Scissors
Buy Now →
Gauge: 10 stitches = 4” (10 cm), 4 rows = 3” (7.6 cm) in double crochet
Abbreviations:
beg: beginning
ea: each
nxt: next
st: stitch
sts: stitches
sp: space
sk: skip
ch: chain
dc: double crochet
*Fdc: foundation double crochet
*CSDC: chainless starting double crochet
*This is a special stitch. See instructions below to learn how to work this stitch.
Special Stitches:
Foundation Double Crochet: (video tutorial here)
To begin, chain 2. Yarn over, insert hook into the 2nd chain from the hook. Yarn over, pull up a loop. Yarn over, pull through one loop on hook. Yarn over, pull through 2 loops on hook. Yarn over, pull through 2 remaining loops on hook.
For all following stitches: Turn work upside-down so the bottom (foundation) edge is facing you. On the bottom of the previous stitch, there is what looks like the top of a normal crochet stitch. Yarn over and insert hook into both strands of that “stitch”. Yarn over, pull up a loop. Yarn over, pull through one loop on hook. Yarn over, pull through 2 loops on hook. Yarn over, pull through 2 remaining loops on hook.
Chainless Starting Double Crochet: (video tutorial here)
Stretch loop on hook until it is slightly longer than a regular double crochet. Holding the top of the loop still with your finger, yarn over with the stretched loop on your hook (not the working yarn) 1 time. Insert the hook into the same stitch the loop is coming from. Yarn over, pull up a loop of yarn. *Yarn over, pull through 2 loops on hook* 2 times.
Seafoam Cardigan Instructions
Side Panel (make 2):
Row 1: ch 2. Sk 1st ch, work a fdc in 2nd ch from hook. Work 114 (120, 124) more fdc. You should have 115 (121, 125) sts, not including beg chs.
Row 2-3: Turn. CSDC in same st. Dc in ea st across. You should have 115 (121, 125) sts.
Row 4: Turn. CSDC in same st. *ch 1, sk 1, dc in nxt st* across. You should have 115 (121, 125) sts.
Row 5: Turn. CSDC in same st. Dc in ea st and in ea ch sp across. You should have 115 (121, 125) sts.
Repeat Rows 2-5; 2 (3, 4) more times. Then, repeat Rows 2-3 once more. You should have a total of 15 (19, 23) rows. Tie off, leaving a tail about 1 yard / 1 m long.
Note: Leave a tail about 1 yard / 1 m long before beginning the 2nd panel. This yarn tail will be used to sew the center back seam.
To Block: (video tutorial here)
For natural fibers, pin project out to the correct measurements on foam blocking mats. Spray with water until fully saturated, allow to dry.
OR
For acrylic fibers, pin project out to the correct measurements on an ironing board or several layers of towels. Hold a steaming iron 2”-3” over the surface of the fabric, making sure all of the fabric is penetrated by the steam. Allow to cool / dry.
After blocking, each panel should measure:
Size 1: 11 ¼” by 46” or 29 cm by 117 cm
Size 2: 14 ¼” by 48” or 36 cm by 122 cm
Size 3: 17 ¼” by 50” or 44 cm by 127 cm

Assembly:
First, we will sew the center back seam. Lay panels out flat so the long foundation edges are touching. Thread the long tail from the foundation edge of one panel through your yarn needle. We are going to whip stitch the foundation edges together, and stop close to the halfway-mark. Each time we take a stitch with the yarn needle, we will be inserting into one stitch from the foundation edge of each panel, joining one pair of stitches.
Take your yarn needle and whip stitch 50 (53, 55) pairs of stitches together. Insert your needle again through the same pair of stitches you just went through, wrap the yarn around the needle, and pull the needle through to make a knot. Weave in the yarn tail.
Now we will join the side seams. At this point, the panels are partially seamed together down the middle. The seamed section is the back of the cardigan, and the sections that are not seamed together yet are the front sections of the cardigan.
Bring each front section down so the short edge of the front section meets the short edge of the back section. At the top, the folded edges of the front panels make the shoulder portions of the cardigan.
Beginning at the bottom corner, line up the side edge of the front with the side edge of the back. We will be stitching the side edges together, leaving an opening at the top for the armhole.
Thread the long yarn tail from one of the corners through your yarn needle. Beginning at the bottom corner, we are going to whip stitch the side edges together, and stop about 2/3 of the way up. Each time we take a stitch with the yarn needle, we will be inserting into one stitch from the edge of each panel, joining one pair of stitches.
Take your yarn needle and whip stitch 34 (36, 38) pairs of stitches together.
Insert your needle again through the same pair of stitches you just went through, wrap the yarn around the needle, and pull the needle through to make a knot. Weave in the yarn tail.
Repeat for the other side seam.
Enjoy your finished Seafoam Cardigan!
This pattern is intended for your personal use only. You may not share it, copy it, sell it, give it away, or mass-produce the finished product. However, you may sell the finished items on a small scale, as long as you convey in your item description that you used a Yay For Yarn pattern.
Yay For Yarn Copyright© 2019 – Current. All patterns and photos are owned by Yay For Yarn.
Pin the image below to save this project for later!
")


I would like to make size 2 longer. Approximately
midcalf… how many chains would I need?
Thanking you in advance!
Hi Connie. If you’d like to make it longer, here’s how you can do that. First, measure down from the shoulder to see how long you want the finished cardigan to fall. Then, work your foundation edge so that it is twice as long as you want the finished cardigan to be, making sure you have an odd number of stitches. (It needs to be twice as long as the finished length, because half of the piece will be part of the front and the other half will be part of the back.) You can then follow the remaining pattern instructions as written. I hope this helps!
I would like to make this longer. I’m doing size 2. If I add 10 stitches to the beginning then I should end up with a finished length of 28″ (shoulder to bottom). Does that sound right?
Hi Nancy! Because the rectangle will be one half of the cardigan, creating both the front and back of one side, adding 10 stitches will add 2″ to the front and 2″ to the back. If you’d like to add 4 inches to the finished length, you’ll need to add 20 stitches to the foundation row. This will add 4″ to the front and 4″ to the back. I hope this helps!
Hello I have a question. when you crochet in three pieces. how do you get the front & back panel yarn color to match? It looks like it’s crocheted in on piece?
Hi Margaret. With the two-piece construction, if you want the ombre colors to blend in, here’s what you can do. After you’ve finished the first panel, if the yarn coming from the skein is not the same color as the foundation edge of the first panel, keep pulling yarn out of the skein until you reach the color that matches the foundation edge, and start your second panel with that color. If you want to make sure that the colors match with the ombre yarn, you may want to make sure you have a bit more yarn than the pattern calls for. I hope this helps!
I love this ???? top I want to make it in all Red Heart super savers ombre colors. I especially like the coral clor. Thank you for sharing this and all your patterns.
Stay Well
Darlene
Hello! I’m working on this cardigan with Red Heart Super Saver. I like your design and hope you design more like these. Just wondering, is it possible to tweak the sewing portion of the cardigan? Thanks!
Hi. Yes, you can tweak the seams, as far as sewing them together further up or stopping before the instructions tell you to. I hope this helps!
I love this ???? top I want to make it in all Red Heart super savers ombre colors. I especially like the coral clor. Thank you for sharing this and all your patterns.
Stay Well
Darlene
Hi, I really love your pattern! Do you think I could transform this lovely cardigan into a summer top by sewing the front pieces together as well? Should I make the two panels bigger?
I am about to start making it and I would much appreciate your reply!
Regards from Athens, Greece
Hi Elizabeth! Yes, you could make this into a top by sewing the front panels together. You wouldn’t need to alter the panel size, just make another seam up the front to close the front of the cardigan. I hope this helps!
Thank you so much for your prompt reply!
I will give it a try and let you know of the outcome!
xx
Thank you very much for the advice, I’m going to try it. Thank you again.
You’re welcome! Happy Yarning!
Hi! Sorry to bother you again. As I said before, I’m currently working on your cardigan. I love the pattern and it looks beautiful so far. Before I assemble it, is it really necessary to (steam) block the panels? I only have a normal clothing iron and I’m only 12 so I’m afraid it might be complicated. Do you have any other recommendations or other ways to block that may involve moisture or water, but not a steam iron? Thank you so much, I appreciate it.
Hi Clementine! If you would rather not steam block your pieces, you could wet block them instead. To do this, you’ll get the pieces wet, gently squeeze out the excess water, and lay them out flat on a couple layers of towels to dry. However, if your yarn is acrylic and / or machine washable, you can just throw the pieces into the washing machine, gently squeeze the excess water out, and lay them flat on towels to dry. The idea is to lay them out to their finished measurements so they will hang nicely when worn. The same concept would apply when you wash the finished cardigan, either by hand or machine. After washing, you can lay it out flat on towels to dry, making sure the garment is not stretched out of shape as it dries. I hope this helps, and I hope your cardigan turns out great!
Could a thinner yarn like lion brand mandala be used for this cardigan?
Hi Ava! Yes, you could use a thinner yarn if you altered the pattern a little bit. Since this cardigan is made from 2 rectangles, it is not too difficult to modify. Just choose a hook size that creates a fabric that looks and feels the way you want with your yarn, and begin with an odd number of stitches that gives you the correct finished length for the panel. You can then work the rows in the stitch pattern, stopping when the panel is the correct width for the pattern. I hope this helps!
Hello I have one side done. I had to re-watch the stating over and over.
It does keep the sides straight.
I made it with the scratch yarn.
I will remake now i know how.
And do the ch2 to make the ch and stitch in one.
Had to watch that over and over but have it now,
Thank you for making it so easy.
Xo Emily
Hi,
Lovely pattern-thank you! I have never made myself a crocheted garment before. Unfortunately, I must have messed up my tension as the two rectangles are not the same length. Any solutions you can give…other than ripping it all apart? It’s a fun pattern!
Thanks-Debbi
Hi Debbi! If the two rectangles are not the same length, the solution will depend on how far “off” they are from each other. If the one rectangle is only slightly shorter (like an inch or so), than blocking can help get it closer to the right size and you could use it without unraveling and starting that panel over. If the one rectangle is several inches shorter than the other, then, yes, you would need to do it over again or the one side of the cardigan will be shorter, and it might also pull a bit on the other rectangle. I hope this helps, and I hope your cardigan turns out great!
I love this cardigan! The pattern is so well written and easy to follow. Unfortunately for me, my rectangles didn’t turn out the same size. I think I must have an issue with gauge and consistency! I’ve been crocheting for 45 years and this is the first time I’ve made a garment for myself. I may just try one of the rectangles again. I appreciate all the hard work you did to create this beautiful cardigan.
You’re welcome, Debbi! I’m so glad you are enjoying the pattern, and I hope your cardigan turns out great!
I can’t find the free copy of this pattern. Is it not a downloadable copy ?
Hi! The free version is the written instructions that are shown in the blog post above. The downloadable, printable PDF copy can be purchased in my shop. I hope this helps!
Thank you it turn great I plan to make more. I used lion Brand’s new yarn called ombre and the color way is called happy you can only find it at Walmart for now.
You’re welcome! I’m so glad you are enjoying your new cardigan!
Working on seafoam cardigan almost done.
I am thinking about adding a DC around the outline of the garment and around the sleeve openings.
Sounds lovely, Maria! I hope your cardigan turns out great!