

Here’s a simple, inexpensive way to make your own custom ergonomic crochet hooks! Because the handles are made from polymer clay, they can be made into the perfect shape and style for your hands.
UPDATE: I have found that the DecoArt gloss glaze I used does not work well as a surface coating for polymer clay crochet hooks. I have since removed the original glaze and covered my hooks with Fimo Gloss Varnish. See how I did it here.
DIY Ergonomic Crochet Hooks
This method will transform your favorite crochet hooks into a work of art, and will make your crocheting more comfortable. I added ergonomic handles to the crochet hooks I already had, and for my set, it only cost me a few dollars per hook, which was a lot cheaper than buying a whole set of my favorite Furls Odyssey hooks.
Please note that polymer clay is not a natural clay. It doesn’t come from the ground, and it’s not made of wet dirt. It is made of chemicals, and becomes a type of plastic when baked. Therefore, there are a few safety precautions to take when working with polymer clay.
- Cross-Contamination: Any tools or other items that are used with polymer clay should be kept separate with polymer clay supplies, and not used with other crafts or in the kitchen. Even after washing, residual chemicals from the clay can still be present on your tools or other items.
- Protect your work surface: Be sure to work on a tabletop that can be easily cleaned afterwards, lay a plastic trash bag and/or clay mat on the table, and be sure all of your clay tools and supplies stay on the plastic trash bag or clay mat.
- Baking the Clay: When polymer clay is baked, it gives off chemicals as it is heated and becomes a type of plastic. It is not recommended to bake clay in an oven you would bake food in. As the clay bakes, it will give off chemicals that will coat the inside of your oven. Even after a good cleaning, residual chemicals from the clay can still be present in your oven. I suggest going to a yard sale or thrift shop and buying a used toaster oven with a working adjustable temperature control. (Mine cost about $2.) This toaster oven can be kept separate and only used for clay. I also suggest setting up your toaster oven outside of the living space, such as on a patio or in a garage, to avoid breathing any fumes as the clay is baking.

Colors:
I chose to mix colors of Fimo Soft & Fimo Professional (I prefer it over Fimo Soft) to make a set of rainbow-colored hooks. Because the original handles on my hooks were color-coded per size, I tried to make the new handles in similar colors to the original handles. Fimo Clay is sold in 2 ounce blocks, and each hook requires 1 ounce of clay. The Fimo blocks are divided into 8 sections, and to get 1 ounce of clay, you’ll need a total of 4 sections. The color blends below are described by how many complete sections of each color were used. (I marbled these colors together, and did not blend them together thoroughly. Here are the approximate color blends that I used:
- Green #1 (US Size B hook): 2 sections of Lemon Yellow, 2 sections of leaf Green
- Yellow (US Size C hook): 3 3/4 sections of Lemon Yellow, 1/4 section of Tangerine
- Orange (US Size D hook): 3 sections of Tangerine, 1 section of True Red
- Red (US Size E hook): 3 sections of True Red, 1 section of Raspberry
- Pink (US Size F hook): 3 3/4 sections of Raspberry, 1/4 section of remaining scrap clay from yellow hook
- Purple (US Size G hook): 3 sections of Purple, 1 section of Raspberry
- Turquoise (US Size 7 hook): 3 3/4 sections of Turquoise, 1/4 section of remaining scrap clay from red hook
- Blue (US Size H hook): 3 3/4 sections of True Blue, 1/4 section of Turquoise
- Green #2 (US Size I hook): 3 1/2 sections of Sap Green, 1/2 section of Leaf Green
- Brown (US Size J hook): 3 1/2 sections of Chocolate, 1/2 section of Caramel

You Will Need:
Metal Crochet Hook (I used my Clover Amour hooks, see review here)
Polymer Clay (I prefer Fimo Soft or Fimo Professional (I prefer it over Fimo Soft)) – 1 oz needed per hook
Sculpey Bake ‘n’ Bond Adhesive (for bonding the clay to the metal hook)
Old Potholder (for taking hooks in/out of the oven) (kept separate and only used for clay, see precautions above)
Scrap of Cotton Batting (to rest your hooks on while baking) (kept separate and only used for clay, see precautions above)
Old Metal Knitting Needle (kept separate and only used for clay, see precautions above)
Craft Knife or Craft Knife (a razor blade will work as well) for cutting raw clay (kept separate and only used for clay, see precautions above)
Ruler
Plastic Trash Bag and/or Clay mat (to protect your work surface, see precautions above)

Toaster Oven (kept separate and only used for clay, see precautions above)
I Also Used (these things are optional):
Finger Gloves (to minimize skin’s contact with the clay, and to keep clay out of fingernails)
Extra Fine Glitter (I used white)
Silicone Clay Tools (for marking the ends of the hooks with their letter sizes)
Wire and Wire Cutters (I used this to help add extra structure to the ends of my hooks, as the clay part extended past the metal hook inside)
Small Paintbrush
Triple-Thick Gloss Glaze (for an extra-shiny finish) UPDATE: I have found that the DecoArt gloss glaze I used does not work well as a surface coating for polymer clay crochet hooks. I have since removed the original glaze and covered my hooks with Fimo Gloss Varnish. See how I did it here.

Piece of styrofoam (the spongy type, for poking the hooks into while applying and drying the glaze)
Shop Supplies for this Project

Fimo Professional Polymer Clay – Amazon
Buy Now →
Fimo Professional Polymer Clay 1lb – Amazon
Buy Now →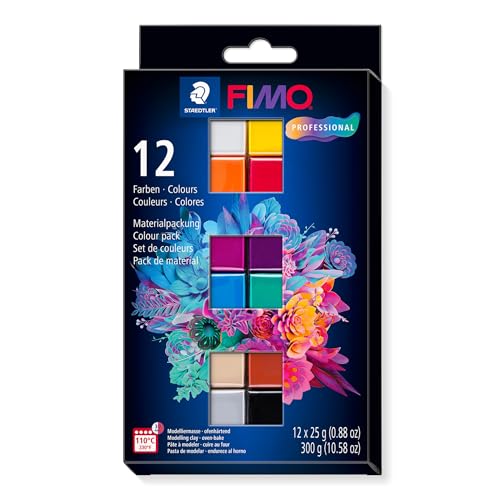
Fimo Professional Polymer Clay Assorted Colors – Amazon
Buy Now → Buy Now →
  Buy Now →
 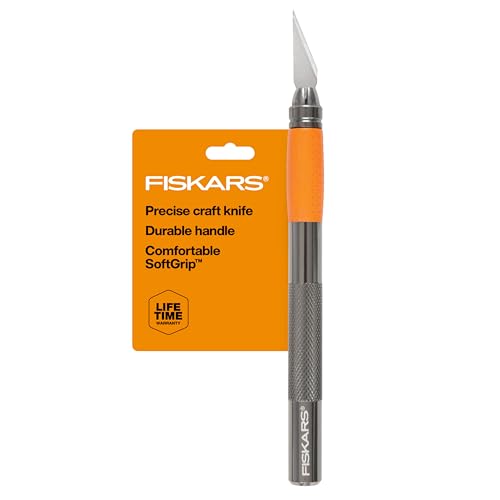 Buy Now →
Sculpey Oven Bake Clay Adhesive (formerly Bake ‘n’ Bond) – Amazon
Buy Now →
Step 1: Removing the Old Rubber Handles
This step is only required if your hooks already have rubber handles. If your hooks do not, and they are all metal, proceed to step 2.
- With your craft knife, begin at the top of the rubber handle and cut a slit all the way down to the bottom. This will take several passes to cut through completely. Just make sure you start the blade at the top edge of the rubber, but not above. (You don’t want to make big scratches on the hook part that will not be covered with clay.)
- Remove the rubber handle from the hook, and save the handle so you’ll know what size the hook is when it comes time to label it.

Step 2: Conditioning & Marbling the Clay
If you want your hooks to be a solid color, don’t worry about marbling your clay. Just work it between your hands to help it become soft and pliable. However, if you want a bit more depth to your colors, you can marble another color into your main color clay.
- Proper amount of clay (1 oz) for one hook handle
- Divide clay into several sections and roll each into a thin rope.
- Press those thin ropes together into one rope.
- Cut into sections and press sections together into a thick bundle.
- Roll into a rope again.
- Twist the rope.
- Cut into sections again, roll each section thinner, and twist each section before pressing those sections together into a new rope.
- Repeat steps 5-7 as many times as desired until you achieve the look you want.
- Roll out into a rope again and twist one more time.
- Wad your rope into a ball and roll between your hands to smooth out. Blend any seams with your fingertips.

Step 3: Shaping the Handles
- Roll your clay into a tapered log shape, thicker in the middle and thinner at the ends. (You want this to be about 5″ long.) Trim off a little over 1/2″ from one end and set this small piece aside for any decorations you may want to add later.
- Smooth out the cut end of the handle piece. Cut a slit down the center of the entire length of the handle piece, going about 3/4 of the way through the thickness, but not cutting it completely in half. Open this slit up a bit to make room for the hook.
- Apply a thin layer of Bake ‘n’ Bond Adhesive to the metal hook handle on all sides, stopping slightly below where you want the clay handle to begin.
- Lay the hook into the slit of the handle clay. I like to make the top edge of the clay handle stop at 1 1/2″ from the hook tip.
- Gently press the handle clay around the hook to close the gap left by the slit.
- Gently squeeze the seam together as much as possible, then blend the seam by rubbing it with your fingertip. You will probably need to gently reshape the handle to make sure it’s smooth and round. I like to make the thickest part of the handle about 3 1/2″ from the hook tip.
- (Optional) Sprinkle some glitter on the work surface and roll the handle in it. Use your finger to pat glitter onto any spots that were missed when you rolled the handle in glitter.

Step 4: Adding Details
These steps are optional. You could stop now and skip to the next steps if desired. However, if you want to add some details, you can do so at most any place on the hook. You don’t have to make your details in the same places I did. I made every one of my hooks with detailing in different places, so you may want to reference the photos of my finished set for ideas.
- (Optional, but may help strengthen the end of the handle) My handles extended a bit past the ends of the metal hooks. For each hook, I used my wire cutter to cut 2 pieces of wire about 1/2″ to 5/8″ long. I inserted these into the end of the hook handle for extra strength. Just make sure both wires are inserted slightly to either side of the center so they won’t bump into the metal hook. You can tap the end of the hook on the work surface to help press the wires in. You want the wire ends to be flush with the clay.
- With your knitting needle, press a groove into the handle all the way around. (You can do this in any place on the length of the handle.) Use the tip of the knitting needle or a thinner knitting needle to make the groove deeper. With your finger, gently press both edges of the groove away from the groove to make those edges more rounded.
- For this hook, I chose to gently squeeze the top section above the groove downward to make a more teardrop shape, and I made another groove a little below the first one to make a “bubble”shape.
- Here, I made the groove deeper. I pressed both edges of the second groove away from the groove to make those edges more rounded.
- I squeezed the section below the second groove upwards from the bottom end to make the middle of the hook thicker and more teardrop shaped.

Step 5: Trim & Decorations
I added trim to some of the detailing on my hooks. This is optional. I decided to add little clay bows to some of my hooks, but this is optional as well.
- Take a small piece of your extra clay and roll it into a thin, consistent-thickness rope. I chose to roll my ropes in glitter before adding them to the hooks.
- Beginning at the center front of the hook, wrap the rope around one of the details of your hook handle. Trim any excess length. I used a very small needle tool and my fingertips to gently blend the ends of the rope together.
- Bow: With another small piece of extra clay, make a flat shape as shown in photo #3. I did this by pinching and flattening a strip of clay.
- Fold the narrow ends to the center and press them down.
- Turn the bow over, seam side down. Make a small strip of clay to go around the bow, and lay it over the center of the bow.
- Tuck the ends of the strip around the back of the bow, and gently press to secure. Apply a thin layer of Bake ‘n’ Bond Adhesive to the back of the bow.
- Place the bow over the seam of the ends of the previously added rope. Gently press to secure. I used my finger to pat some glitter on the bow as well.

Step 6: Marking the Size of the Hook
I added a small size marker to the bottom of each of my hook handles.
- Take a small piece of extra clay and shape it into a ball. Flatten the ball to make a disc shape.
- With my flat and/or round silicone clay tools, I pressed marks into that disc shape to make letters. (I generally go by the letter size.) You could use the end of a thin knitting needle if you prefer, or you could use letter stamps if you have them.
- I pressed the letter side and the edges of the disc into glitter.
- Apply a dab of Bake ‘n’ Bond to the end of the hook handle, and gently press the disc onto the end of the hook.

Step 7: Baking the Hooks
Lay your hooks on small pieces of cotton batting and place on the rack of your toaster oven. Although the package says to bake at 230 degress Fahrenheit for 30 minutes, I bake mine differently. I like to bake my hooks at about 200 degrees Fahrenheit for about 1 hour. The lower-temperature-for-a-longer-time keeps the clay from burning, but makes sure it is baked solidly all the way through. If you accidentally leave your hooks in longer than an hour, at that lower temperature, they will not be harmed. Handle your hooks gently while they are hot, as they are slightly more fragile when hot. You can even turn the oven off and leave the door open to let them cool before removing them. When they are cool, lift them off the batting and wipe off any fuzz that may have stuck to your hooks.

Step 8: Applying Glaze (Optional, but recommended)

Once the hooks are baked, you can apply a surface coating. I chose Gloss Glaze Fimo Gloss Varnish (more info here) for my hooks to achieve a very shiny finish. I like to poke the hooks into the styrofoam to make them stand upside-down while I apply the glaze and let it dry. Then, I applied the glaze with a small paintbrush, let it dry, applied another coat, and let it dry again. The bottle of the glaze I used said to let the glaze cure for 24 hours before using the item.

TA-DAAAA! You now have a finished set of custom-made ergonomic crochet hooks!
Have you ever modified your crochet hooks?
Pin the image below to save this tutorial for later!

")


Are your polymer clay hooks heavy?? By the way..your tutorial is GREAT and inspiring!
Hi Holly! Compared to a regular crochet hook without a large handle, yes, my hooks are heavier. However, I don’t personally find the weight of the hooks uncomfortable. Glad you found the tutorial helpful!
Another way to label the sizes of hooks is to buy those glass letter beads and press them into the end of the handle. They provide more visual contrast and are easier to read if you have vision problems.
I dicovered your youtube reviews when searching for the best ergonomic crochet hooks.
How do find working with your new polymor clay handles?
Once cooked, does the polymor clay gas off?
Do the decortive details get in the way of using the hooks?
The Amour hooks have some loyal advocates and seem to be a relatively affordable option.
I was slightly shocked to see you removing the handles. Your clay replacements are lovely
Do you enjoy using your newly handled hooks? How are they holding up to actual use?
Thanks
Diana
Hi Diana! I have not used all of them in projects yet, but I have used some of them in projects so far. I have enjoyed the new, more ergonomic shape. Once the clay is baked and cooled, and the glaze has cured, they do not have a smell to them. I have found that the decorative details do not get in the way or affect the comfort of the handles. So far, they are holding up quite well. Polymer clay is a material that becomes a form of plastic once baked, and isn’t likely to break unless dropped on a hard surface. I like my polymer clay versions better than the original rubber handles. They are more ergonomic than before, as the new, thicker handle shape does not require the hand to be closed around them as tightly. I also prefer the new glossy, glittery finish. 🙂 Hope this helps! Thanks!
You are such a gifted and talented young lady! Love watching your Addi videos. You did a lovely job with your hooks–very creative and cost efficient idea.
Thanks so much, Helen! I’m so glad you have been enjoying my videos!
You did a awesome job on the hooks
Thank you, Yvette!