

Use this seaming technique to join crochet pieces invisibly! Perfect for joining granny squares and many other crochet motifs.
Ever wondered if there was a way to sew crochet pieces together without seeing the seaming stitches?
I sure did. At least, until I discovered Mattress Stitch.
Not long ago, I released a video showing how to crochet the perfect granny square. Several people asked if I could share my favorite way to sew those granny squares together. Normally, I’d have an instant answer for a question like that, as I have a favorite method for most crochet tasks. But I’ve tried so many ways to join granny squares. I had to stop and think about what I did and didn’t like about each method.
This one is a clear winner.
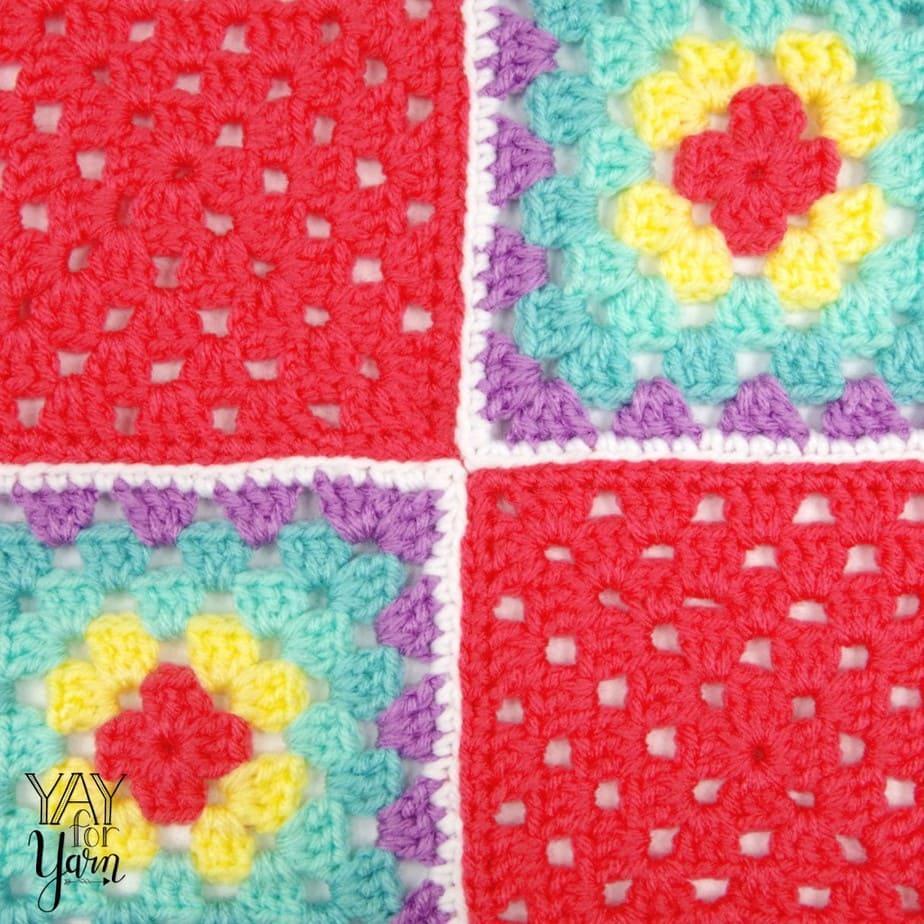
It’s not hard to do, but I think it creates the most professional-looking seam of any technique I’ve tried. With Mattress Stitch, you can sew two different-colored granny squares together, and not see a single seaming stitch on either side. Best of all, the seamline is perfectly clean, straight, and smooth. And the intersection at the corners? Neat and square.
Mattress Stitch is not just for granny squares. In fact, it works great for any type of motif that is worked from the center out, or any instance where you need to join the top edge of a row to the top edge of another row.
You can even use a completely contrasting yarn to sew the seam, and it will hardly show at all. However, I like to weave in yarn tails into a section of the same color, so I use a seaming yarn that matches one square or the other. This way, I can weave the tails of the seaming yarn into the square it matches. In this case, I used the pink yarn for the seams and wove the tails into the pink squares.
To Begin the Seam:
Note: The needle should always be inserted in the same direction for each stitch. I am right handed, so I insert the needle from right to left. If you are left handed, you may prefer to insert the needle from left to right.
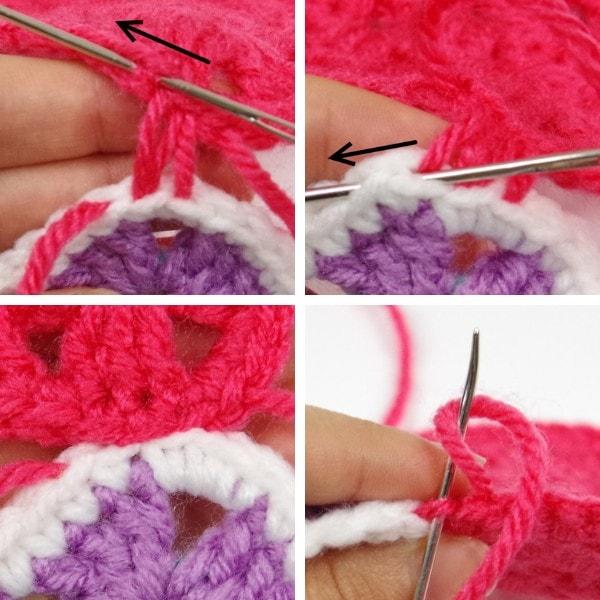
Thread a length of yarn through your yarn needle or blunt tapestry needle. Find the stitch in the center of the corner of the square (see 1st photo). Insert the needle down into the top of that stitch, between the front strand and back strand, then bring the needle right back up through the top of the next stitch, between the front strand and back strand (see arrow in 2nd photo, needle inserted in 3rd photo).
Pull the needle through, leaving a tail (see 4th photo). Find the center corner stitch on the other square. Insert the needle down into the top of that stitch, between the front strand and back strand, then bring the needle right back up through the top of the next stitch, between the front strand and back strand (see 5th photo). Pull the needle through (see 6th photo).

To Continue the Seam:
(Example below shown after a couple stitches have been done, but works the same way no matter where you are in the seam.)
Go back across to the first square. Insert the needle down into the top of the same stitch you came out of on the previous stitch through that square, between the front strand and back strand. Then bring the needle right back up through the top of the next stitch, between the front strand and back strand (see 1st photo below).
Go back across to the second square. Insert the needle down into the top of the same stitch you came out of on the previous stitch through that square, between the front strand and back strand. Then bring the needle right back up through the top of the next stitch, between the front strand and back strand (see 2nd photo below).
After every few stitches (or every stitch if you prefer), pull on the yarn to tighten and close up the seam (see 3rd photo).
Continue stitching in this manner, alternating between squares and pulling tight after every few stitches. When you reach the end of your seam, insert the needle under the seaming yarn from the last stitch, wrap the yarn around the needle (see 4th photo), and pull the needle through to make a knot.
If Your Seams Intersect:
Continue to mattress stitch right up to the intersection. Insert the needle under the last seaming stitch on the first seam (see 1st photo below), and pull the needle through. Then, insert the needle under the last seaming stitch on the second seam (see 2nd photo below), and pull the needle through.
Insert the needle back through the corner of the top square you already stitched through, as you would normally make a mattress stitch (see 3rd photo). Now go to the square diagonally opposite from the one you just stitched through. Take a mattress stitch through that corner (see 4th photo), and pull the needle through. Continue mattress stitching across your seam as normal. 5th photo shows the intersection after a few more regular stitches have been done.

Watch the video below for a full demonstration of this technique:
So, have you tried seaming your crochet with Mattress Stitch? How did you like it?
Check out more of my favorite crochet tips here.
What’s your favorite seaming method?

")


0 Comments