

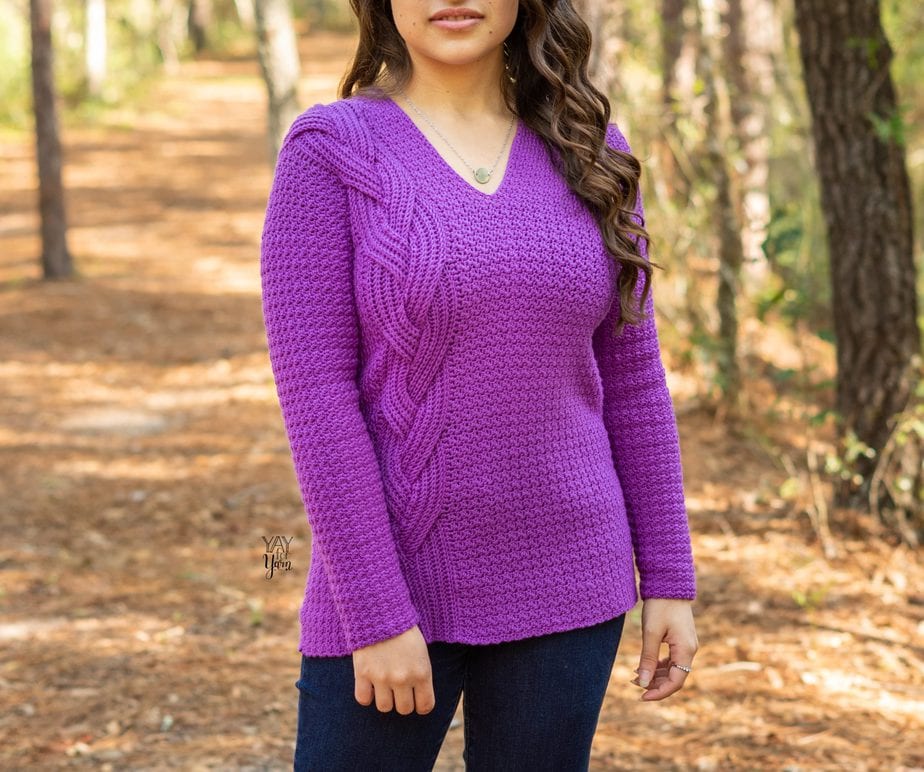
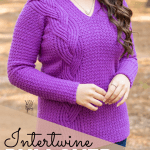
This lightweight crochet pullover features a lovely braided faux cable. Crochet your own Intertwine Pullover with this free, size-inclusive crochet sweater pattern.
When Knit Picks offered to collaborate with me on a pattern design in their new High Desert yarn, I knew exactly what I wanted to create. It would be lightweight and comfortable, with a touch of texture and a feature element.
The highlight of the Intertwine Pullover is a wide braided faux-cable, which is much easier to make than it looks. No front and back post stitches or confusing cable crosses here. Griddle Stitch gives the rest of the sweater a slight texture to help the braid really pop.
Table of Contents
Crocheting a garment doesn’t have to be complicated! This is not a top-down raglan sweater or a sweater made with separate sleeve, back, and front panels. Instead, the body of this pullover sweater is worked flat, starting with the braid. We then work along both sides of the braid to create the rest of the sweater body. While sewing the side seams, we leave an opening around which we can work the sleeves. The finished sweater is made in one piece, similar to a sideways drop-shoulder construction, but with a more seamless look.
How to Choose the Best Yarn for a Women’s Crochet Pullover Sweater
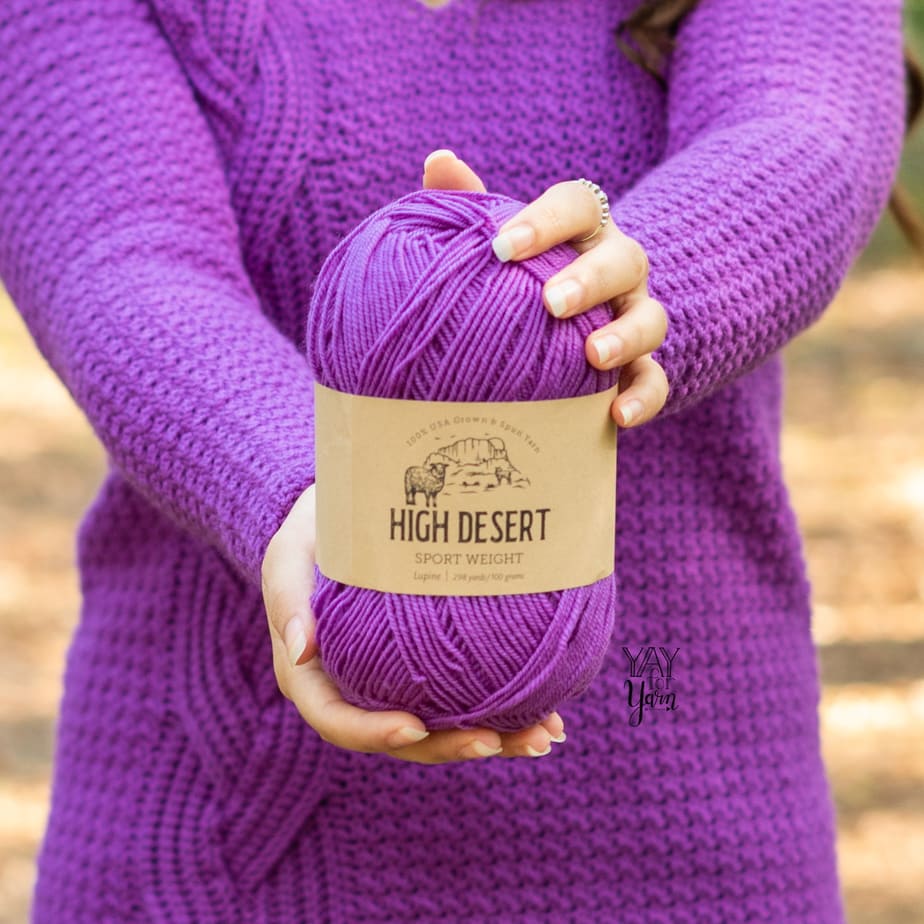
This women’s cardigan crochet pattern calls for #2 Sport Weight yarn. Knit Picks sent me some of their brand-new High Desert Sport Weight wool to use for this design, and I’m thrilled with how squishy and soft it is! This is definitely the highest-quality wool yarn I have tried yet.
High Desert is 100% USA Grown and Spun Shaniko Wool. The sustainable merino fiber is harvested from the American West under the Responsible Wool Standard certification, and the fiber is then processed in North and South Carolina.
I don’t think I have ever used a pure, non-superwash wool yarn that is as soft as this one. The strand itself is spun very well, with good twist, no splitting, and a bouncy, springy texture. It’s not the least bit scratchy at all, so if you think you don’t like wool yarn, this yarn might just change your mind. ;)
When selecting the yarn you want to use for this pattern, make sure the yarn label says it is #2 Sport Weight. (You’ll also want it to be soft and comfortable against the skin.) Then, purchase enough skeins of the yarn you want to use so that you have at least the total number of yards required in the pattern for the size you are making.
(Please note that the High Desert Wool Yarn from Knit Picks is also available as a worsted-weight yarn, so if you decide to use High Desert wool, please be sure to purchase the Sport Weight version for this project.)
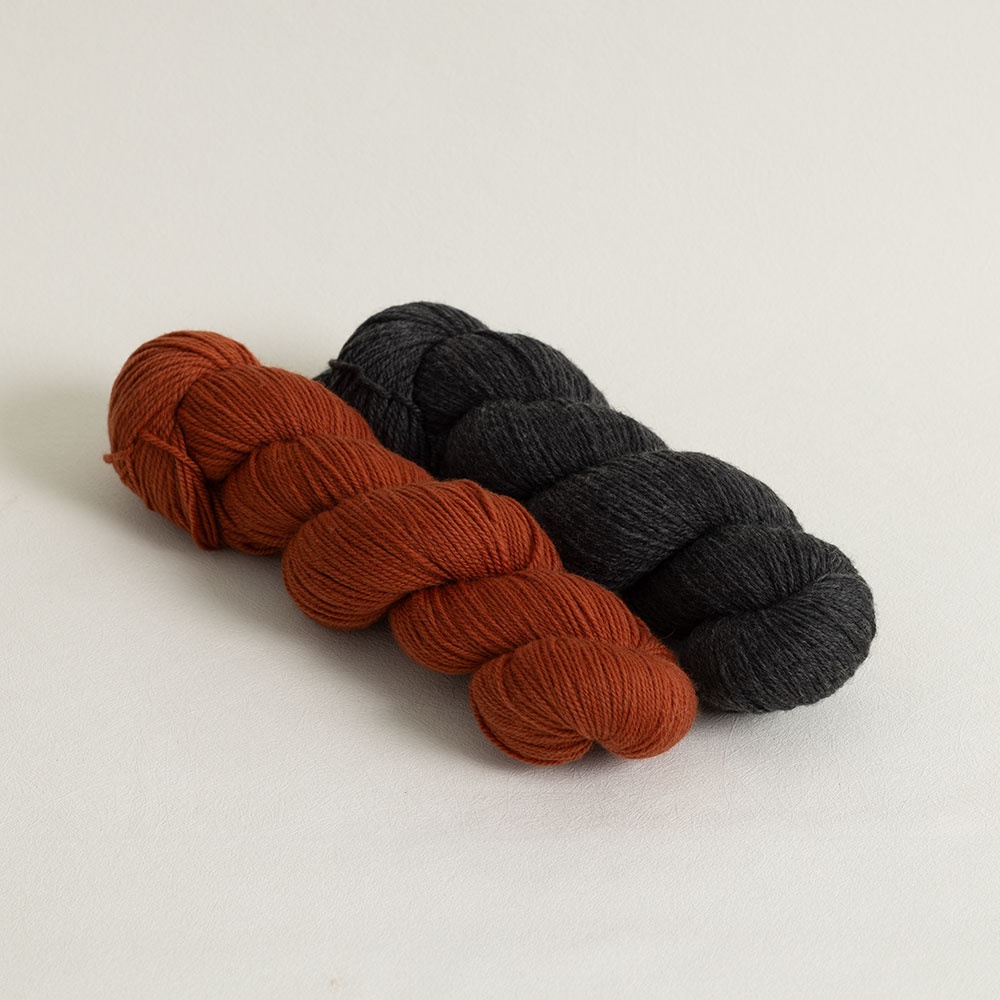
If you’d like to substitute a different yarn, I would recommend either Knit Picks Wool of the Andes Sport or Brava Sport. An acrylic yarn or any animal fiber yarn (like wool or alpaca) would be suitable for this project.
How do I Choose a Size?
The Intertwine Pullover crochet pattern includes instructions for 9 sizes, from a women’s size X-Small to 5X. (Pattern is written for XS, S, M, L, XL, 2XL, 3XL, 4XL, and 5XL.) To decide which size you want to make, you’ll need to measure around the fullest part of the bust. Then, follow the instructions in the “Sizing” section of the pattern to select the size according to the wearer’s bust measurement.
Please note that the pullover length will fall differently on individuals of different heights. To see how long the sweater will fall, measure the back length measurement against the wearer.
Check out more size-inclusive women’s free crochet sweater patterns!

1. Cuddle Cardigan / 2. Diamond Cardigan / 3. Crimson Cardigan
Can I crochet this if I am a beginner?
This crochet sweater pattern is labeled “Intermediate” for the skill level, but the stitches and construction are not super complicated. To make this project, you’ll need to know how to work the basic crochet stitches, increase and decrease, work in the round, and work in a simple stitch pattern. The main stitch pattern used in this sweater is Griddle stitch, alternating the single crochet stitch and double crochet stitch.
You will also need to be comfortable reading a written pattern, and understanding how to follow a set of repeating instructions. (See this article by the Craft Yarn Council to learn more about how to read a crochet pattern.) If you are familiar with those techniques, you can make this sweater.
Pin this project to save it for later!

Ready to get started? Let’s crochet the Intertwine Pullover!
Intertwine Pullover Crochet Pattern
by Yay For Yarn
Project Level: Intermediate
Sizing:
– – Sizing follows the Craft Yarn Council’s standards for Women’s sizes.
– – This sweater has a classic fit, with about 2” (5 cm) of positive ease. Measure the bust of the wearer, and choose the size that is closest to the wearer’s bust measurement, under the title, “To Fit Bust”.
– – Instructions and yarn requirements for size X-Small are given outside the parentheses, with Small, Medium, Large, X-Large, 2X, 3X, 4X, and 5X given inside the parentheses, like this:
X-Small (Small, Medium, Large, X-Large, 2X, 3X, 4X, 5X).
– – When only one number is given, it applies to all sizes.
To Fit Bust:
30 (34, 38, 42, 46, 50, 54, 58, 62)” / 76 (86.5, 96.5, 106.5, 117, 127, 137, 147.5, 157.5) cm
Finished Bust:
32 (36, 40, 44, 48, 52, 56, 60, 64)” / 81 (91, 101.5, 112, 122, 132, 142, 152, 162.5) cm
Back Length:
23 (23, 23, 24.5, 24.5, 24.5, 24.5, 24.5, 24.5)” / 59 (59, 59, 63, 63, 63, 63, 63, 63) cm
Please Note: Pullover length will fall differently on individuals of different heights. To see how long the sweater will fall, measure the back length measurement against the wearer.

You Will Need:
- – 1635 (1788, 1949, 2207, 2336, 2506, 2637, 2804, 2970) yards of #2 Sport Weight Yarn (I used KnitPicks High Desert Sport in Lupine, 100% USA Grown Shaniko Wool, 3.5oz/100g or 298yds/272m per skein, 6 (6, 7, 8, 8, 9, 9, 10, 10) skeins)
- – US Size 7 / 4.5mm Crochet Hook (or size needed to obtain gauge)
- – Scissors
- – Measuring Tape
- – Yarn Needle or Blunt Tapestry Needle
- – Locking or Split-Ring Stitch Marker (a safety pin will also work)
Shop Supplies for this Project
High Desert Sport Yarn – Crochet.com
Buy Now →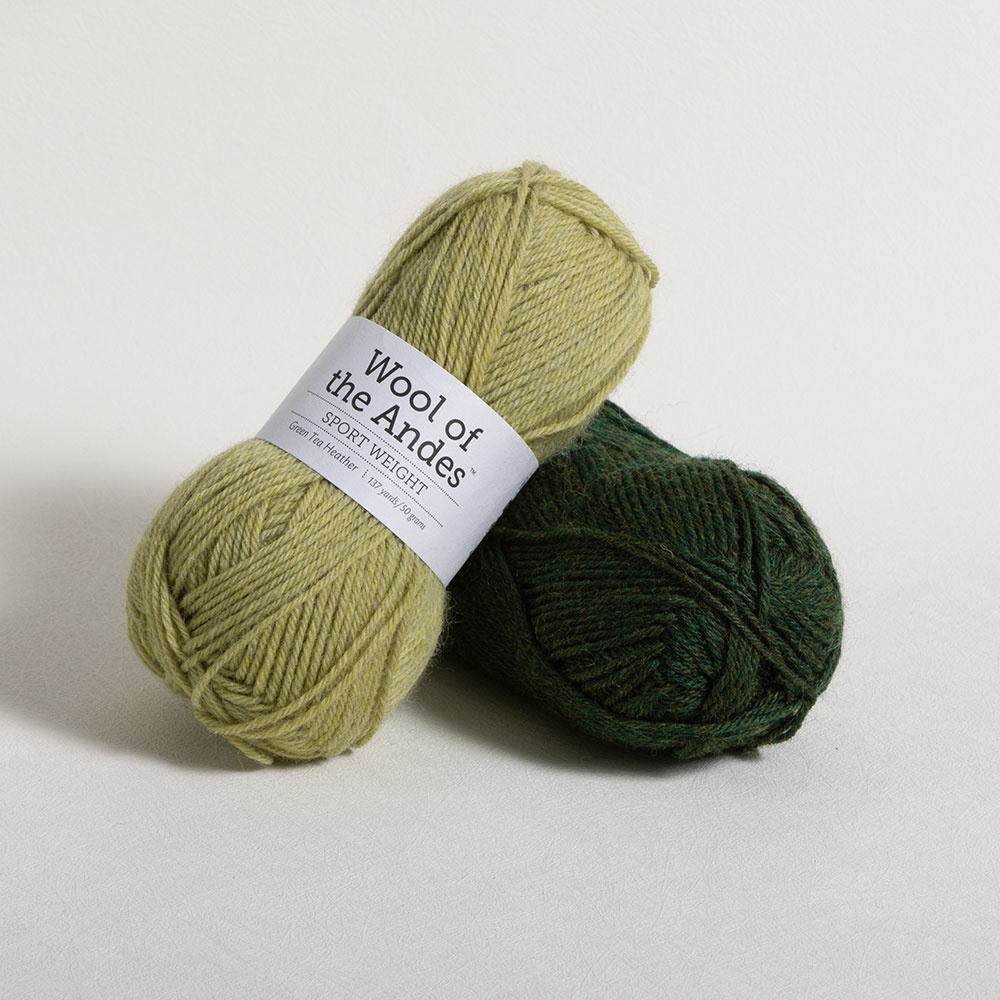 Buy Now →
 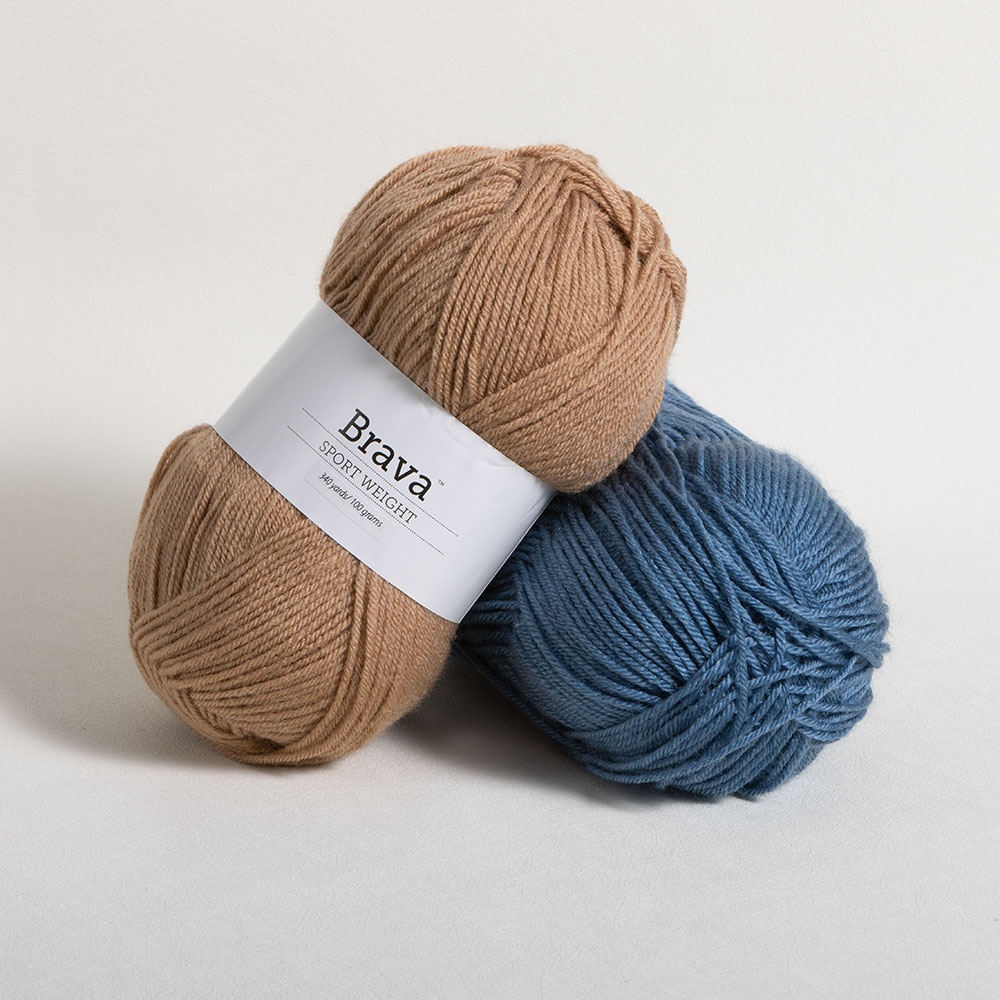 Buy Now →
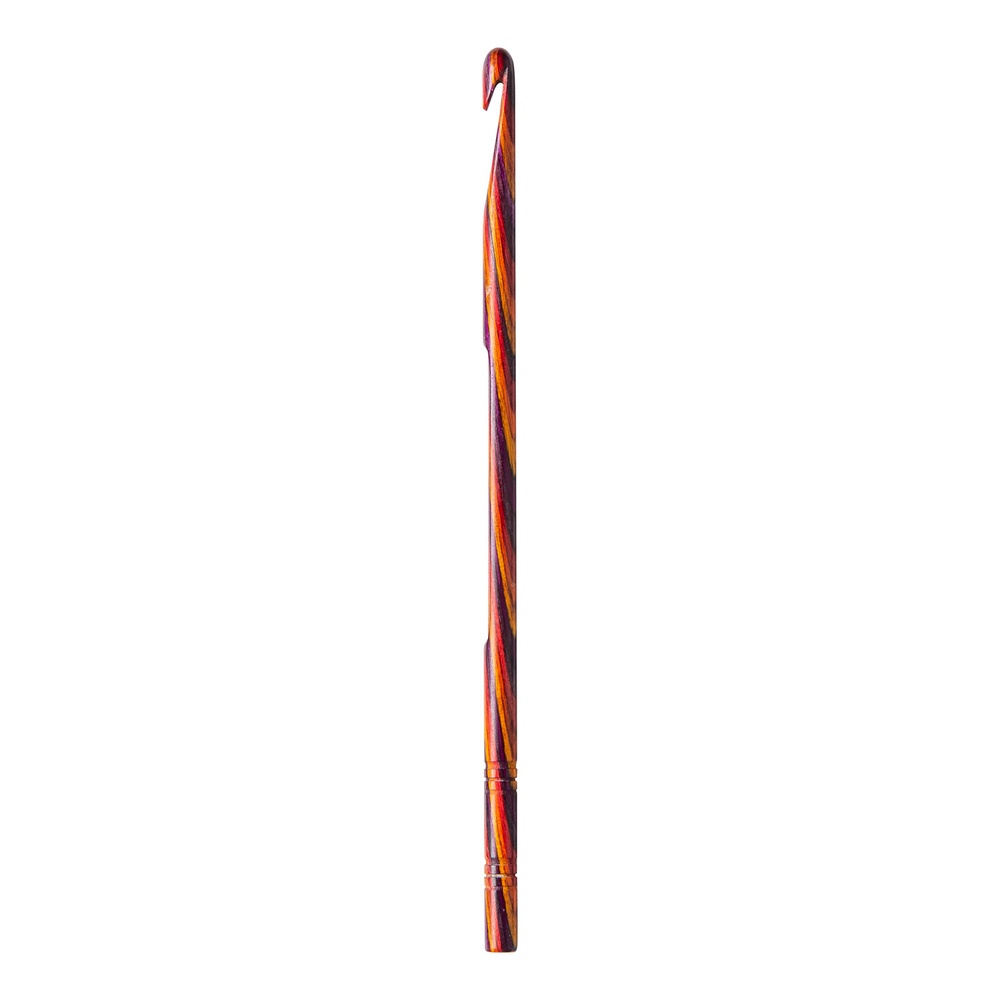
WeCrochet Radiant Crochet Hooks
Buy Now →
Chibi Metal Yarn Needles – Amazon
Buy Now →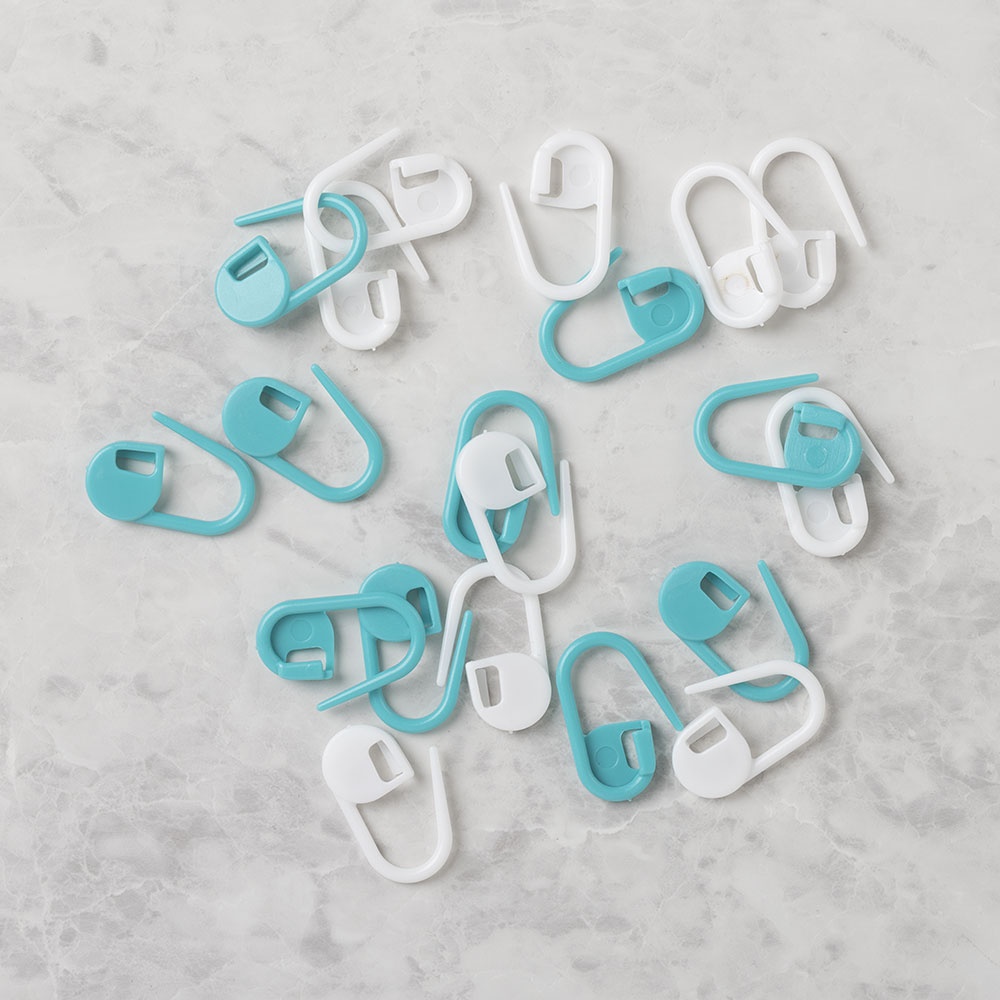
WeCrochet Locking Stitch Markers
Buy Now →
Knitter’s Pride Rainbow Folding Scissors
Buy Now →
Abbreviations:
st(s): stitch(es)
sk: skip
nxt: next
ea: each
sp: space
beg: beginning
ch: chain
sc: single crochet
hdc: half-double crochet
dc: double crochet
sl st: slip stitch
BLO: back loop only
*Fsc: foundation single crochet
*yo-slst: yarn-over slip stitch
*CSSC: chainless starting single crochet
*invslst: invisible slip stitch
*sc2tog: single crochet 2 stitches together
*dc2tog: double crochet 2 stitches together
*This is a special stitch. See instructions below to learn how to work this stitch.

Special Stitches
Foundation Single Crochet: (video tutorial here)
To begin, chain 2. Insert hook into the 2nd chain from the hook. Yarn over, pull up a loop. Yarn over, pull through one loop on hook (one chain made). Yarn over, pull through both remaining loops on hook.
For all following stitches: Turn work upside-down so the bottom (foundation) edge is facing you. On the bottom of the previous stitch, there is what looks like the top of a normal crochet stitch (the chain from the previous stitch). Insert hook into both strands of that “stitch”. Yarn over, pull up a loop. Yarn over, pull through one loop on hook (chain made). Yarn over, pull through both remaining loops on hook.
Yarn-over Slip Stitch:
Yarn over, insert hook into specified stitch. Yarn over, pull loop through stitch and all remaining loops on hook.
Chainless Starting Single Crochet: (video tutorial here)
Stretch loop on hook slightly. Insert hook in the same stitch the loop is coming from. Yarn over, pull up a loop. Yarn over, pull through 2 loops on hook.
Invisible Slip Stitch: (video tutorial here)
Remove hook from current loop. Insert hook from back to front through the top of the first stitch from beg of round. Place original loop back on hook. Pull loop through the st from front to back.
Sc2tog: *Insert hook into the next stitch, yarn over and pull up a loop. Repeat from * one more time. Yarn over, pull through all three loops on hook.
Dc2tog: *Yarn over, insert hook into the next stitch, yarn over and pull up a loop. Yarn over, pull through two loops on hook. Repeat from * one more time. Yarn over, pull through all three loops on hook.
Gauge: 34 sts = 7” / 24 rows = 5” in griddle stitch (see instructions for gauge swatch below)
(Note: Gauge should be measured after blocking your swatch. Learn more about checking your gauge here.)
Pattern for Gauge Swatch
Row 1: Ch 41. Sk 1 ch, sc in 2nd ch from hook, dc in nxt st. *Sc in nxt st, dc in nxt st* across. <You should have 40 sts, not including skipped ch.>
Rows 2-32: Ch 1, turn. (Ch 1 does not count as a stitch here and throughout.) Sc in same st, dc in nxt st. *Sc in nxt st, dc in nxt st* across. <You should have 40 sts, not including beg ch-sp.>
After blocking, swatch should measure 8.2” (20.8 cm) wide by 6.7” (17 cm) long. If your swatch does not match these finished measurements or the pattern gauge measured in the center of the swatch, please adjust your hook size to get the correct gauge.

Intertwine Pullover Instructions
Notes: Pullover is worked sideways in one piece, starting with the braid. After assembling the braid, we will work along each side of the braid and continue working rows to add width to both sides. Since the braid is off-center, the neck opening will be worked into one side of the body panel. Once the body panel is finished, we will sew the side seams and join yarn around the armhole opening to make each sleeve.
This pattern begins with a row of foundation single crochet instead of a foundation chain. The foundation single crochet is simple to work, and makes the foundation chain and the first row of single crochet at the same time. The foundation edge, when worked in this way, has much more stretch and flexibility than a regular foundation chain. This will make the foundation edge much easier to work into later.
Body of Sweater
Braid Sections (make 3)
Leave a tail about 8” long and ch 2. Fsc in 2nd ch from hook. Loosely work 277 (277, 277, 297, 297, 297, 297, 297, 297) more fsc. <You should have a total of 278 (278, 278, 298, 298, 298, 298, 298, 298) fsc sts, not including ch sts at beg of row.>
Rows 1-6: Ch 1, turn. Yo-slst in BLO of same st and in ea st across. <You should have 278 (278, 278, 298, 298, 298, 298, 298, 298) yo-slsts.>
Tie off. Leave a tail about 8” long.
Braid Assembly
Lay one end of each braid section out flat in front of you, each with the same side of the fabric facing up. We will be stitching the sides of the strips (not the short ends) together with short seams to secure them together before we begin braiding.
Use your yarn needle and one of the yarn tails to seam the left and center sections together, stopping when you have joined 19 sts from each section. Tie off, weave in the yarn tail. Use another of the yarn tails to seam the center and right sections together, stopping when you have joined 10 sts from each section. Tie off, weave in the yarn tail.
With the seamed end of the braid in front of you, cross the right section over the center section, then cross the left section over the center section. This is one braid stitch. Repeat this braid stitch 12 (12, 12, 13, 13, 13, 13, 13, 13) more times, for a total of 13 (13, 13, 14, 14, 14, 14, 14, 14) braid stitches.
Using the yarn tails at this end of the braid, seam the center and right sections together, stopping when you have joined 19 sts from each section. Tie off, weave in the yarn tail. Now, with another yarn tail, seam the left and center sections together, stopping when you have joined 10 sts from each section. Adjust the braid to even it out if needed. Place a stitch marker on the surface of the braid that is facing up to mark the right side.

Right Side of Pullover
We will now work a row along one side of the braid and continue working back and forth to create the right side of the pullover (right side when worn).
Lay braid out with right side facing up. At each end of the braid, the edge of the braid section on one side is longer than the edge of the braid section on the other side. Join yarn in the first stitch of the longer edge.
Row 1: Ch 2. Hdc in BLO of same st, hdc in BLO of nxt 26 (26, 26, 25, 25, 25, 25, 25, 25) sts. *Hdc in BLO of nxt 15 sts along the edge of the following braid section.* Repeat from *to* 11 (11, 11, 12, 12, 12, 12, 12, 12) more times. Hdc in BLO of last 19 sts along edge of last braid section. <You should have 226 (226, 226, 240, 240, 240, 240, 240, 240) sts, not including beg ch-sp.>
Row 2: Ch 1, turn. Sc in same st, dc in nxt st. *Sc in nxt st, dc in nxt st* across. <You should have 226 (226, 226, 240, 240, 240, 240, 240, 240) sts, not including beg ch-sp.>
Repeat Row 2; 12 (12, 18, 18, 22, 22, 28, 28, 32) more times. Tie off, leaving a long tail at least 1 yard long.
Left Side of Pullover
The left side of the pullover (left side when worn) is constructed similarly to the right side. However, because the braid is offset to the right side, the left side of the pullover will be wider and include the neck opening.
With right side of the work facing up, join yarn in the first stitch along the edge of the braid that we haven’t worked into yet.
Row 1: Ch 2. Hdc in BLO of same st, hdc in BLO of nxt 26 (26, 26, 25, 25, 25, 25, 25, 25) sts. *Hdc in BLO of nxt 15 sts along the edge of the following braid section.* Repeat from *to* 11 (11, 11, 12, 12, 12, 12, 12, 12) more times. Hdc in BLO of last 19 sts along edge of last braid section. <You should have 226 (226, 226, 240, 240, 240, 240, 240, 240) sts, not including beg ch-sp.>
Row 2: Ch 1, turn. Sc in same st, dc in nxt st. *Sc in nxt st, dc in nxt st* across. <You should have 226 (226, 226, 240, 240, 240, 240, 240, 240) sts, not including beg ch-sp.>
Repeat Row 2; 7 (11, 11, 17, 17, 21, 21, 27, 27) more times.
We will now create a slit in our piece for the neck opening.
Row 3: Ch 1, turn. Sc in same st, dc in nxt st. [Sc in nxt st, dc in nxt st] 48 (48, 48, 51, 51, 51, 51, 51, 51) times. Sc in nxt 46 (46, 46, 48, 48, 48, 48, 48, 48) sts. [Sc in nxt st, dc in nxt st] across to end of row. <You should have 226 (226, 226, 240, 240, 240, 240, 240, 240) sts, not including beg ch sp.>
Row 4: Ch 1, turn. Sc in same st, dc in nxt st. [Sc in nxt st, dc in nxt st] 40 (40, 40, 43, 43, 43, 43, 43, 43) times. Insert hook into base of previous st, and work an fsc in base of previous st. Work 45 (45, 45, 47, 47, 47, 47, 47, 47) more fsc. Insert hook into base of previous fsc, yarn over and pull up a loop. Sk nxt 46 (46, 46, 48, 48, 48, 48, 48, 48) sts of previous row, insert hook into nxt st of previous row. Yarn over, pull loop through st and loop on hook, yarn over, pull through both remaining loops on hook. This is equivalent to a sc, but we have now joined the foundation edge of the fsc to it. Dc in nxt st. [Sc in nxt st, dc in nxt st] across to end of row. <You should have 226 (226, 226, 240, 240, 240, 240, 240, 240) sts, not including beg ch sp.>
Repeat Row 2; 37 (43, 47, 53, 57, 61, 67, 71, 77) more times. Tie off, leaving a tail at least 1 yard long.
Take a length of yarn at least 2 yards long, and thread it into your yarn needle. Flip the body of the sweater over so that the wrong side of the braid is facing up. On the wrong side of the braid, where the strands overlap each other down the center, the braid is still able to open up a bit when stretched width-wise. Beginning at one end of the braid, stitch the overlapping edges of the braid closed, only stitching on the surface (not all the way through). (The seam line will look like a long zig-zag.) When you reach the other end of the braid, and you have closed all the gaps of overlapping sections in the center, tie off and weave in the yarn tail.

Assembling Body of Sweater
Block both panels with the blocking method of your choice.
To Block: (video tutorial here)
For natural fibers, pin project out on foam blocking mats. Spray with water until fully saturated, allow to dry.
OR
For acrylic fibers, pin project out on an ironing board or several layers of towels. Hold a steaming iron 2”-3” over the surface of the fabric, making sure all of the fabric is penetrated by the steam. Allow to cool / dry.
Side Seams
Lay the body panel out flat so the wrong side of the braid is facing up, and the braid is running vertically. Fold it in half by bringing the top edge of the panel (the edge with the end of the braid) down to meet the bottom edge. The braid should be folded in half, with both ends of the braid now lining up on top of each other at the hem edge.
The wrong side (bumpy side) of the last row from each panel should be facing out. The folded sections at the top are the shoulders, and the opening in the center is the neckhole.
Take the yarn tail from one side edge of the panel, and thread it through your yarn needle. We will begin stitching the sides of the panel together, beginning at the hem edge. We will stop stitching before we reach the fold, leaving an opening for the armhole.
Beginning at the hem edge, whip stitch pairs of stitches together (one pair of stitches is one stitch from the front edge and one stitch from the back edge) until there are 56 (62, 66, 70, 76, 84, 90, 98, 104) stitches remaining around the opening that have not been joined together. Take one more stitch through the last pair of stitches you just worked into, wrap the yarn around the needle, and pull the needle through to make a knot. Weave in the yarn tail.
Repeat these instructions for the other side seam.

Sleeves
We will be joining the yarn at the base of the armhole, and working the first round of the sleeve into the remaining stitches of the armhole.
Lay the sweater in front of you so the top of the side seam is facing you. We need to join the yarn in the top of a double crochet from the last row of the body panel, joining close to the side seam.
Either the stitch on one side of the seam or the stitch on the other side of the seam will be a double crochet from the last row of the body panel. Join yarn in that stitch, leaving a 6”-8” (15-20 cm) tail, and proceed to work round 1.
Round 1: CSSC in same st, dc in nxt st. [Sc in nxt st, dc in nxt st] around. Join with invslst in CSSC from beg of round. You should have 56 (62, 66, 70, 76, 84, 90, 98, 104) sts, including CSSC, but not including invslst.
At this point, there will be a small gap at the underarm, right above the end of the seam. Use your yarn tail to make a couple of stitches to close the gap, then make a knot and weave in the tail.
Work 1 Plain Round: Turn. CSSC in same st, dc in nxt st. [Sc in nxt st, dc in nxt st] around. Join with invslst in CSSC from beg of round. <0 sts decreased.>
Repeat the Plain Round 2 (1, 3, 0, 0, 1, 6, 3, 1) more times.
We will now begin gradually decreasing stitches to make the sleeve narrower as we get closer to the cuff.
Work 1 Decrease Round: Turn. CSSC in same st, dc in nxt st. [Sc in nxt st, dc in nxt st] around to last 4 sts, sc2tog, dc2tog. Join with invslst in CSSC from beg of round. <2 sts decreased.>
Next, *work 6 (5, 4, 4, 3, 2, 1, 1, 1) Plain Rounds, work 1 Decrease Round.* Repeat this series of rounds from *to* 8 (10, 11, 12, 14, 18, 20, 23, 25) more times. <You should now have 36 (38, 40, 42, 44, 44, 46, 48, 50) sts, including CSSC, but not including invslst.>
Work 6 (4, 6, 4, 3, 5, 9, 6, 4) more Plain Rounds. <You should now have a total of 74 (74, 72, 72, 66, 66, 60, 60, 60) rounds in the sleeve. Tie off, weave in ends.
Repeat instructions for sleeve to make the second sleeve on the other armhole. Block sleeves using the blocking method of your choice.
Enjoy your finished Intertwine Pullover!

This pattern is intended for your personal use only. You may not share it, copy it, sell it, give it away, or mass-produce the finished product. However, you may sell the finished items on a small scale, as long as you convey in your item description that you used a Yay For Yarn pattern.
Yay For Yarn Copyright© 2021 – Current. All patterns and photos are owned by Yay For Yarn.
Pin the image below to save this project for later!

")


Hi! I’m following all of the instructions and counted my stitches a million times but it looks like my neck opening is WAY off and my single crotchet row doesn’t match my fsc. Not sure if you can help but any advice is appreciated!
Hi Danielle. If your neck opening is off-center, that is correct. The slit for the neck opening is supposed to be shifted towards the front, so the neck opening will be a little lower in the front and higher in the back. If you would like, you could send me a photo of your piece to blogger[at]yayforyarn.com, and I would be happy to help troubleshoot. 🙂
This is such a gorgeous pattern and I’m super excited to have just started it!
I got the paid-for version which is great and extremely detailed with lots of photos, but there is just one thing I’m struggling with right at the beginning…
Could you tell me how long one of the 3 pieces of the braid should be for the L size?
I have done 3 pieces but I’m still pretty new to Crochet and all the pieces are different lengths! One I have done quite tight and another is much looser. The third is somewhere in between.
I just want to get a rough idea of how long the pieces should be before braiding so I can remake the braid pieces at the right length with the right tensioning.
As the braid is different from the gauge pattern, I’m struggling to know which one is the closest to size!
This will be a gift, not for myself, so I can’t just wing-it, unfortunately.
Thanks so much in advance for your help!
Hi Chloe! The row gauge of the braid pieces are different, because a different stitch with a different row height is used. However, the stitch gauge for the sweater is 34 sts = 7″. You’ll want the stitch gauge of the braid section to match that as closely as possible. One thing to keep in mind is that when you pull a new loop through as you work your stitches, you don’t want to stretch that loop or tighten it back down once you slide it onto your hook. The size of your loops should be about the same size as the hook shaft, so that they glide easily across (not too tight), but do not have a gap between the base of the loop and the hook shaft. The loop should “fit” the hook shaft, so you don’t want to pull up on the loop and stretch it or pull on the working yarn and tighten it. If you keep that in mind as you’re making your stitches, that will help keep your overall tension more consistent. I hope this helps, and I hope your sweater turns out great! If you have any more questions, just let me know. 🙂
I would love to make the intertwine sweater. I do like a crew neckline. Can you suggest how to alter the neckline, please?
Hi Gina. This sweater isn’t really designed to be altered for a crew neck, but if you wanted to make that change, you could try working some short rows to fill in the v-neck shape. This would probably best be done at row 3 and before working row 4 on the left side of the pullover. You’d need to do that on both the front and back neck. It would definitely alter the number of foundation single crochet stitches you would need to work on row 4, so I would only recommend trying this if you are comfortable altering patterns. I hope this helps!
Good Morning,
I would like to let you know, this honestly is the most beautiful sweater I have ever seen!!!! It is incredible. I have been crocheting for about 50 years but I have never ever attempted such a beautiful and scared pattern! I must sound stupid, but I am scared to attempt the braid and then crochet the rest of the sweater. I could never ever do near as beautiful of a job as whoever crocheted this.
It is so beautiful!!!!! How I wish I could make this but as I said I scared. I am a pensioner living alone and do not know anyone who could help me. But maybe, just maybe someday, I could make this.
Thank you for a truly beautiful sweater and it is in my favorite color.
I love the sweater and would like to make it with short sleeves since I live in Southern California and it does not get cold enough to wear long sleeves often. Is there an easy way to figure out how long to make them so they stop about mid bicep?
Hi Mary. Yes, you could easily modify the sweater to have short sleeves. Since the sleeves are worked from the top down and added last, you can just follow the instructions as written and try it on as you go. Just stop crocheting when the sleeve is the length you want, and repeat on the other sleeve. I hope this helps!
Beautiful