

Learn to knit your own Custom-Fit Pullover Sweater on your Addi King Knitting Machine!
Table of Contents
PLEASE NOTE: This is NOT a row-by-row, detailed, written machine-knitting pattern. This is a RECIPE, an approximate guidelines and tutorial for how to make a CUSTOM-FIT pullover sweater on your Addi King Size Knitting Machine. The instructions will show you how to calculate sizing, stitch counts, row counts, and increases for your own custom, machine-knit pullover sweater.
Pullover Sweater on the Addi King Knitting Machine
by Yay For Yarn
You will Need:
Addi Express King Size (46 Needle) Knitting Machine
Approx. enough Yarn in the weight category of your choice for your sweater (I used #5 Bulky) (it’s good to have extra yarn just in case)
Measuring Tape
Scissors
Yarn Needle or Blunt Tapestry Needle
Loom Pick
Crochet Hook (I used US size I / 5.5 mm)
Shop Supplies for this Project

Addi Kingsize Knitting Machine
Buy Now →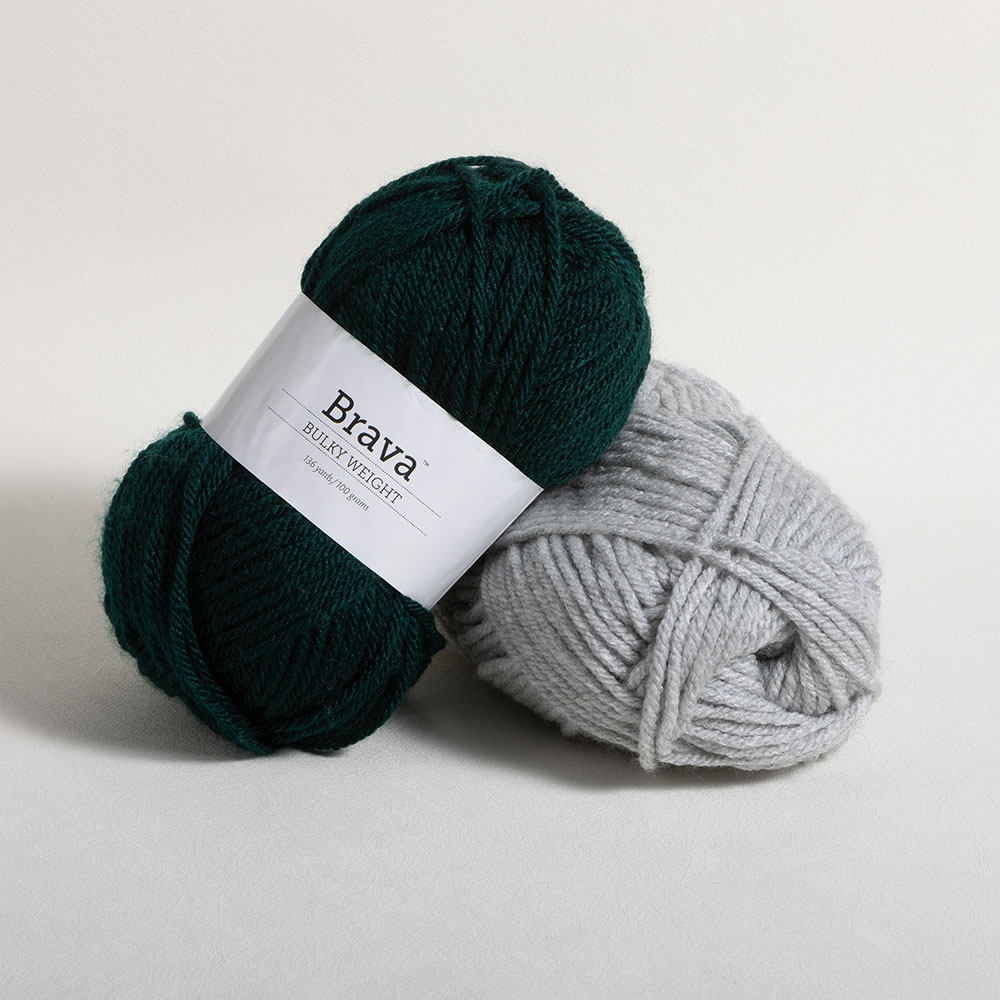 Buy Now →
 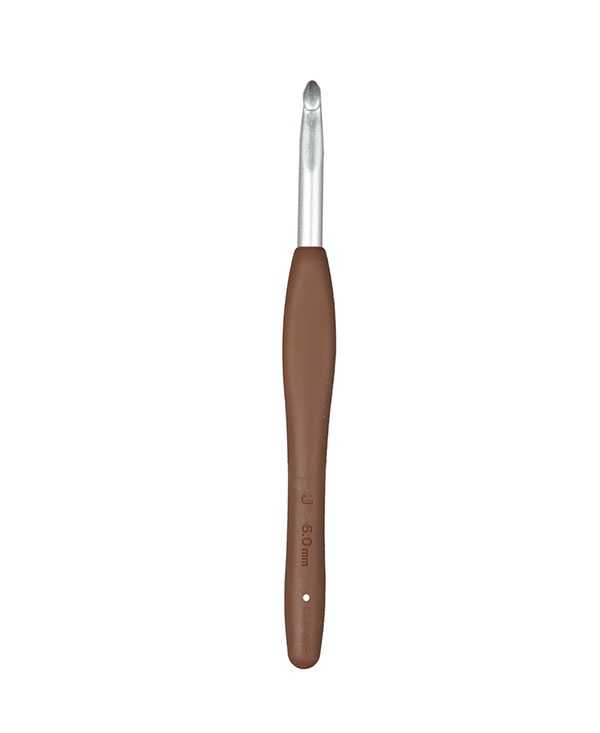 Buy Now →
 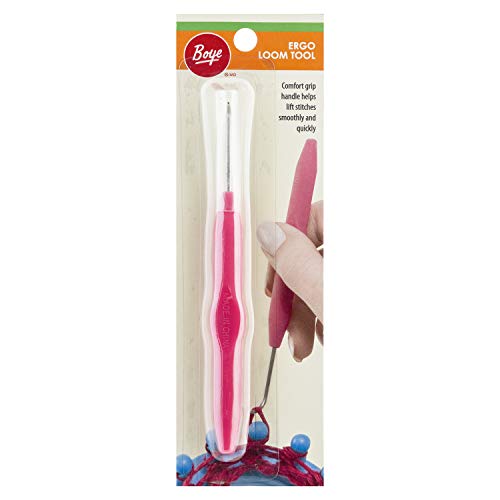 Buy Now →
Chibi Metal Yarn Needles – Amazon
Buy Now →
Knitter’s Pride Rainbow Folding Scissors
Buy Now →
You will need to know how to:
- Knit a Flat Panel on your Addi Knitting Machine
- Do a Long-Tail Cast On on your Addi Knitting Machine
- Knit Ribbing on your Addi Knitting Machine
- Work Increases on your Addi Knitting Machine
- Bind Off with a Crochet Hook on your Addi Knitting Machine
- How to Seam your Knitting with Mattress Stitch
- *If you want stripes on your sweater, you will also need to know How to Knit Stripes on your Addi Knitting Machine
View my tutorials for all these techniques here.

NOTE: When you work out these numbers, you will very likely come up with decimal numbers (ex. 8.5) rather than whole numbers (ex. 9). When instructions specify, you will need to round your decimal number to the nearest whole number. This means that if your number is 5.2, that is closer to 5 than it is to 6. So we would round 5.2 to 5, which is a whole number. If the number is 5.7, that is closer to 6, so we would round 5.7 to 6, which is a whole number. Any decimal number that has a number less than 5 after the decimal point gets rounded down to the lower whole number. Any decimal number that has a 5 or a number greater than 5 after the decimal point gets rounded up to the next whole number. When the instructions say to round to the nearest whole number, if your number is already a whole number, there is no need to round it.
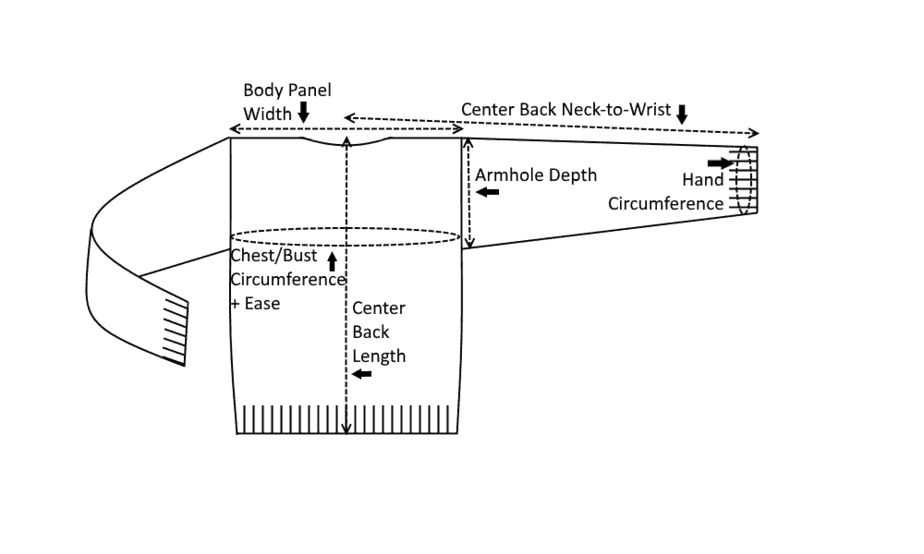
Finished Garment Measurements :
How to Calculate your Custom-Fit Sweater
If you cannot measure the wearer, but know their approximate size, use the Craft Yarn Council’s Standard Sizing Guidelines to get the measurements you need for this chart. Fill these numbers in to the Body Measurement section below.
Child / Youth Standard Size Chart
You can also use the Craft Yarn Council’s Body Sizing Guide to determine how much ease to add to your sweater according to the size you are making.
If you can measure the wearer, take body measurements as follows:
– Bust / Chest: Measure around the fullest part of the bust / chest. Do not draw the tape too tightly.
– Center Back Neck–to-Wrist: With arm straight, measure from back base of neck, across shoulder, and along arm to wrist.
– Center Back Length: Measure from the most prominent bone at base of neck to where you want the bottom edge of the sweater to fall.
– Armhole Depth: Measure from the top outside edge of the shoulder down to the armpit.
– Hand Circumference: Measure around the palm of the hand, just below the knuckles, and not including the thumb.
1. Take Bust / Chest measurement and add 0” to 6” (0 cm to 15 cm) for ease (extra room in the garment, depending on how close fitting or loose fitting you want it to be). See the Craft Yarn Council’s Body Sizing Guide to determine how much ease to add to your sweater, according to the size you are making. This is your finished sweater circumference measurement.
2. Take the Finished Sweater Circumference measurement and divide the number by 2 (in half). This is the Body Panel Width, which is what the width of your front panel and the width of your back panel should be. You may need to seam several panels together to achieve the correct width.
3. The Center Back Length is what the length of your front panel and the length of your back panel should be.
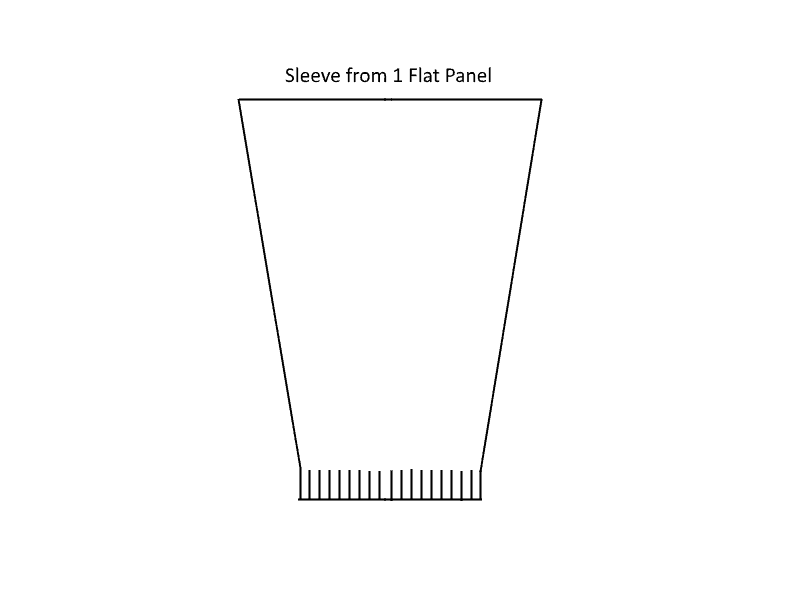
4. Take the Body Panel Width (see step 2) and divide that number by 2 (in half). Now, subtract that number from the Center Back Neck-to-Wrist measurement. This is the total Sleeve Panel Length.
5. Take the Armhole Depth measurement and multiply it by 2. This is what the width of your sleeve panels should be at the top (where the sleeve is joined to the body of the sweater). You may need to seam several panels together to achieve the correct width.
6. The Hand Circumference measurement is what the width of your sleeve panels should be at the bottom (wrist).
7. Knit a swatch on your machine with the yarn you will be using for your sweater. Make the swatch about 6” (15 cm) wide. When you are finished, remove it from the machine, but DO NOT cut the yarn. (Once all the required information has been obtained from the swatch, it can be unraveled and that yarn used in your sweater.) Give the swatch a vertical stretch (to align all the stitches correctly). I recommend blocking your swatch with the same method you will use to block your finished sweater before proceeding. Lay the swatch on a flat surface. You may need to set small objects on top of the swatch around the edges to hold it still and keep it from curling up.
8. Measure how many stitches there are in 4” (10 cm) of your swatch fabric. Now, divide that number by 4 (or by 10 if using cm). This is how many stitches you have per inch (or cm). (It will usually be a decimal number, and not a whole number. Do not round this number.)
9. Measure how many rows there are in 4” (10 cm) of your swatch fabric. Now, divide that number by 4 (or by 10 if using cm). This is how many rows you have per inch (or cm). (It will usually be a decimal number, and not a whole number. Do not round this number.)
10. Take the number of stitches per inch / cm and multiply it by the Body Panel Width measurement (see step 2). Round this number to the nearest whole number (if necessary). This is the number of stitches wide that your front body panel and back body panel should each be once assembled. A flat panel on the Addi King Knitting Machine can be made up to 43 stitches wide. 2 of those stitches will be used in the seam, leaving a total maximum width of 41 stitches after seaming. If the number of stitches you need is 41 or less, you will only need to make one flat panel to achieve the correct body panel width. If the number of stitches you need is more than 41, you will need to join more than one flat panel together to achieve the correct width.
– If you only need one flat panel for the front body panel and one flat panel for the back body panel, add 1 stitch on each side of each flat panel for seaming. That is the number of stitches you will need to cast on for each panel.
– If seaming several flat panels together to achieve the correct width, decide how many flat panels you need to join to get the correct body panel width. Add 1 stitch on each side of each flat panel for seaming. Divide this number by how many flat panels you want to join for each body panel (front or back). This is the number of stitches you will need to cast on for each flat panel.

11. Take the number of rows per inch / cm and multiply it by the Center Back Length measurement (see step 3). Round this number to the nearest whole number (if necessary). This is the number of rows you will need to knit for your front body panel and for your back body panel to be the correct length.
12. Take the number of rows per inch / cm and multiply it by the Sleeve Panel length (see step 4). Round this number to the nearest whole number (if necessary). This is the number of rows you will need to knit for each of your sleeve panels to be the correct length.
13. Take the number of stitches per inch / cm and multiply it by the Hand Circumference measurement (see step 6). Round this number to the nearest whole number (if necessary). This is the number of stitches wide that each of your sleeve panels should be at the bottom once assembled.
-If you only need one flat panel for each sleeve (see step 14 below), add 1 stitch on each side of the panel for seaming. This is the number of stitches you will need to cast on for each sleeve panel.
-If seaming 2 flat panels together to achieve the correct sleeve width (see step 14 below), divide the number of stitches wide your sleeve panel should be at the bottom by 2 (in half). Round this number to the nearest whole number (if necessary). Add 1 stitch on each side of each flat panel for seaming. The total number of stitches needed for each flat panel is the number of stitches you will need to cast on for each flat panel.
-If seaming 3 flat panels together to achieve the correct sleeve width (see step 14 below), divide the number of stitches wide your sleeve panel should be at the bottom by 3 (in thirds). Round this number to the nearest whole number (if necessary). Add 1 stitch on each side of each flat panel for seaming. The total number of stitches needed for each flat panel is the number of stitches you will need to cast on for each flat panel.
14. Take the number of stitches per inch / cm and multiply it by the Width at top of Sleeve Panel measurement (see step 5). Round this number to the nearest whole number (if necessary). This is the number of stitches wide that each of your sleeve panels should be at the top once assembled. A flat panel on the Addi King Knitting Machine can be made up to 43 stitches wide. 2 of those stitches will be used in the seam, leaving a total maximum width of 41 stitches after seaming.
If the number of stitches you need is 41 or less, you will only need to make one flat panel to achieve the correct sleeve panel width. If the number of stitches you need is more than 41, you will need to join more than one flat panel together to achieve the correct sleeve panel width.
-If you only need one flat panel for each sleeve, add 1 stitch on each side of the panel for seaming. This is the number of stitches you will need to have at the top of each sleeve panel.
-If seaming more than one flat panel together to achieve the correct width, decide how many flat panels you need to join to get the correct sleeve panel width. Add 1 stitch on each side of each flat panel for seaming.
–If you need 2 flat panels to achieve the correct width, divide the total number of stitches by 2 (in half). This is the number of stitches you will need to have at the top of each flat panel.
–If you need 3 flat panels to achieve the correct width: The center panel will be straight with no increases (see step 20). The center panel will be the same number of stitches wide at the top as it is at the bottom. So, take the total number of stitches needed and subtract the number of stitches you need to cast on for one of your flat panels (see step 13). Divide those remaining stitches by 2 (in half). (Those stitches are divided between the 2 side panels). This is the number of stitches you will need to have at the top of each of the 2 side panels. The number of stitches you will need to have at the top of the center panel is the same number of stitches you will need to cast on for the center panel.
15. Take the total number of stitches needed at the bottom of the sleeve (see step 13) and subtract it from the total number of stitches needed at the top of the sleeve (see step 14). This is the total number of stitches you will need to increase as you work your way up from the bottom of the sleeve to the top.
16. Decide how wide you want the ribbing at the bottom of the sweater and sleeves to be. Multiply that number by the number of rows per inch / cm. Round this number to the nearest whole number (if necessary). This is the number of rows of ribbing you should knit to get the ribbing width you want. Please note that the ribbing rows are included in the total number of rows you need for the front / back panels and sleeve panels (see steps 11 & 12).
17. Take the total number of rows needed for the sleeve panel (see step 12) and subtract the number of rows needed for the ribbing. This is the total number of rows knit after the ribbing for the sleeve panel.
18. Take the total number of stitches you will need to increase as you work your way up from the bottom of the sleeve to the top, and divide it by 2 (in half). We will be working the increases for the sleeve in pairs. This is how many pairs of increases you will need to work during the rows knit after the ribbing for the sleeve panel (see step 17).
19. Take the number of rows knit after the ribbing for the sleeve panel (see step 17) and divide it by the number of pairs of increases needed (see step 18). This is the number of rows you will knit per pair of increases.
20. If you only need one flat panel for each sleeve:
When we work an “increase row”, we put one increase at the beginning of the row and one increase at the end of the row, thus increasing 2 stitches (one pair of increases). Subtract one row from the number of rows per pair of increases in step 19. This is the number of rows you will knit between each increase row.
-If you need more than one flat panel for each sleeve:
The two panels that are on the sides will be narrow at the bottom, and increase stitches and get wider as you go up. (If you have a 3rd panel in your sleeve, it will be straight and it will go in between the 2 side panels.) On one of the side panels, you will only increase stitches on the left side of the panel, and the right side will be straight. On the other side panel, you will only increase stitches on the right side of the panel, and the left side will be straight. So each pair of increases is divided between the 2 side panels. Each “increase row” will increase 1 stitch at one edge of the panel. (Which edge you increase on depends on which panel you’re making.) Subtract one row from the number of rows per pair of increases in step 19. This is the number of rows you will knit between each increase row.


Pullover Sweater Instructions
To Knit the Front Body Panel:
– If you only need one flat panel for your front panel:
With a Long-Tail Cast On, cast on the number of stitches you determined in step 10. Work ribbing for the number of ribbing rows you determined in step 16. Continue knitting normally until you have knit the total number of rows you need for the front panel, as you determined in step 11. Cut your yarn, leaving a long tail (at least 3 times as long as your panel is wide). Pick up all stitches onto a length of waste yarn.
– If you need more than one flat panel for your front panel:
For Each Panel: With a Long-Tail Cast On, cast on the number of stitches you determined in step 10. Work ribbing for the number of ribbing rows you determined in step 16. Continue knitting normally until you have knit the total number of rows you need for the front panel, as you determined in step 11.
On the first panel, cut the yarn, leaving a tail that is at least 3 times as long as your complete front panel will be wide. Pick up all stitches on a length of waste yarn.
On following panels, cut the yarn, leaving about an 8” (20 cm) tail. Pick up all stitches on a length of waste yarn.
To Knit the Back Body Panel:
Repeat instructions for Front Body Panel(s).
To Knit the Sleeve Panels:
-If you only need one flat panel for each sleeve:
With a Long-Tail Cast On, cast on the number of stitches you determined in step 13. Work ribbing for the number of ribbing rows you determined in step 16.
*Knit the number of rows between increase rows in step 20. Knit an increase row by working an increase at the beginning and at the end of the row.* Repeat between *and* until you have the correct number of rows after the ribbing (see step 18) AND the correct number of stitches for the top of the sleeve panel (see step 14).
Cut your yarn, leaving a long tail (at least 3 times as long as your panel is wide). Pick up all stitches on a length of waste yarn.
Repeat for the second sleeve panel.
-If you need two flat panels for each sleeve:
For left flat panel:
With a Long-Tail Cast On, cast on the number of stitches you determined in step 13. Work ribbing for the number of ribbing rows you determined in step 16.
*Knit the number of rows between increase rows in step 20. Knit an increase row by working an increase at the left end of the next row.* Repeat between *and* until you have the correct number of rows after the ribbing (see step 18) AND the correct number of stitches for the top of this flat panel (see step 14).
Cut your yarn, leaving a long tail (at least 3 times as long as your complete sleeve panel will be wide). Pick up all stitches on a length of waste yarn.
For right flat panel:
With a Long-Tail Cast On, cast on the number of stitches you determined in step 13. Work ribbing for the number of ribbing rows you determined in step 16.
*Knit the number of rows between increase rows in step 20. Knit an increase row by working an increase at the right end of the next row.* Repeat between *and* until you have the correct number of rows after the ribbing (see step 18) AND the correct number of stitches for the top of this flat panel (see step 14).
Cut your yarn, leaving a tail about 8” long. Pick up all stitches on a length of waste yarn.
-If you need three flat panels for each sleeve:
For left and right flat panels:
Same as left and right flat panels for a 2-flat-panel sleeve.
For center flat panel:
With a Long-Tail Cast On, cast on the number of stitches you determined in step 13. Work ribbing for the number of ribbing rows you determined in step 16.
Continue knitting normally until you have knit the total number of rows you need after the ribbing on the sleeve panel, as you determined in step 18. You should have the same number of stitches at the top of the panel as you started with at the bottom. Cut your yarn, leaving a tail about 8” long. Pick up all stitches on a length of waste yarn.
For All Flat Panels:
Tighten up the cast-on edge, starting at the end opposite from the cast-on tail, by pulling on each next loose strand of yarn along the edge to take the extra slack out of the previous loose strand. (See video tutorial for long-tail cast on for more detail.) You will need to do this to every flat panel in your sweater. You don’t want to make it too tight so the edge isn’t stretchy. You just want to make the edge look more tidy.
To Assemble Body Panels:
-If you only have one flat panel for each of your body panels, skip this step.
-If you have more than one flat panel for each of the body panels, seam them together with mattress stitch, using the cast-on tails from your flat panels. (See video tutorial for mattress stitch for more detail.)
To Assemble Sleeve Panels:
-If you only have on flat panel for each of your sleeve panels, skip this step.
-If you have more than one flat panel for each of the sleeve panels, seam them together with mattress stitch, using the cast-on tails from your flat panels. (See video tutorial for mattress stitch for more detail.) Refer to the diagrams on page 6 to join your panels.
To Join Shoulder Seams and Finish Neck Edge:
Refer to the video tutorial for this sweater and the video tutorial for binding off with a crochet hook to see how to do this.
To Join Sleeves to Body of Sweater:
Refer to the video tutorial for this sweater to see how to do this.
To Stitch Side Seams:
Beginning at the cast-on edge of your body panels, use the cast-on tails from the corners of the body panels to mattress stitch the side seams up to the point where the sleeves meet the body of the sweater at the underarm. (See video tutorial for mattress stitch and video tutorial for this sweater for more detail.)
To Stitch Sleeve Seams:
Beginning at the cast-on edge of your sleeve panels, use the cast on tails from the corners of the body panels to mattress stitch the sleeve seams up to the point where the sleeves meet the body of the sweater at the underarm. (See video tutorial for mattress stitch and video tutorial for this sweater for more detail.)
Weave in all ends and block your sweater with whatever method you prefer.
This pattern is intended for your personal use only. You may not share it, copy it, sell it, give it away, or mass-produce the finished product. However, you may sell the finished items on a small scale, as long as you convey in your item description that you used a Yay For Yarn pattern.
Yay For Yarn Copyright© 2018 – Current. All patterns and photos are owned by Yay For Yarn.

If you have any questions, feel free to leave a comment below!
Have you ever machine-knit a sweater?
Pin the image below to save this project for later!

")


Hi! Wonderful Pattern. Any average for how much yarn in weight or length?
The amount of yarn needed can vary greatly based on what size you make the sweater, how fitted or oversized it is, which thickness of yarn you are using, and more. So I cannot give an estimated yarn quantity, but you can look at other hand-knit sweater patterns similar to the custom sweater you plan to make to get a ballpark idea of how much yarn will be needed. It’s always better to have extra yarn to make sure you don’t run out. I hope this helps!
Bonjour,
Je suis intéresser par votre modèle de pull à la machine king Addi de 46 aiguilles ?
Serait il possible de le faire pour moi ! Une taille 58.
Pourriez -vous m’indiquer : combien il me faut de pelotes. SVP.
Merci beaucoup, je voudrais me faire pour Noel.
Je suis impatente d’avoir de vos nouvelles.
A bientot.
Françoise
Bonjour. Je ne serais pas en mesure de tricoter le pull pour vous, et je suis désolé, mais je ne sais pas exactement combien de fil il faudrait pour faire le pull vous-même. Je ne sais pas ce que serait l’équivalent d’une taille française 58 en taille US. Cependant, si vous recherchez des modèles de pulls français dans la taille que vous souhaitez faire, cela peut vous donner une idée de la quantité de fil nécessaire. Il est préférable d’avoir plus de fil que ce dont vous pensez avoir besoin, juste pour vous assurer d’en avoir assez. J’espère que ça aide!
I found your you tube videos extremely helpful on deciding weather to get an Addi knitting machine. Your instructions are so clear and easy to understand. Thank you for all the wonderful content you share with the world. I’m excited to try knitting something other than hats or scarves on the Addi.
hi I went to your webite Yay for Yarn and it told me it was no longer available. I’m getting a new king addi machine and I would love to see your website
thanks
patricia
Hi Patricia. What part of the site is not working for you? If perhaps your internet connection was not working, and the page could not load, that might cause it to tell you it is not available. I would suggest trying to visit the page again, and see if it will load. I hope this helps!