

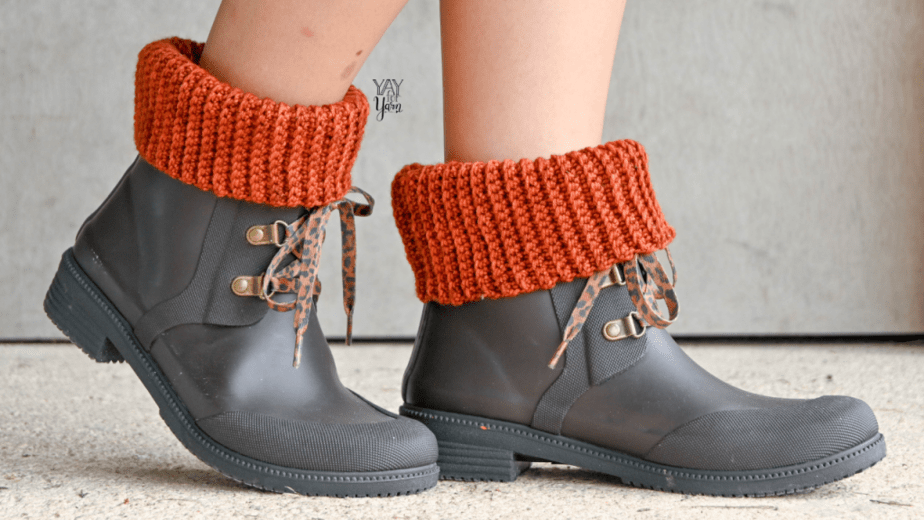
Want to crochet a quick and cozy pair of boot cuffs? These may be the EASIEST boot cuffs you’ll ever make! Make them in any size and in any yarn you like with this free crochet boot cuffs tutorial.
What is a boot cuff?
Boot cuffs, or boot toppers, are a cozy fashion accessory, similar to leg warmers, but shorter. You wear them under your boots, allowing them to peek out the top of the boot. They give the look of a chunky sock, but without the bulk. Boot cuffs can be worn with almost any type of boot, including mid-calf boots, ankle boots, and knee-high boots.
What are boot cuffs used for?
Boot cuffs aren’t just a fashionable accessory! In cold weather, a chunky boot cuff can help keep cold air from getting into the top edge of your boots. It can also prevent the top of your boot from rubbing your leg if you wear ankle boots with shorts, skirts, or dresses.
I decided to design these easy crochet boot cuffs after I wore my lace-up boots with a dress. The top edge of the boots rubbed my leg when I walked, so I decided to create some cute boot cuffs to solve the problem.
How do you crochet boot cuffs for beginners?
Many crochet boot cuff patterns are crocheted in the round, but you can also make a rectangle and sew it together into a tube. This method is simpler, and easier for beginners to tackle. However, for the boot cuff to be stretchy and comfortable, it’s best to use a crochet stitch pattern that creates ribbing.
For this free crochet boot cuff pattern, I’ve chosen to use the simplest type of ribbing you can create with crochet. These boot cuffs are quick and easy to make, and they make great gifts!
How do you crochet a ribbing?
One of the easiest ways to crochet ribbing is to work rows of stitches in the back loop only. This means that when you insert the hook into the stitch from below, you only insert the hook into the back loop of each stitch.
By working into the back loops of the stitches, the new row sits a little bit behind the row below. As you work back and forth, this texture alternates, creating a stretchy ribbed fabric.
I prefer to crochet ribbing with back loop only single crochet, as it makes a ribbed fabric with great stretch and elasticity.
To learn how to crochet in the back loop only, check out this tutorial.
This tutorial will show you how to create your own custom fit boot cuffs from any yarn you like, or you can follow the specific instructions for the boot cuffs I made.

How to Crochet Custom Fit Boot Cuffs
With this simple pattern, you can make your own pair of crocheted boot cuffs in any size, with any yarn you have. Here’s how to customize your boot cuffs to fit just the way you like them:
First, you’ll need to look at how high your boots are. Boot cuffs can be very stretchy, but it’s good to know how far up the leg the cuffs will be worn so you can measure correctly.
If you want to wear the cuffs with ankle boots, for example, they can be smaller than if you wanted to wear them with taller boots. The stitch we’ll be using for the boot cuffs creates a stretchy ribbed fabric, so the fit is forgiving, but it’s good to start with a measurement for the most comfortable fit.
Measure around your calf at the height where the top of your boots will be when worn. Your finished boot cuffs need to be able to stretch to this measurement. The length of your finished rectangle, from foundation chain edge to top row, needs to be able to stretch to comfortably fit around your calf at the height you want to wear them.
Next, decide how high you want your boot cuffs to be. The height of a boot cuff is usually about 4″ to 6″. I prefer a height of 6″ so that you can fold the top edge down.
Then, you can start crocheting your boot cuff. Grab the yarn you want to use, and choose a crochet hook size that is appropriate for the thickness of the yarn. Your yarn label will often give a recommended hook size, so you can use that as a guide. Go up a hook size or two if you crochet tightly, or down a hook size if you crochet loosely.
Our boot cuff is made from a rectangle turned sideways, so instead of the rows running horizontally, the rows run up and down. This means that the length of our foundation edge is actually going to be the height of the finished boot cuff.
Start with a foundation chain that is as long as you want the height of your finished cuff to be. Then, begin working rows of single crochet in the back loop only to create a stretchy ribbed fabric. If you’d like to add a decorative picot edging to the top edge of your cuff, see the pattern instructions below for how to do that.
Continue working rows of back loop only single crochet until your piece is long enough to comfortably stretch around your calf at the height you want to wear it. I recommend stopping when the length of your piece is about 1″ to 2″ less than the circumference of the calf. (Be sure to measure your piece when it is laying flat and unstretched.) This will make sure that the cuff can stretch comfortably around the calf, without being too loose and sliding down.
Once you’ve finished crocheting, tie off, leaving a tail about 12″ long. We’ll use this yarn tail to sew our cuff together later.
Repeat those steps to crochet the rectangle for the second boot cuff. Make sure you use the same number of foundation chain stitches for your second piece as you did for the first piece.
Next, we need to block our pieces. If you’re not familiar with blocking, check out this tutorial. You can choose to wet block or steam block your pieces, depending on what type of yarn you’re using.
Finally, we can sew our boot cuffs together. For each cuff, thread the long yarn tail through your yarn needle and use a whip stitch to sew the foundation chain edge of the rectangle to the top row of the rectangle. When you reach the end of the seam, take one more stitch through the edge of the fabric, wrap the seaming yarn around the needle, and pull the needle through to make a knot. Weave in all yarn tails to finish your boot cuffs.
Easiest Crochet Boot Cuffs
Free Crochet Pattern by Yay For Yarn
Skill Level: Easy / Beginner
Note: There are two different versions of this pattern below. One is plain, the other has a picot edging. Each version is made with a different yarn at a different gauge, so yarn info and gauge measurements are given below the title for each version of the pattern. Feel free to use these instructions as guidelines and adapt them to make your own custom boot cuffs using the information in the blog post above.
Sizes:
Instructions and yarn requirements for size X-Small are given outside the parentheses, with Small, Medium, Large, and X-Large given inside the parentheses, like this:
X-Small (Small, Medium, Large, X-Large)
Fits Calf Circumference:
11-12″ (13-14″, 15-16″, 17-18″, 19-20″)
Actual Cuff Circumference, Unstretched:
10″ (12″, 14″, 16″, 18″)
To choose a size, measure around your calf, where the top of your boots would be when worn. Then, choose the size that most closely matches this measurement according to the measurements given under “Fits Calf Circumference”.
Feel free to customize the fit of the cuff if you like. Some yarns will naturally produce a fabric that is a little more or a little less stretchy, so you can adjust the fit as needed. To make the circumference of the cuff larger, just work extra rows on your piece. The fit can be adjusted by repeating the row instructions more or fewer times than the pattern specifies.
You Will Need:
#3 Light / DK Weight yarn (see individual patterns below for quantities)
Crochet Hook in size needed to obtain gauge (see individual patterns below for recommended hook sizes)
Scissors
Yarn Needle or Blunt Tapestry Needle
Measuring Tape
Shop Supplies for this Project

Laurel Hill Variations DK Yarn
Buy Now →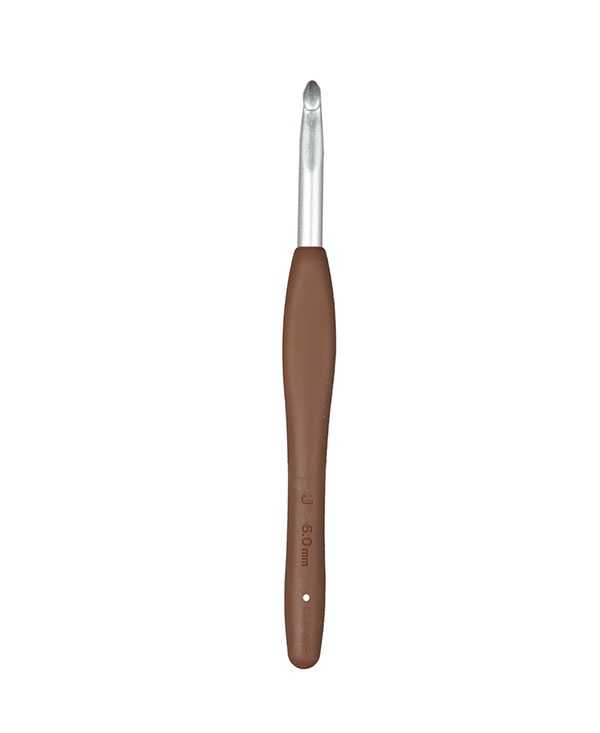 Buy Now →
Chibi Metal Yarn Needles – Amazon
Buy Now →
Knitter’s Pride Rainbow Folding Scissors
Buy Now →
Abbreviations:
st(s): stitch(es)
sk: skip
ea: each
sp: space
beg: beginning
ch: chain
sc: single crochet
BLO: back loop only
Easiest Boot Cuff (Plain Version)
Yarn: You’ll need 183 (220, 256, 292, 329) yards of #3 Light / DK Weight yarn for this project. I used Variations DK from Laurel Hill in “Rust 113 – Burnt Amber”, 100% Superwash Australian Merino Wool, 100g / 225 yds per skein, 1 (1, 2, 2, 2) skeins.
Gauge: 20 sc sts = 4″; 28 BLO sc rows = 4″, measured with the fabric unstretched
Hook: I used a size G+ / US Size 7 / 4.5mm hook. Choose a hook size that helps you match the gauge required for this pattern.
Finished Height: 6″
Instructions:
With G+ / US Size 7 / 4.5mm hook, ch 31.
Row 1: Sk first ch st, sc in 2nd ch from hook. Sc in ea remaining st across. You should have 30 sts, not including ch skipped at beg of row.
Row 2: Ch 1, turn. Sc in BLO of same st and in BLO of ea st across. You should have 30 sts, not including beg ch-sp.
Repeat row 2 until you have a total of 65 (78, 91, 104, 117) rows. Tie off, leaving a tail at least 12″ long. See blocking and seaming instructions below to finish the boot cuffs.
Easiest Boot Cuff (with Picot Edging)

Yarn: You’ll need 136 (163, 190, 217, 245) yards of #3 Light / DK Weight yarn for this project. I used Ice Yarns Cotton Bamboo Light in “Dark Cream”, 60% Bamboo / 40% Cotton, #3 Light / DK Weight, 100g / 153 yds per skein, 1 (2, 2, 2, 2) skeins. This yarn is a little thicker than some DK weight yarns. I think it’s more like a light worsted weight yarn.
Hook: I used a size H / US Size 8 / 5mm hook. Choose a hook size that helps you match the gauge required for this pattern.
Gauge: 24 sc stitches = 5″; 20 BLO sc rows = 4″, measured with the fabric unstretched
Finished Height: 5.5″
Instructions:
With H / US Size 8 / 5mm hook, ch 25.
Row 1: Sk first ch st, sc in 2nd ch from hook. Sc in ea remaining st across. You should have 24 sts, not including skipped ch at beg of row.
Row 2: Ch 3, turn. Sk 2 ch sts, sl st in 3rd ch from hook. Sc in BLO of first sc st from row below. Sc in BLO of ea remaining st across. You should have a picot at beg of row, and 24 sc sts.
Row 3: Ch 1, turn. Sc in BLO of same st and in BLO of nxt 23 sts across. You should have 24 sts, not including beg ch-sp.
Repeat Rows 2-3 until you have a total of 50 (60, 70, 80, 90) rows, ending with row 2. Tie off, leaving a tail at least 12″ long. See blocking and seaming instructions below to finish the boot cuffs.
To Block: (video tutorial here)
For natural fibers, pin project out on foam blocking mats. Spray with water until fully saturated, allow to dry.
OR
For acrylic fibers, pin project out on an ironing board or several layers of towels. Hold a steaming iron 2-3” over the surface of the fabric, making sure all of the fabric is penetrated by the steam. Allow to cool/dry.
Seaming:
For each boot cuff, lay your piece out flat so that the rows are running vertically. Thread the long yarn tail through your yarn needle. Bring the two short ends of the rectangle together. Starting where your yarn tail is attached to the work, whip stitch the foundation edge of the piece to the last row. When you reach the end of the seam, take one more stitch through the edge of the fabric, wrap the seaming yarn around the needle, and pull the needle through to make a knot. Weave in all yarn tails.
Enjoy your finished boot cuffs!
This pattern is intended for your personal use only. You may not share it, copy it, sell it, give it away, or mass-produce the finished product. However, you may sell the finished items on a small scale, as long as you convey in your item description that you used a Yay For Yarn pattern.
Yay For Yarn Copyright© 2023 – Current. All patterns and photos are owned by Yay For Yarn.
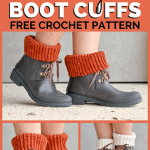
Pin the image below to save this pattern for later!

")


0 Comments