
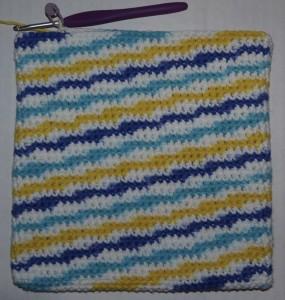
This easy-to-make crochet potholder is double thick to protect your hands, counters, and table. A pretty, yet practical gift that will last for years.
Table of Contents
Potholders are one of my favorite projects to give as gifts. They’re quick and easy, and super practical for anyone who likes to cook and bake.
Traditional double-thick potholders are usually worked on the diagonal, but mine is worked straight. My version is also larger, because I like to use them as trivets for protecting my counters and table from hot pots, pans, and baking dishes.
Cotton yarn is a must for making potholders, because it is insulating and machine washable. Unlike some types of yarns, cotton will not melt when in contact with heat.
Double Thick Crochet Potholder / Hot Pad
Skill Level: Advanced Beginner
Abbreviations:
st: stitch
beg: beginning
sts: stitches
ea: each
nxt: next
sl st: slip stitch
sp: space
sk: skip
ch: chain stitch
sc: single crochet
Supplies:
US Size G (4.0 mm or 4.25 mm) crochet hook ( I like this one )
About 165 yds of #4 worsted weight cotton yarn
Yarn Needle or Blunt Tapestry Needle
Scissors
Ruler (for measuring gauge)
Stitch marker (I prefer the Locking Type)
Shop Supplies for this Project
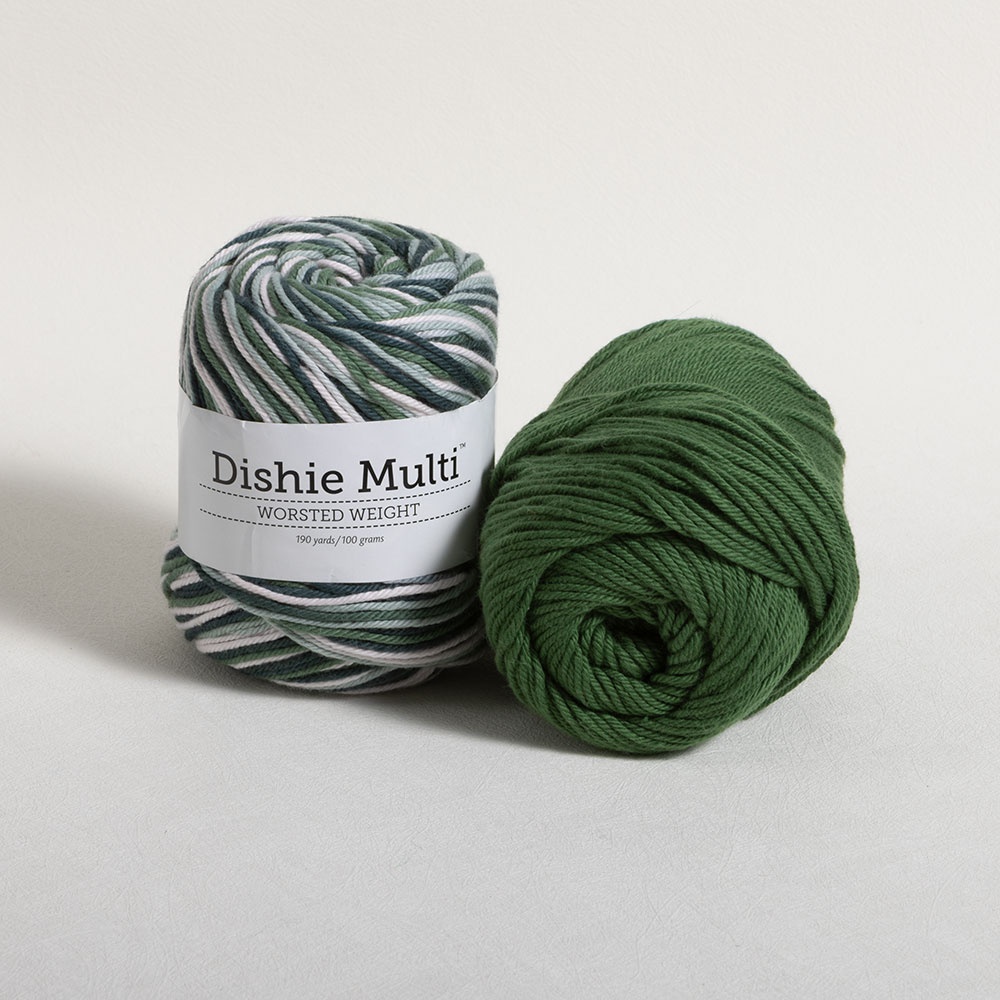
Dishie Cotton Yarn – Crochet.com
Buy Now →
Sugar ‘n’ Cream Cotton Yarn 2oz Skeins – Amazon
Buy Now →
Sugar ‘n’ Cream Cotton Yarn Cones – Amazon
Buy Now →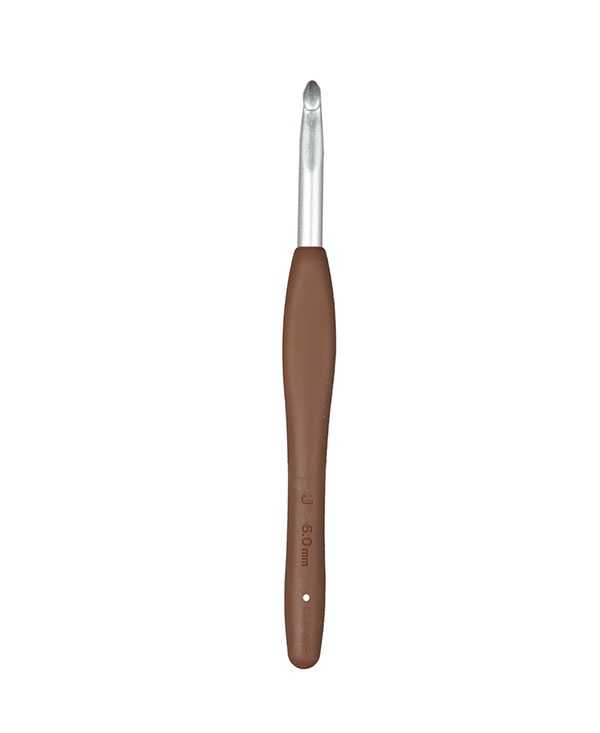 Buy Now →
Chibi Metal Yarn Needles – Amazon
Buy Now →
Knitter’s Pride Rainbow Folding Scissors
Buy Now →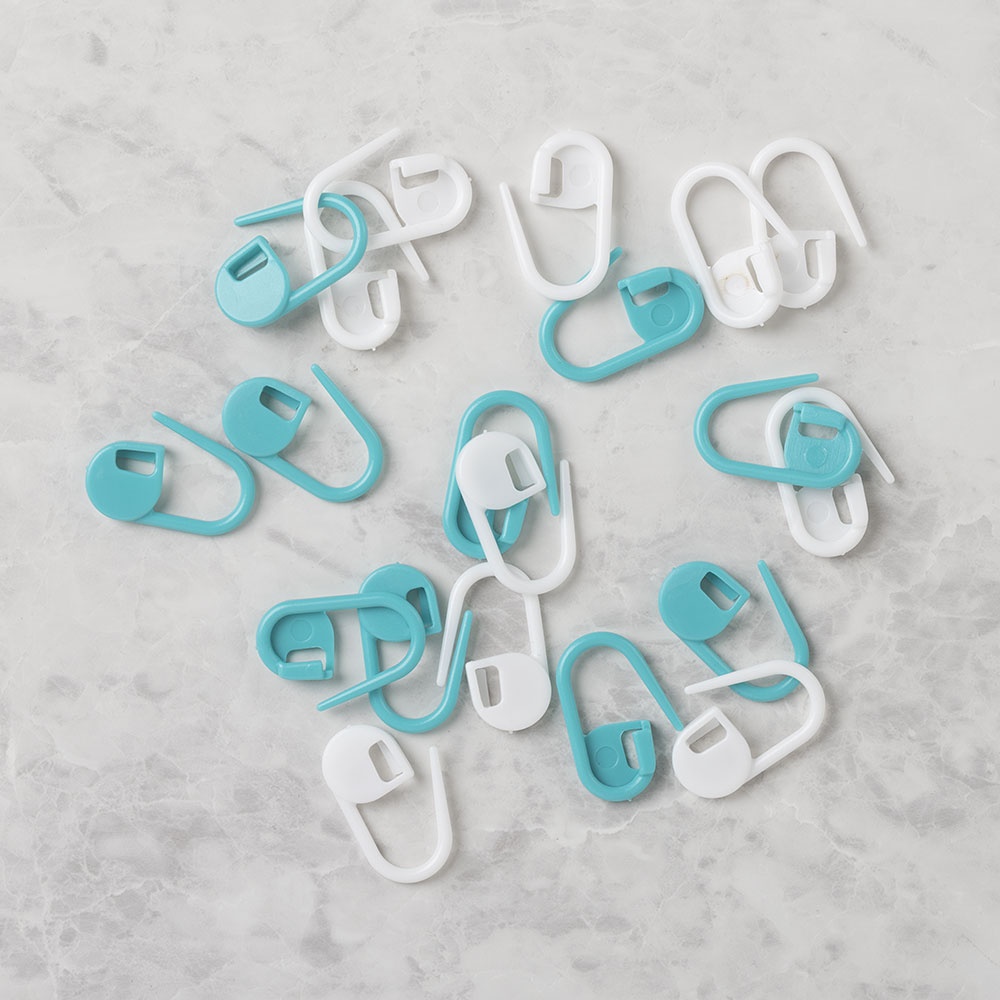
WeCrochet Locking Stitch Markers
Buy Now →
Gauge: 18 sc sts = 4″ (10.16 cm) and 19 sc rows = 4″ (10.16 cm). You may need to go up or down a hook size to get the correct gauge. Correct gauge is not crucial to this pattern, but it may affect your yardage.
The finished potholder measures 8″ by 8″ (20.32 cm by 20.32 cm)
Double Thick Crochet Potholder / Hot Pad Instructions
The Pattern:
With G hook and worsted weight cotton yarn, ch 35.
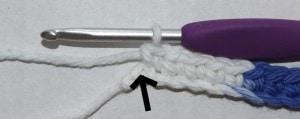
Round 1: sk 1st ch, sc in 2nd ch from hook. Sc in nxt 32 chs. 4 sc in last ch (see arrow in photo below).
Working on opposite side of ch, sc in nxt 32 chs.
Tip: crochet over your tail to avoid weaving it in later.

2 sc in last ch. Place st marker in current loop on hook. You should have 72 sts, including the ch skipped at beg of round.
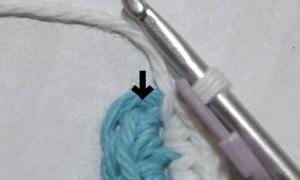
Round 2: Sc in the ch that was skipped at beg of round below (see arrow in photo below).

Sc in nxt 71 sts around. Move marker to current loop on hook. You should have 72 sts.


Round 3-38: Sc in nxt 72 sts around. Move marker to current loop on hook. You should have 72 sts.

The stitch marker will be offset a little.
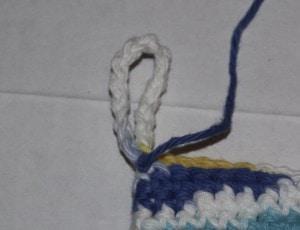
Sc in nxt 6 sts, sl st in nxt st. Ch 14, sl st in same st. Tie off, leave at least a 24″ (61 cm) tail.
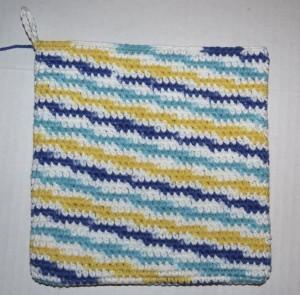
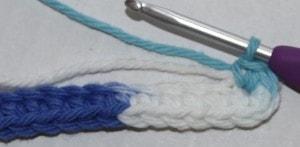
Decide whether you would like the right side or the wrong side to show on the outside of the potholder. I chose to make the wrong side face out, but here is what my potholder would look like with the right side out.
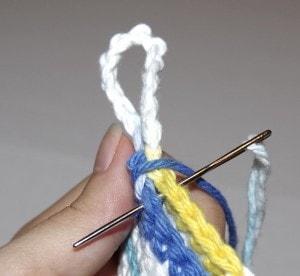
Thread your tail through the eye of your yarn needle. Whip stitch the opening at the top edge of the potholder closed.

Tie off, weave in ends. Block lightly if desired.

What’s your favorite type of crochet potholder?
")


I love how yours look with your variegated yarn. Can you share what type of yarn you used? Thanks
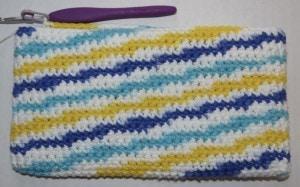
Hi Colleen! I believe these are the yarns I used… from left to right (on the main photo for the pattern), Sugar ‘n’ Cream Ombres in “Emerald Isle”, Bernat Handicrafter Cotton Ombres in “Sunkissed Ombre”, and Sugar ‘n’ Cream Ombres in “Summer Prints”. I hope this helps!
I make these using either 40 chain stitches to begin or 44 chain stitches for a larger pot holder. I use the larger to set hot dishes or pots on. My directions are as follows: Use4 and H or 8 needle and acrylic yarn. (I find it helpful to mark the beginning chain stitch before starting the first row). 40 stitches require about 18 rows and 44 chain requires about 21 rows.
Chain 40 stitches. ( put a stitch marker in the beginning chain stitch; This will be the end of the row when you start with the single crochets), this is your foundation .
Row 1 Do a single crochet in the back loop of the 2nd chain stitch from the needle, and continue until you reach the last chain stitch with the stitch marker . Do 2 single crochets in the last stitch. Work a single crochet in the back of the loop (where you just did two stitches in one) and continue to do a Single crochet in each back loop of the foundation chain.
Row 2 thru 6 continue with single crochet thru row 6 until you reach the beginning stitch. At this point you can change the color to create stripes in the finished potholder or continue thru row 18 with a single color. The potholder will begin to look like a long pouch.
To form a square, fold the corners in and the side should then touch. Crochet 20 single crochets past the end for the 40 chain start and 22 single crochets on the 44 chain start (half of the original chain count). At this you can forma loop for hanging, if you so desire, by chaining 10 stitches in the last single crochet you made and connect it to the next back loop. Measure enough thread for 3 times the width of the potholder. Using your crochet hook or a yarn needle, work this long thread thru the matched up loops to stitch the sides together. At the end, I work the remaining thread thru the seam you just made and clip off the remainder of the thread when you reach the other side. Use your crochet hook to pull the thread tail, left at the end of the foundation row, to th einside of your potholder.
I hope this is clear enough to follow. I takes me approximately 3 hours to complete one potholder
Is it possible to make it smaller like a 6×6?
Yes. Just start with a chain slightly over 6″ long, and follow the tutorial until you have worked about 6′ of rounds. I hope this helps!
I love this pattern and have been making them like crazy. I wish I could show you. The only change I had made to the pattern is 2-38 I have put the stitches in the back loop of the stitch. It gives it a nice and pretty ribbed effect. I love it. Thank you for the awesome pattern.
Hello, I’m on row 5 and my potholder measures 9” across. 18 stitches measures 4”. What am I doing wrong? I’m using a ‘f’ hook. Please advise. Thank you.
Hi Lisa! If you’re getting the correct gauge with the hook size you’re using, have you tried checking to see if you have the correct number of stitches in your round? If a few extra stitches were accidentally added on the first round, where you increase stitches into the ends of the chain, that could cause the potholder to be a bit larger, even if you have the correct gauge. I hope this helps!
Do you need to use the stitch marker or can you just keep going around and around til you get the size you want?
Hi Amy. Yes, you could do it without the stitch marker, and just keep working rounds until it is long enough. You’ll want to make sure you end your last round at the side edge of the potholder. I hope this helps!
thanks for pattern could you email how to make bigger otherwise I do know how to crochet great video thanks
Hi Pat. If you want to make the potholder larger, you can just make a longer chain before beginning round 1. To make the potholder longer, you would just repeat round 3 until it is the length that you want. I hope this helps!
Is it possible to get the printed pattern for the double sided potholder please. Or the place I can download it from please?
Hi Elizabeth! Unfortunately, I do not currently have a printable version of this pattern available. Sorry I couldn’t be of more help!
Where is the printable pattern for this potholder?
Hi Linda! I am working on getting the printable version ready to publish, but it is not quite finished yet. I can let you know when it is ready if you like. Thanks!
Been crocheting these potholders like crazy in cotton yarn! I also make a mini version (15 chains) crocheted with 2″ wide strips of bridal tulle for scrubbies… soooo cute! Some of the scrubbies, I start out with cotton then add a couple of rounds n tulle then finish up with the cotton. LOVE the potholders, scrubbies and this pattern!
We could use the small addi… Rectangle tube (? rows), Kitchener one end, fold, Kitchener remaining edge. Depending on tension, the end result should be a 2″ to 3″ square.
The same concept could be used for the big Addi and make super large platter size hotpads or even small pillows.
Love your tutorials, both written and video because they are always extremely well thought out and impeccably executed!
Thanks so much, Kay! I’m so glad you are enjoying the pattern! I haven’t tried crocheting with tulle before, but I might have to try that sometime. 🙂
This is an awesome pattern! Thank you 🙂 Just the right size for those of us with larger hands.
Thank you! I am so glad you enjoyed the pattern!
I have to tell you how much I LOVE this pattern. I ran out of yarn so I ended up making it a short rectange but it’s GREAT like that too!
I used a seed stitch to amuse myself and add extra funk. The options are really endless with this. I’m so thankful you shared it! Doing it in the round makes it so much less tedious than making two and sewing together.
LOVE IT! 🙂
Thanks! I am so glad you like it!
I like all of them. I have one thing to for you to note. You should notate in your directions for those of us that have never done a double sided potholder in this way before, that the ends are supposed to curl up as you go around them. I wasn’t sure if I was doing it right at first because of the curling up. I thought maybe it was printed wrong! So maybe you could add a notation that they are supposed to curl up so everyone knows. I am used to double sided potholders done in two separate pieces and then crocheted together. I would put the notation somewhere in round 2 so people know what to expect. Thanks for this pattern. I figured it out eventually.
Also, I don’t really feel the need to put a marker for every round. Takes too much time. If you just continue crocheting in the round until potholder measures approximately 8×8 it comes out the same. Once you establish 72 stitches you will always have 72 stitches as long as no increase or decrease is made right? Just sayin.
And one last thing, these are huge potholders. For anyone wanting a potholder to fit a ladies hand, I would suggest making it in a rectangle shape. (stop at row 28-30) Otherwise if you are giving it to a man than it would be a nice size. Excess potholder would tend to get more food on it if you know what I mean. I also didnt fasten off when I came to the last stitch, I just turned and closed it with a row of single crochet, then chained 8 and sc back down the ch8 connected with a ss to form a loop.
Yes, these are large potholders. I like to put them under large baking dishes or pans to protect my countertops and tables. I also like the extra protection from burning my hands. 🙂 Because these potholders are cotton, I just throw them in the washing machine if they get dirty. Thanks!
I love the ombre color on the top
Thank you Jackie! I like that one too. It is bright and cheery! 🙂