
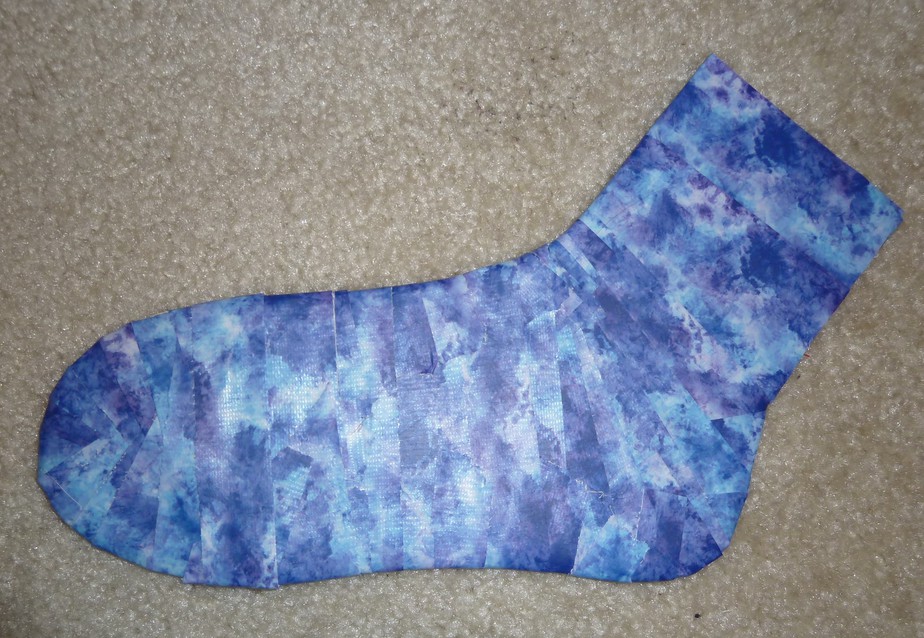
Here is an inexpensive way to make your own sock blockers! These are indispensable tools to the sock knitter or crocheter. Sock Blockers are used to fine-tune the shape of a handmade pair of socks.
You will need:
2 pieces of sturdy cardboard
1 roll of Duck Tape in your favorite print or color
A sock with a slightly loose, comfortable fit (can even be a store-bought sock)
Pins
A Pencil
A pair of heavy Craft Scissors
To make each sock blocking tool (you will need 2):
Place your cardboard on a soft surface that you can stick pins into (a folded towel works well). Lay your sock flat on top of the cardboard. Pin the sock to the cardboard by sticking the pins through the sock, the cardboard, and your soft surface.
Trace around the sock with your pencil and unpin the sock.
Use your heavy craft scissors to cut the shape out on the pencil line. Lay this cutout on top of your second piece of cardboard and trace around it. This ensures that both of your blockers match and avoids tracing the sock again. 🙂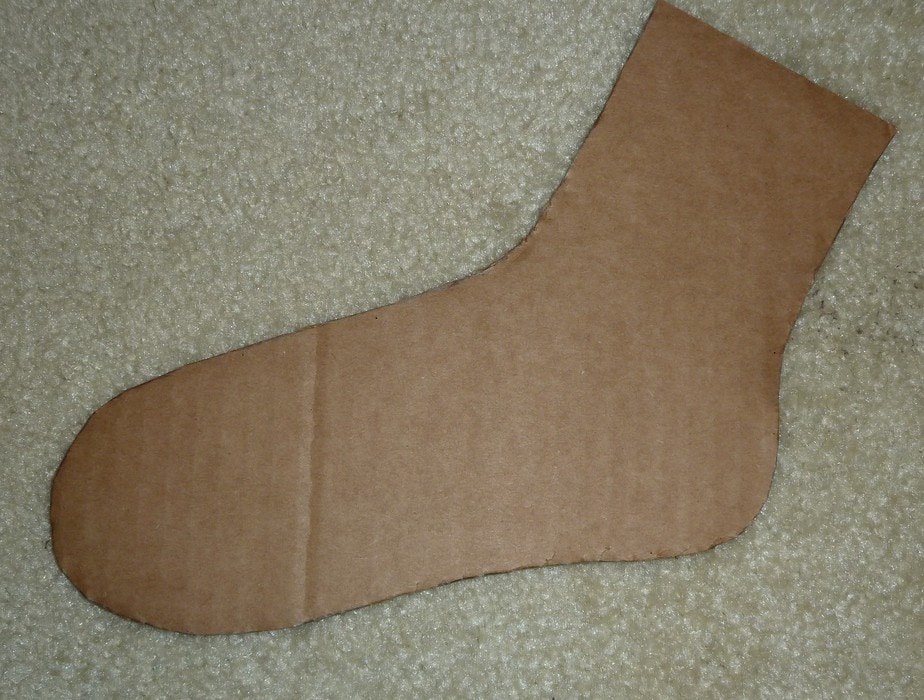
Now we must cover the cardboard sock cutout with Duck Tape. This strengthens the sock blocker and makes it waterproof. Beginning at the “leg” of the sock shape, wrap a few strips of Duck Tape around the cardboard. Each strip of tape should overlap the previous strip slightly, and the ends of each strip should overlap each other. I used two strips of tape around the “leg” of my sock shape, but you may need more or less depending on the length of the “leg” of your sock. Stop adding strips around the leg in this manner when you reach the beginning of the heel. 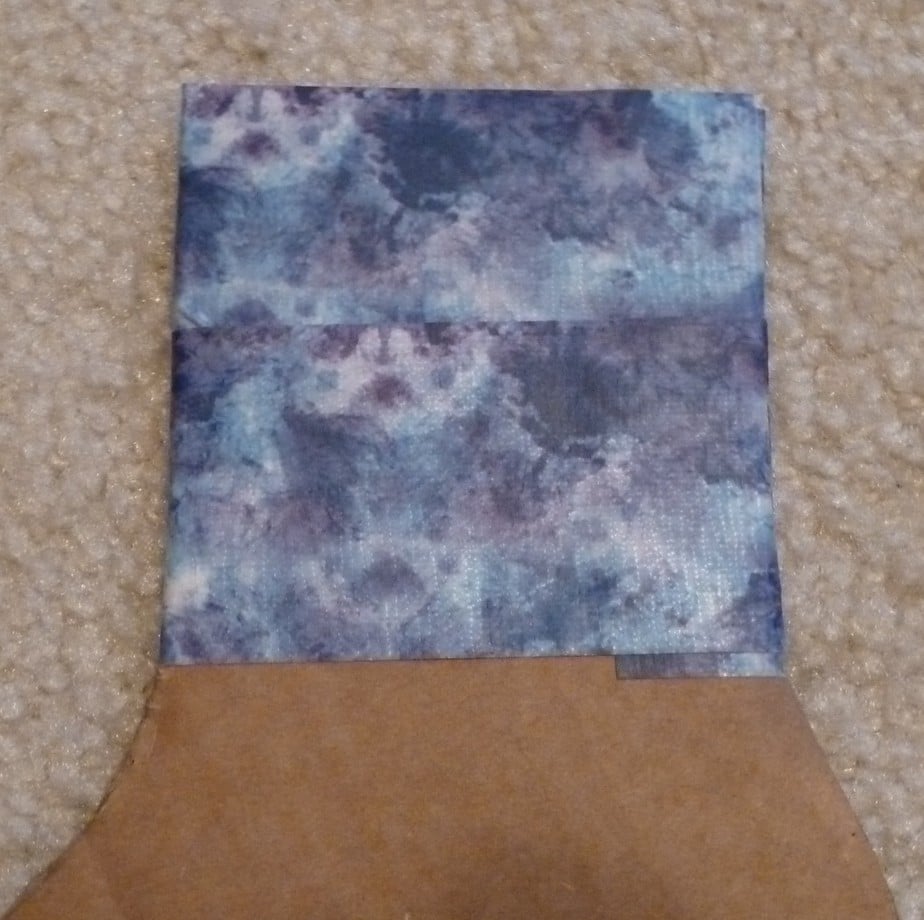
For the heel of our cutout, we must use narrower strips of tape to get the shape just right. Tear or cut a strip of tape that is longer than the heel is wide diagonally, as shown below. Tear or cut the strip in half lengthwise. Place one of the half-strips on your cardboard heel as shown. The end of the tape on the front of the ankle should overlap the previous strip more than the end on the heel.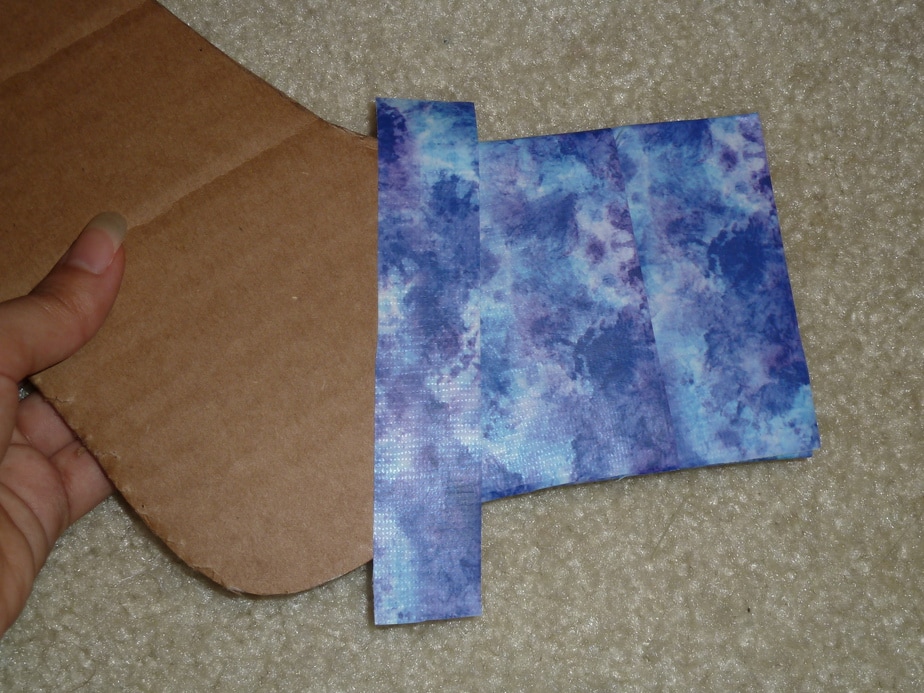
Fold the ends of the strip around the edge of the cardboard and to the other side. The ends should fold under diagonally.
Flip the blocker over and repeat with the other half-strip of tape. Continue covering the heel with tape in this manner until the heel is fully covered on both sides.
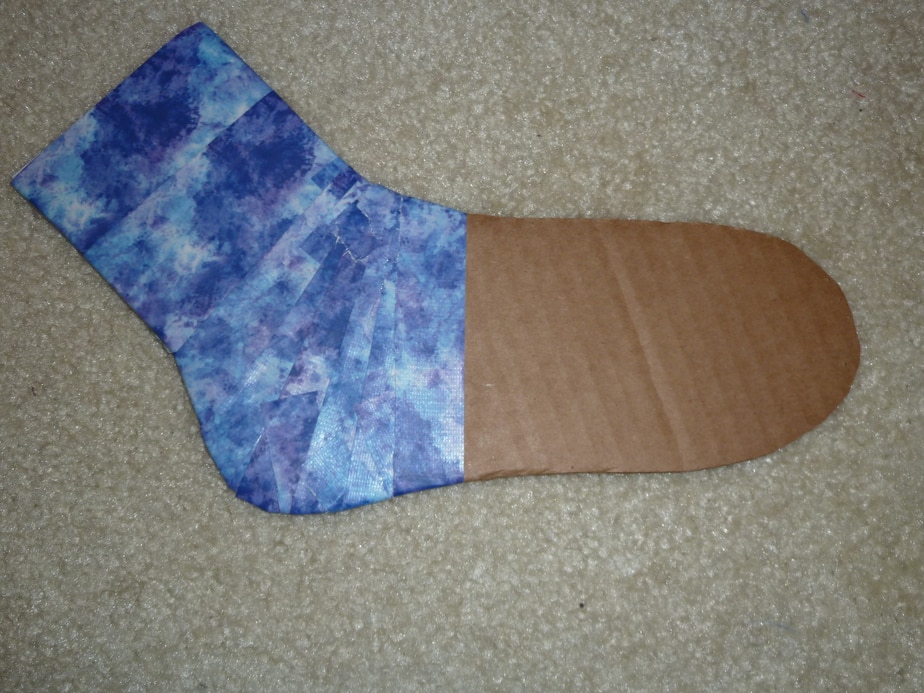
Cover the straight part of the foot with tape in the same manner as for the leg. I used half-strips for this step. Stop when you get to the toe area.
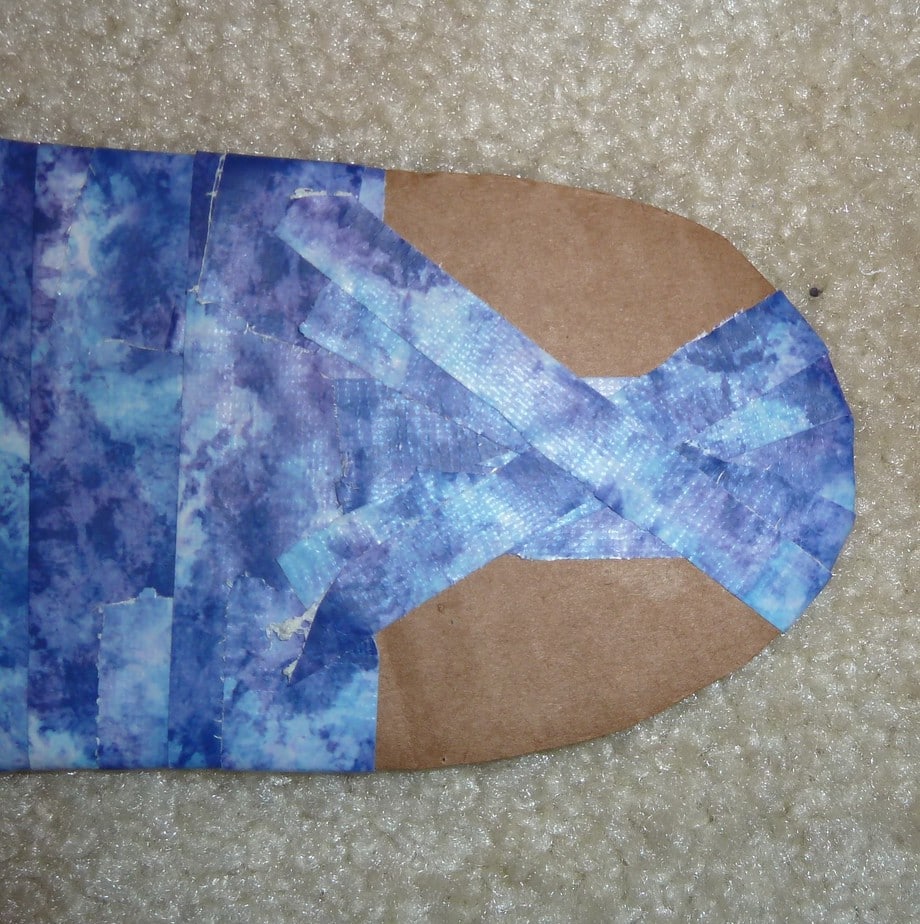
Now, place another half-strip of tape perpendicular to the previous strip. This strip should wrap around the end of the toe and overlap the previous strip at both ends. In other words, it should look like the photo below on both sides. 
For the toe, we will need quarter-strips. Tear each length of tape in four pieces lengthwise. First, center your strip on the edge of the cardboard, slightly overlapping the previous strip a little. Each end of the strip should overlap the previous vertical strip. Once you have placed your first diagonal toe strip, place another diagonal toe strip to create a mirror image of the first strip. You should have an X on the front and back sides of the toe. This step has been completed twice in the photo below.
Continue covering the toe as in the previous photo. Again, the cutout should look like the photos on both sides.
Finished toe is shown here.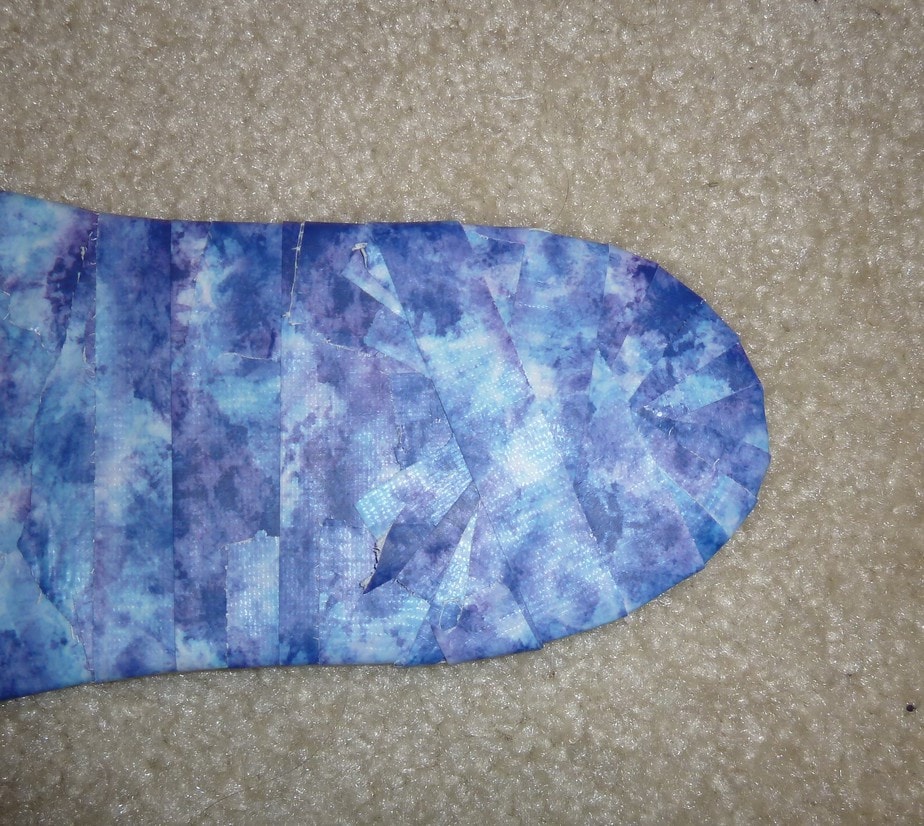
The final step is to seal the “cuff” (top edge of the leg) so it will be waterproof. Cut a piece of tape that is as long as the cuff is wide. Use the full width of the tape for this; do not tear it lengthwise. Lay this piece of tape down, sticky side up. Place the cuff edge of the cutout on top of the piece of tape so it covers about half of the width of the tape. 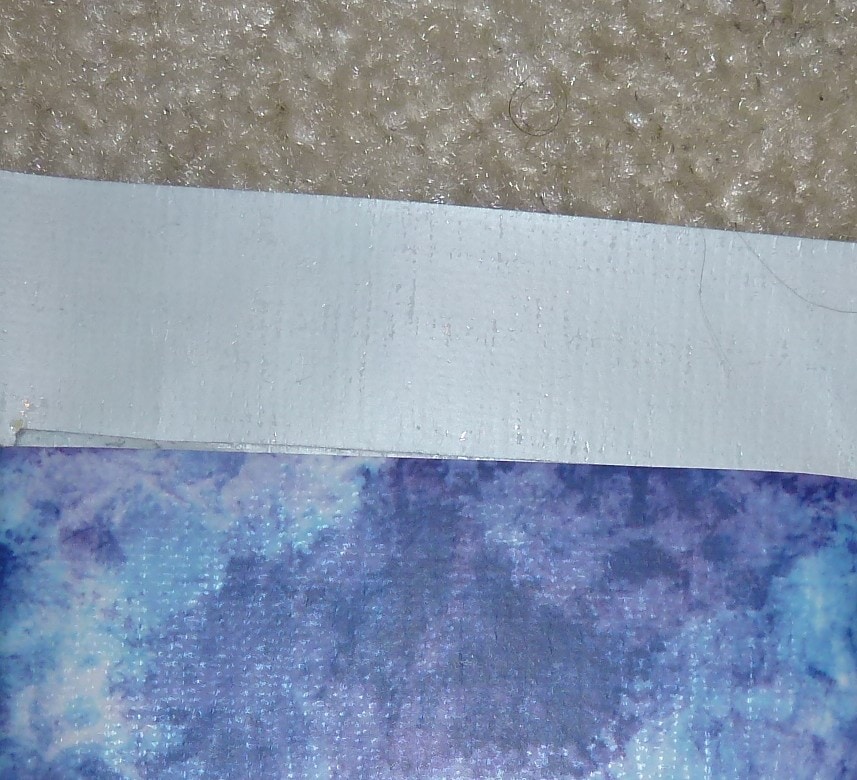
Fold the rest of the width of the tape to the other side. You will have encased the edge of the cardboard with tape.
All Finished! 🙂
Now, to block your handmade socks:
Insert your new Sock Blockers into the socks.
Spray your socks lightly with water on both sides and allow to dry,
OR
Hold a steaming iron 2-3″ above the socks. Do not let the iron touch the socks. Flip socks over and repeat.

I hope you enjoyed this tutorial. If you have any questions, please leave a comment below.
")


great idea for sure but a lot of tape work … would it be possible to make it out of a sheet of plastic, like say from the covers of an old spiral calendar book, would that be too thin or would it work?
Hi Barbara! Yes, you could cut it out of some kind of plastic. As long as the plastic isn’t too floppy so it would be able to hold its shape inside the sock, and as long as the cut edges are smooth, it should work just fine. If the cut edges aren’t smooth on their own, you could just put tape on the edges so it won’t snag the inside of your socks. You could also use quilter’s template plastic for this. It comes in sheets from craft stores that sell quilting fabric, and you can cut it to shape with scissors. The kind I have is heavy-duty, and while slightly flexible, is stiff enough to hold its shape. Template plastic would probably also need the edges taped to avoid snagging, but would work well. I hope this helps!