

This trick eliminates the hole in the center of your work when you crochet in the round from the center out. Perfect for hats, afghan squares, amigurumi, and more!
I love to crochet in the round, so I am always looking for any tips and tricks I can use to make my crochet in the round look neater and more professional.
Well, this is a pretty good one.
It’s commonly called the Magic Circle, Magic Loop, or Magic Ring. You know that little hole you get when you crochet in the round from the center out? This trick makes that hole disappear!
Normally, when we work in the round from the center out, we begin by making a short chain, and then slip stitching into the first chain to form a ring of chains. Then, all the stitches of the first round are worked into the center of that ring.
While that method works just fine, it does leave a hole in the center of the work. This can be a problem for amigurumi projects, as the stuffing of the amigurumi toys can leak out through the hole.

So instead, we use the Magic Circle method.
This method allows you to cinch that hole closed, leaving a hole so small, you can barely see it. It gives a very neat, tidy look to the center of the project. The Magic Circle can be used whether you are working in individual rounds or a continuous spiral.

So grab your hook and some yarn, and let’s make a Magic Circle!
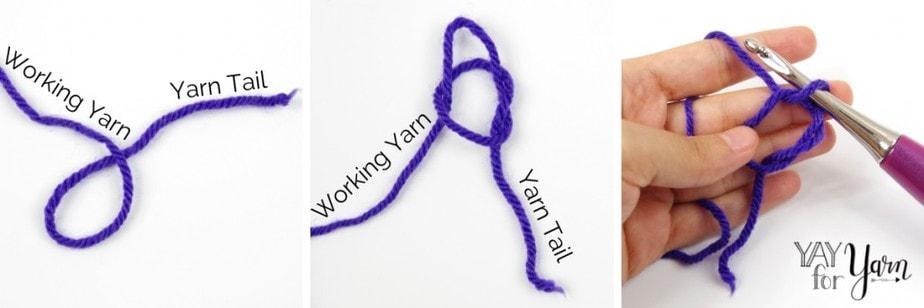
First, make a loop in the yarn, about 6 inches away from the end of the yarn tail. The working yarn that is coming from the skein should be laying over top of the yarn tail. Now, bring a loop of the working yarn through the first loop you already made. This is just like making a slip knot, but we are not tightening it. Place the new loop onto your hook.
Now, we can begin crocheting. If you are using a starting chain to begin, work however many chains are specified in your pattern for the starting chain. (Even patterns that work in a continuous spiral generally begin with at least a chain-1 starting chain.) 
Or, you can begin with my favorite, a chainless starting stitch. These stitches perform the function of a starting chain, but look just like a regular stitch. If you have not tried the chainless starting stitches before, see my tutorial here. By using a chainless starting stitch with the invisible slip stitch, you can work in the individual rounds with a completely invisible seam. Anyway, to use a chainless starting stitch with the Magic Circle, you’ll need to chain 1 and pull the chain stitch tight. Then, you can work the chainless starting stitch of your choice into the center of the Magic Circle. 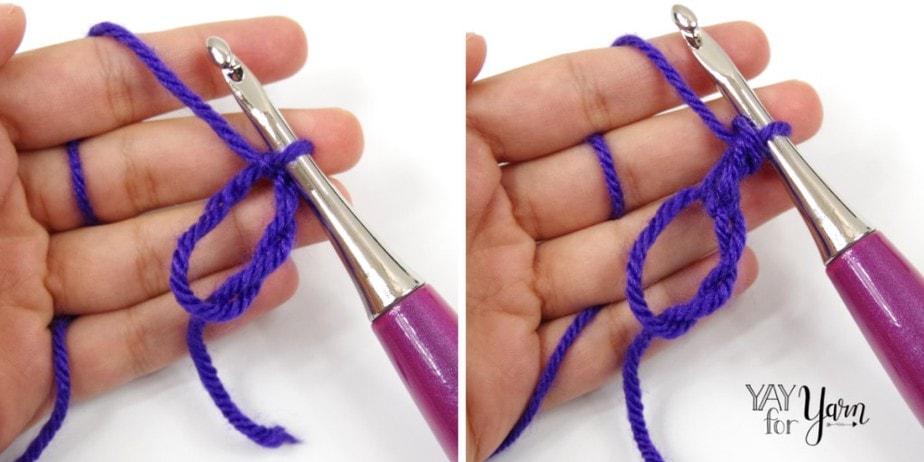
Now, work all the remaining stitches for your first round into the center of the Magic Circle. You are essentially working around the strand of yarn that makes the circle.
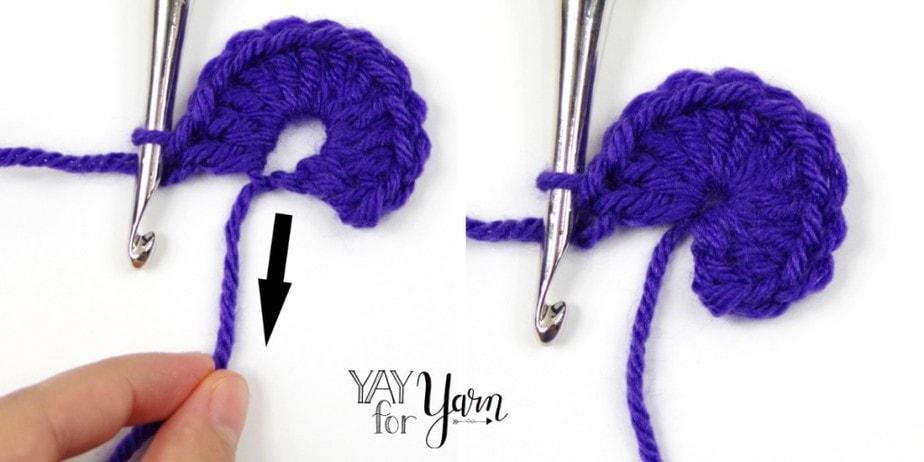
The next step is to cinch the circle closed. To do this, pull on the yarn tail until the hole closes up. You want to pull it as tight as you can.
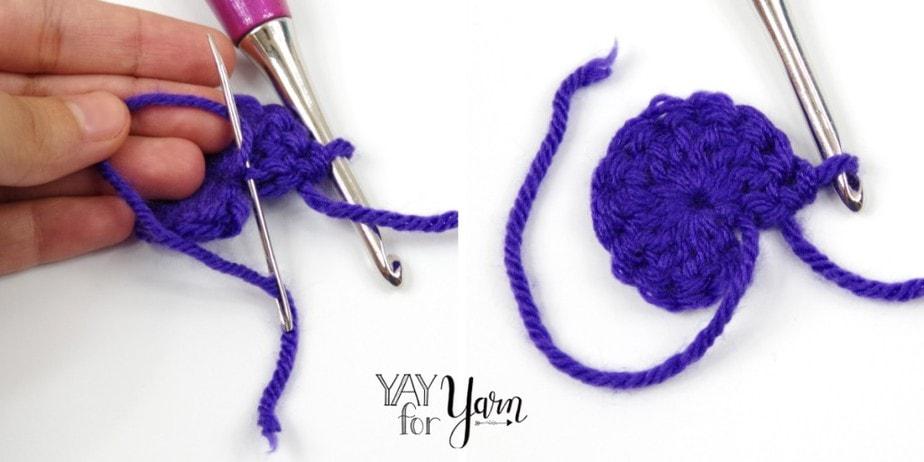
Finally, we need to secure the yarn tail so the circle will not loosen. Thread the yarn tail through the eye of your yarn needle. With the yarn needle, pick up a strand of yarn on the back of the work close to the center of the circle. Wrap the tail yarn around the needle, and pull the needle through to make a knot. You can weave in the tail now, or wait until your project is finished.
So, what do you think? Will you use the Magic Circle in your next project?
Pin the image below to save this tutorial for later!

")


Thank you, thank you, thank you! Been so discouraged trying to decipher videos and photos in learning the Magic Circle. Your simple comparison to an untightened slip into was the missing link for me!
You’re welcome! I’m so glad the tutorial was helpful to you!