

Is your crochet a wonky shape? Does it get wider or narrower as you go? Learn to properly count your stitches and fix that problem NOW!
Have you ever tried to crochet a simple rectangle, and had it come out looking like this?
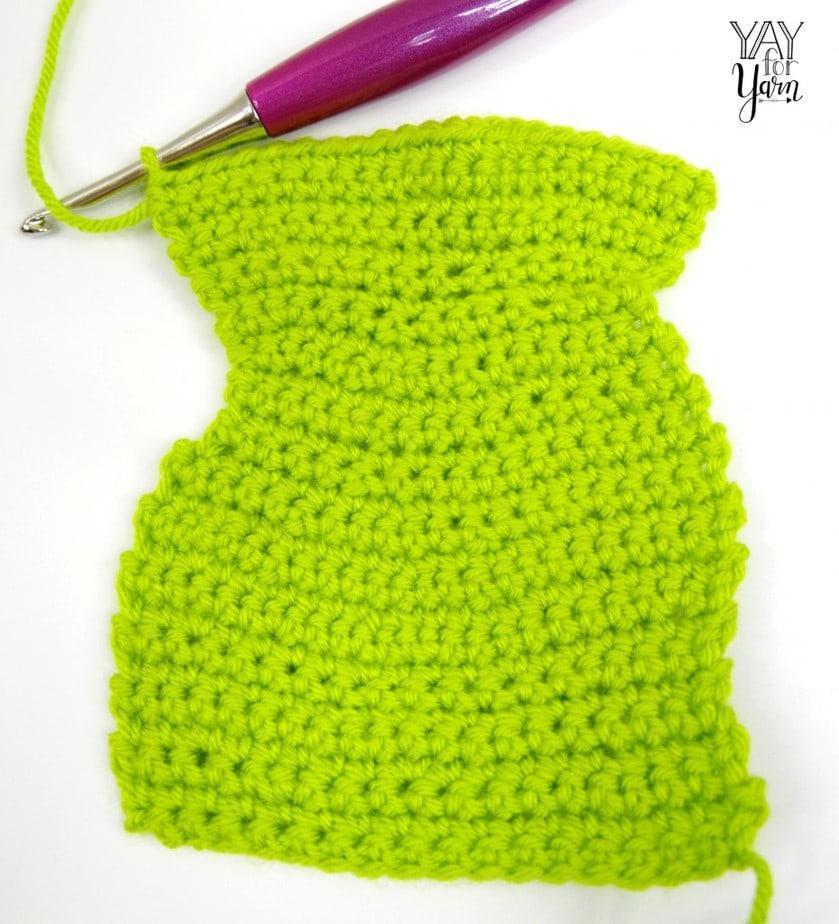
Well, you’re not alone.
This happens to beginner crocheters all. the. time. In fact, this was one of my biggest struggles when I first learned to crochet. No matter what type of project I tried to make, I never could seem to make a straight piece. My projects were almost always wider or narrower at the top than at the bottom.
Does this sound familiar? It’s a common problem among beginners, and it’s caused by unintentionally adding or skipping stitches.
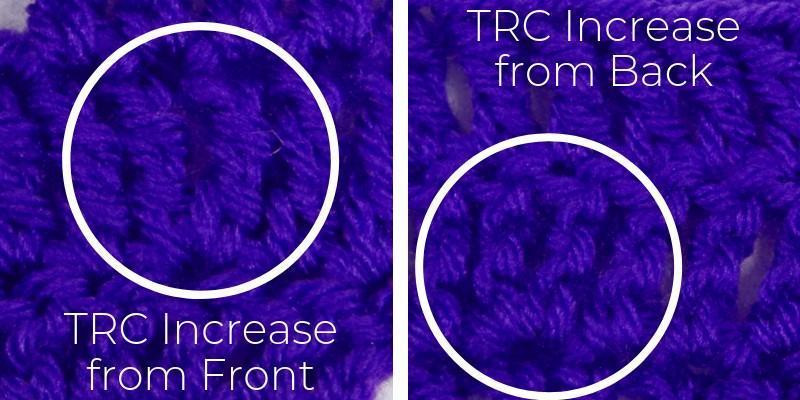
Sometimes, we add stitches to a row by working more than one stitch into a single stitch from the previous row. This is called an increase. It makes the fabric wider by adding stitches to the row. If your crochet keeps getting wider, you may be increasing stitches without realizing it. Here’s what an increase looks like in several types of crocheted fabric; single crochet, half-double crochet, double crochet, and treble crochet:


We can also subtract stitches from a row to make the fabric narrower. This is called a decrease. Normally, we make a decrease with a decrease stitch, which works two or more stitches together into one. However, it can also be done by just skipping a stitch. If your crochet keeps getting narrower, you may be skipping stitches without realizing it. Here’s what a decrease looks like in several types of crocheted fabric; single crochet, half-double crochet, double crochet, and treble crochet:


So, why is this problem so common? Well, it’s probably not taught to new crocheters enough. In my personal opinion, I think it is most common among self-taught crocheters. Don’t get me wrong, I think it’s great to teach yourself to crochet. After all, that’s how I learned most of my crochet skills. However, as essential as it is to learn to count stitches, the “teach yourself to crochet” books always seem to overlook that aspect. I have yet to see one that actually explained how to count stitches and “troubleshoot” your crochet.
So, how do you fix it? By learning to properly count your stitches.
Counting the stitches in the row each time you finish a row will show you if you accidentally skipped or added a stitch somewhere. Most well-written crochet patterns will give a stitch count (number of stitches you should have) for each row or round.
Keep in mind, though…
Some people choose to count the turning chain as a stitch, and some people do not. Neither way is “wrong”, but designers don’t always specify whether they are counting the turning chain as a stitch or not. So be sure to look for that info in your pattern. (If the pattern does not specify, I would suggest choosing another pattern that does give stitch counts before moving on to patterns that do not.)
If the pattern does not count the turning chain as a stitch, you’ll need to work the first stitch of the row into the same stitch the turning chain is coming from. On the following row, you will not work into the top of the turning chain from the previous row.
If the pattern does count the turning chain as a stitch, you’ll need to work the first stitch of the row into the next stitch (the stitch after the one the turning chain is coming from). On the following row, you will work into the top of the turning chain from the previous row.
(This also applies to working in the round if rounds begin with a turning chain.)
I prefer to eliminate the turning chain altogether by replacing it with a Chainless Starting Stitch.
Watch the video below for a full demonstration on how to count your stitches:
If you’re struggling with keeping crochet pieces from getting distorted or changing shape, I highly recommend that you count your stitches. For best results, you should count your stitches after every row or round. It’s better to take the time to count your stitches for each row than to count every once in awhile. It isn’t fun to realize you’ve made a mistake 10 rows back and have to rip out all that work to fix it. ????
Have you ever had a problem with your stitch counts?
")


I just need to say THANK YOU! I have read your directions (which I am best at rather than videos) AND watched your videos and you explain everything thoroughly and I so appreciate it. I am self taught from a pamphlet ages ago and not even a mention of counting stitches and surprisingly I had no problem making blankets. However, now making amigurumi (first one a lovey) I had been becoming frustrated with the stitch count and your video helped. You do talk fast though I am thankful I can slow the video down and put captions on.
Just a thank you for doing stitch count. Not many bloggers even emphasize what to include still! <3
You’re welcome! Glad it was helpful.
Thank you for this basic information. You explained it well and I have made these mistakes many times. Now I hope to count my stitches and view my stitches correctly. So your lesson is welcomed. Thank you!
Claudia Duffee
I’m trying to make a baby blanket but I’ve frogged it twice so far. The reason is that the chain stitch at the beginning is a stitch so my rows are one over every single row. What am I doing wrong?
Hi Carole. If your chain at the beginning of the row is counted as a stitch, then you’ll also need to work a stitch into the chain from the row below at the end of each row. Does that make sense? In other words, if the chain counts as a stitch in your stitch count, then you need to treat it like a regular stitch in the row and work a stitch into the top of it. If you’re still stuck, feel free to send me a photo of your piece at blogger[at]yayforyarn.com, and I’ll be happy to help you troubleshoot. I hope this helps!
Thanks so much for this! I keep confusing my stitch counts and I spend time recounting every row.
Thank you very much for your help because I am a self taught crocheter.