

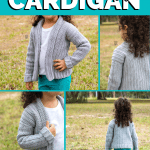
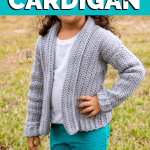
Even beginners can crochet this simple children’s cardigan! Learn how to crochet a sweater for kids with this free pattern & video tutorial.
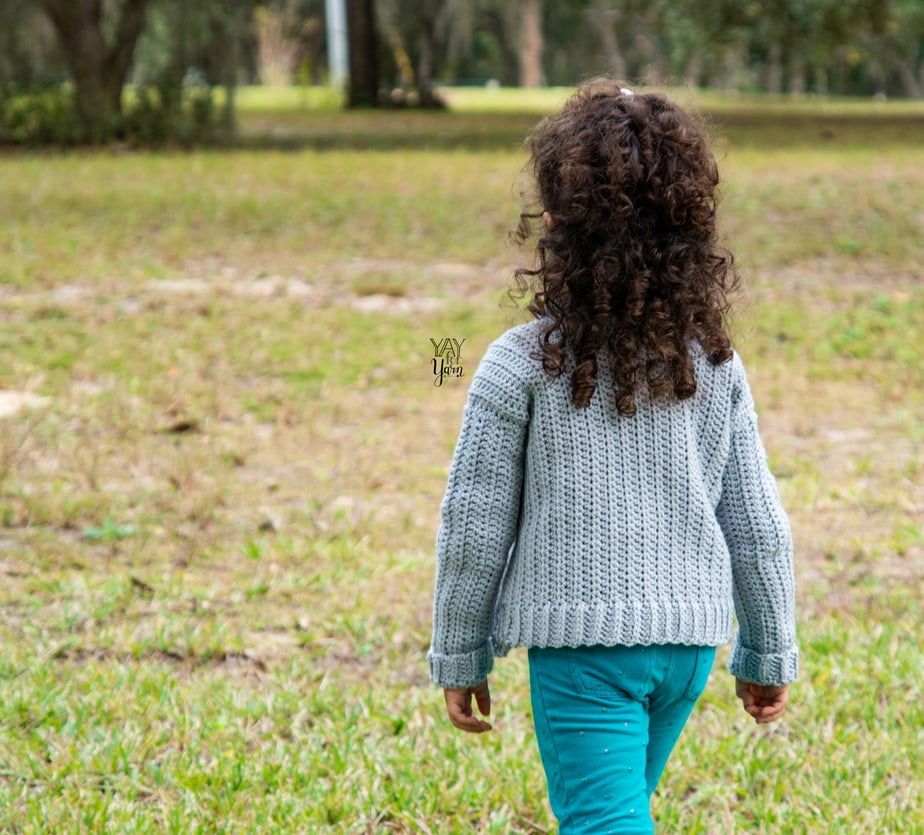
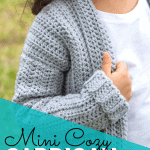
Every little girl needs a soft, cozy sweater to go with all her fall and winter outfits. This pattern is a child-sized version of the Comfy Cozy Cardigan, my most popular crochet sweater pattern for women.
The Mini Cozy Cardigan features simple construction, with very little shaping. The cardigan is made in just three pieces. Each piece is a slightly modified rectangle. Once the pieces are finished, we will sew them together and add a wide edging around the neck edge, which can fold back like a collar.
Table of Contents

How to Choose the Best Yarn for a Children’s Crochet Cardigan
This kids cardigan crochet pattern calls for #4 Medium / Worsted Weight yarn. I prefer to use a washable yarn for any projects intended for children. For the Mini Cozy Cardigan, I chose to use Yarn Bee Soft & Sleek, a smooth, washable, low-pill acrylic yarn.
When selecting the yarn you want to use for this pattern, make sure the yarn label says it is #4 Worsted Weight. Then, purchase enough skeins of the yarn you want to use so that you have at least the total number of yards required in the pattern for the size you are making.

How do I Choose a Size?
The Mini Cozy Cardigan crochet pattern includes instructions for 8 sizes, from children’s size 2 to 16. To decide which size you need to make, you’ll need to measure around the chest. Then, follow the instructions in the “Sizing” section of the pattern to select the size according to the child’s measurement.
Please note that the cardigan length will fall differently on individuals of different heights. To see how long the cardigan will fall, measure the back length measurement against the wearer.
Can I crochet this if I am a beginner?
This kids cardigan crochet pattern uses simple construction, with a few special stitches. If you’re comfortable with simple crochet techniques, and familiar with reading a written pattern, you can make this project. Plus, there’s a full video tutorial for this project, which will walk you through the written instructions and help you follow along.
Ready to get started? Let’s crochet the Mini Cozy Cardigan!
Mini Cozy Cardigan Crochet Pattern
by Yay For Yarn
Project Level: Basic
Sizing:
– Sizing follows the Craft Yarn Council’s standards for Children’s and Youth sizes.
– This sweater fits oversized, with about 4” of positive ease. If child is between sizes, size up if you want a slouchy-fit sweater, or size down if you want a more fitted sweater.
– Instructions and yarn requirements for size 2 are given outside the parentheses, with 4, 6, 8, 10, 12, 14, and 16 given inside the parentheses, like this:
2 (4, 6, 8, 10, 12, 14, 16)
– When only one number is given, it applies to all sizes.
To Fit Chest:
21 (23, 25, 26.5, 28, 30, 31.5, 32.5)” / 53 (58.5, 63.5, 67, 71, 76, 80, 82.5) cm
Finished Chest Measurement of Cardigan:
25 (26.5, 28, 29.5, 31, 33, 34.5, 36)” / 63.5 (67, 71, 75, 79, 84, 87.5, 91.5) cm
Back Length:
11.75 (12.5, 13.75, 16.75, 18, 19.25, 20.75, 21)” / 30 (32, 35, 42.5, 45.5, 49, 52.5, 53) cm
Please Note: Cardigan length will fall differently on individuals of different heights. To see how long the cardigan will fall, measure the back length measurement against the wearer.
You Will Need:
Approx. 400 (450, 525, 678, 762, 764, 968, 1022) yards #4 Worsted Weight yarn (I used Yarn Bee Soft & Sleek Low-Pill in Silver Grey, 100% Acrylic, 5oz / 142g, 232 yds / 213m per skein, 2 (2, 3, 3, 4, 4, 5, 5) skeins)
US Size I (5.5 mm) crochet hook
Scissors (Shop the scissors I used here)
Measuring Tape (Shop the measuring tape I used here)
Yarn Needle or Blunt Tapestry Needle
2 Stitch Markers or Safety Pins
Gauge:
11 stitches = 3” (7.6 cm), 5 rows = 2” (5 cm) in half-double crochet

Abbreviations:
beg: beginning
ea: each
nxt: next
st(s): stitch(es)
sp: space
sk: skip
ch: chain
dc: double crochet
hdc: half-double crochet
*Fhdc: foundation half-double crochet
*Rhdc: ribbing half-double crochet
*Dc3tog: double crochet 3 stitches together
*This is a special stitch. See instructions below to learn how to work this stitch.
Special Stitches
Foundation Half-Double Crochet (video tutorial here)
To begin, chain 2. Yarn over, insert hook into the 2nd chain from the hook. Yarn over, pull up a loop. Yarn over, pull through one loop on hook. Yarn over, pull through all 3 remaining loops on hook.
For all following stitches: Turn work upside-down so the bottom (foundation) edge is facing you. On the bottom of the previous stitch, there is what looks like the top of a normal crochet stitch. Yarn over and insert hook into both strands of that “stitch”. Yarn over, pull up a loop. Yarn over, pull through one loop on hook. Yarn over, pull through all 3 remaining loops on hook.
Ribbing Half-Double Crochet (video tutorial here)
Yarn over, insert hook, not into the top of the hdc below, but into the horizontal strand that runs across the front of the hdc below. Yarn over, pull up a loop. Yarn over, pull through all 3 loops on hook.
Double Crochet 3 Together
*Yarn over, insert hook into nxt st. Yarn over, pull up a loop, yarn over pull through 2 loops.* Repeat between *and* 2 more times. Yarn over, pull through all 4 loops on hook.
Mini Cozy Cardigan Instructions
Notes: This cardigan is worked sideways, back and forth in rows. The body of the sweater is worked in one long piece. Then the panel is rotated 90 degrees, and the two long strips extending off of the panel are folded down to create the left and right front of the cardigan. Sleeves are also worked sideways.
This pattern begins with a row of foundation half-double crochet instead of a foundation chain. The foundation half-double crochet is simple to work, and makes the foundation chain and the first row of half-double crochet at the same time. The foundation edge, when worked in this way, has much more stretch and flexibility than a regular foundation chain. I highly recommend using the foundation half-double crochet to begin your panel, but instructions for a regular foundation chain and row of half-double crochet are also included.
Body of Sweater
Row 1: Ch 2, sk 1 ch, Fhdc in 2nd ch from hook. Work 85 (91, 99, 121, 131, 139, 151, 153) more Fhdc. You should have 86 (92, 100, 122, 132, 140, 152, 154) sts, not including beg ch-sp.
OR
Row 1: Ch 88 (94, 102, 124, 134, 142, 154, 156). Sk first 2 chs, hdc in 3rd ch from hook. Hdc in nxt 85 (91, 99, 121, 131, 139, 151, 153) sts. You should have 86 (92, 100, 122, 132, 140, 152, 154) sts, not including skipped chs from beg of row.
Row 2: Ch 2, turn. (The ch 2 does not count as a stitch here and throughout.) Rhdc in same st and in ea of nxt 5 (5, 6, 6, 8, 8, 10, 10) sts. Hdc in ea of nxt 74 (80, 86, 108, 114, 122, 130, 132) sts. Rhdc in ea of nxt 6 (6, 7, 7, 9, 9, 11, 11) sts. You should have 86 (92, 100, 122, 132, 140, 152, 154) sts, not including beg ch-sp.
Repeat Row 2: 7 (8, 8, 9, 10, 10, 11, 12) more times.
Row 3: Ch 2, turn. Rhdc in same st and in nxt 5 (5, 6, 6, 8, 8, 10, 10) sts. Hdc in ea of nxt 32 (34, 36, 46, 50, 54, 58, 60) sts. STOP. Do not continue working across previous row. You should have 38 (40, 43, 53, 59, 63, 69, 71) sts, not including beg ch-sp.
Row 4: Ch 2, turn. Hdc in same st and in ea of nxt 31 (33, 35, 45, 49, 53, 57, 59) sts. Rhdc in ea of nxt 6 (6, 7, 7, 9, 9, 11, 11) sts. You should have 38 (40, 43, 53, 59, 63, 69, 71) sts, not including beg ch-sp.
Row 5: Ch 2, turn. Rhdc in same st and in ea of nxt 5 (5, 6, 6, 8, 8, 10, 10) sts. Hdc in ea of nxt 32 (34, 36, 46, 50, 54, 58, 60) sts. You should have 38 (40, 43, 53, 59, 63, 69, 71) sts, not including beg ch-sp.
Repeat Rows 4-5: 5 (5, 6, 6, 6, 7, 7, 7) more times. Repeat Row 4 once more.
Row 6: Ch 2, turn. Rhdc in same st and in ea of nxt 5 (5, 6, 6, 8, 8, 10, 10) sts. Hdc in ea of nxt 32 (34, 36, 46, 50, 54, 58, 60) sts. Fhdc in base of same st, then work 47 (51, 56, 68, 72, 76, 82, 82) more Fhdc. You should have 86 (92, 100, 122, 132, 140, 152, 154) sts, not including beg ch-sp.
Repeat Row 2: 8 (9, 9, 10, 11, 11, 12, 13) more times. Tie off.
Sleeve (make 2)
Leave a tail at least 2-3 yards long before beginning, then:
Row 1: Ch 2, sk 1 ch, Fhdc in 2nd ch from hook. Work 42 (46, 48, 52, 58, 63, 65, 68) more Fhdc. You should have 43 (47, 49, 53, 59, 64, 66, 69) sts, not including beg ch-sp.
OR
Row 1: Ch 45 (49, 51, 55, 61, 66, 68, 71). Sk first 2 chs, hdc in 3rd ch from hook. Hdc in nxt 42 (46, 48, 52, 58, 63, 65, 68) sts. You should have 43 (47, 49, 53, 59, 64, 66, 69) sts, not including skipped chs from beg of row.
Row 2: Ch 2, turn. Rhdc in same st and in ea of nxt 3 (3, 4, 4, 6, 6, 8, 8) sts. Hdc in ea of nxt 20 (22, 22, 24, 26, 29, 29, 30) sts. Dc in ea of nxt 19 (21, 22, 24, 26, 28, 28, 30) sts. You should have 43 (47, 49, 53, 59, 64, 66, 69) sts, not including beg ch-sp.
Row 3: Ch 3, turn. Dc in same st and in ea of nxt 25 (27, 28, 30, 32, 34, 34, 36) sts. Hdc in ea of nxt 13 (15, 15, 17, 19, 22, 22, 23) sts. Rhdc in ea of nxt 4 (4, 5, 5, 7, 7, 9, 9) sts. You should have 43 (47, 49, 53, 59, 64, 66, 69) sts, not including beg ch-sp.
Repeat Rows 2-3: 6 (6, 7, 8, 8, 9, 9, 9) more times. You should have a total of 15 (15, 17, 19, 19, 21, 21, 21) rows, including Row 1. Repeat Row 2 once more.
Row 4: Ch 2, turn. Hdc in same st and in ea of nxt 38 (42, 43, 47, 51, 56, 56, 59) sts. Rhdc in ea of nxt 4 (4, 5, 5, 7, 7, 9, 9) sts. You should have 43 (47, 49, 53, 59, 64, 66, 69) sts, not including beg ch-sp. Tie off, leaving a tail at least 1 yard long.
Assembly
Block all pieces before seaming. Use the blocking method recommended for the type of yarn you are using.
To Block: (video tutorial here)
For natural fibers, pin project out on foam blocking mats. Spray with water until fully saturated, allow to dry.
OR
For acrylic fibers, pin project out on an ironing board or several layers of towels. Hold a steaming iron 2-3” over the surface of the fabric, making sure all of the fabric is penetrated by the steam. Allow to cool / dry.

Thread the very long tail at the top of the sleeve through your yarn needle. On one long edge of Body of Sweater, count the stitches and divide them in half. Place a stitch marker at the center point. Fold Sleeve in half lengthwise, so long edges are together. Place a stitch marker at the center of the top edge of the sleeve.
Line up marker on sleeve with marker on Body of Sweater. This is the top of the shoulder. Making sure both the sleeve and the sweater are laying flat, whip stitch the sleeve to the body of the sweater, beginning at the corner of the sleeve where the tail begins and stopping at the stitch markers.
Count how many stitches of the body of the sweater were sewn to the first half of the sleeve. Remove stitch marker from current position. Count out the same number of stitches from the body of sweater for the other half of the sleeve seam. Place the stitch marker at that point and line up the other corner of the sleeve with the marker.
Continue to whip stitch the sleeve to the body of the sweater until you reach the corner of the sleeve. Once you have stitched through the corner of the sleeve, take another stitch in the same place, wrap the yarn around the needle, and pull the needle through to make a knot.
Do not cut the seaming yarn. Just remove it from the yarn needle. We will use it for the side seam later. Repeat instructions for this seam on the other sleeve.
Thread the shorter yarn tail from the cuff of the sleeve through your yarn needle. Fold Sleeve in half lengthwise so the two long edges are together. Starting from the cuff, whip stitch the long edges of the sleeve together.
Stop when you reach the point where the sleeve meets the body of the sweater. Take another stitch through that point, wrap the yarn around the needle, and pull the needle through to make a knot. Weave in this yarn tail.
Thread the remaining tail from the sleeve-to-body-of-sweater seam through your yarn needle. Lay sweater out so the front side edge is next to the back side edge. Whip stitch these two edges together, stopping at the hem edge. Take another stitch through that point, wrap the yarn around the needle, and pull the needle through to make a knot. Weave in this yarn tail. Repeat instructions for these seams on other side of cardigan.
Edging:
With wrong side of left front (left front when worn) facing you, join yarn in 1st stitch at hem edge.
Row 1: Ch 2. Working up the left front edge toward the neck, Rhdc in same st and in ea of nxt 5 (5, 6, 6, 8, 8, 10, 10) sts. Hdc in ea of nxt 41 (45, 49, 61, 63, 67, 71, 71) sts. Dc3tog with remaining st from front, corner, and back neck edge. Hdc evenly across back neck edge, stopping when there is room left for one more st on back neck edge. Dc3tog with remaining space on neck edge, corner, and 1st st on front edge. Hdc in ea of nxt 41 (45, 49, 61, 63, 67, 71, 71) sts. Rhdc in ea of nxt 6 (6, 7, 7, 9, 9, 11, 11) sts.
Row 2: Ch 2, turn. Rhdc in same st and in ea of nxt 5 (5, 6, 6, 8, 8, 10, 10) sts. Hdc in ea st across front edge, stopping when there is one more st before the dc3tog from previous row. Dc3tog. Hdc in ea st across back neck edge, stopping when there is one more st before the dc3tog from previous row. Dc3tog. Hdc in ea st across other front edge to last 6 (6, 7, 7, 9, 9, 11, 11) sts, Rhdc in ea of last 6 (6, 7, 7, 9, 9, 11, 11) sts.
Repeat Row 2: 1 (1, 2, 2, 2, 3, 3, 3) more times.
Row 3: Ch 2, turn. Hdc in same st and in ea st across.
Repeat Row 3: 5 (5, 6, 6, 6, 7, 7, 7) more times. Tie off, weave in ends.
Enjoy your finished Mini Cozy Cardigan!
This pattern is intended for your personal use only. You may not share it, copy it, sell it, give it away, or mass-produce the finished product. However, you may sell the finished items on a small scale, as long as you convey in your item description that you used a Yay For Yarn pattern.
Yay For Yarn Copyright© 2020 – Current. All patterns and photos are owned by Yay For Yarn.
Pin the image below to save this project for later!

")


Although I have known how to do some simple crochet for about 20 years, I am quite easily still a beginner. This is the first garment I’ve crocheted. I love it! Can’t wait to make more! I’m already thinking of all the possibilities. I tagged you in my IG post
When I crocheted into the 2nd Fhdc for the second side of the body, it was then not attached at the shoulder. I can’t figure out what I’ve done strong. Also are you saying to block the pieces before starting the edging?
Hi Patty. If you’re not sure what the problem is on the 2nd Fhdc, feel free to send me a photo at blogger[at]yayforyarn.com. I would be better able to help troubleshoot with a photo for reference. And yes, the pattern recommends blocking the pieces of the cardigan before seaming or adding the edging. I hope this helps!
Hello I’d like to use a super bulky yard instead. How do you suggest I can alter this pattern?
Hi Kam. Unfortunately, you cannot modify this pattern to use super bulky yarn unless you plan on re-writing the entire pattern from scratch. I would not recommend doing that unless you are comfortable writing your own patterns. The pattern calls for #4 Medium weight yarn, so I recommend using a yarn in that category for best results. I hope this helps!
Hi I’m really struggling with the sleeve. Thought it be really easy to whip them up but I’ve spent 4 hrs and still can’t get the second repeat to hold the correct amount of stitches someone pls help
Hi Amanda! If you’re having trouble with the stitch counts on the sleeve, feel free to send me a photo of your piece so I can help troubleshoot. You can send me a photo at blogger[at]yayforyarn.com. I hope this helps!
I LOVE this pattern! For brand new beginner crocheters however, I strongly recommend doing a crochet chain for the amount needed and NOT that other way because if you crochet into that very bottom loop of your chain, it has the exact same effect and its a TON easier.
Hi Shawn! I’m so glad to hear that you are enjoying this pattern. Although crocheting into the back bump of your chain does give the same look as the foundation half-double crochet, it is structurally different and does not have the same stretch as the foundation half-double crochet. (One of the purposes in using the foundation half-double crochet is for the stretch, so that the foundation edge has the same amount of stretch as the top edge of the work, and therefore both sides will hang evenly.) Feel free to do it either way, as both methods will work, but the foundation half-double crochet does have its advantages if you choose to use that technique. I hope this helps!
LOVE this patten! Worked up beautifully for my granddaughters. Please tell me you’ve worked this up in adult size?! I’d love to make this for myself.
Diane
Hi Diane! I’m so glad to hear that you’ve enjoyed this pattern. Yes, there is a women’s version of this cardigan pattern, which you can find here. I hope this helps!
I really like this pattern..but for the size 2 the sleeves were about 4″ or so way to long. Did anyone else have that problem?
Hi Linda! Did you check to make sure your gauge after blocking matches the pattern gauge? If the gauge is slightly off, that could cause the sleeves to be too long, however… each child is different and arm lengths can vary. The sweater is designed so that the sleeve length is at the longer end of the range of average arm lengths, so that for children with longer arms, the sleeves won’t be too short, but for children who don’t need as much sleeve length, the ribbed sleeve cuffs can be rolled up if needed. I hope this helps!
Hi there,
I’m wondering if you could clarify something in the pattern for me please. In the main body section, row 6 – after the 32 HDC along, it asks for FHDC in that end stitch and then work 47. In what stitches is the 47 please?
Hi Claire! The first FHDC is worked into the base of the previous regular stitch, and each of the following FHDC stitches are worked into the base of the previous FHDC. This is creating a strip of FHDC stitches, which is the new foundation edge for the other front piece of the cardigan. I hope this helps!
I am making the size 6. It works up so fast and easy but now I’m wondering if its long enough. It’s measuring 15″ from shoulder to bottom of ribbing. I can’t hold it up to the person because we live in different states. Can I increase just the length and leave the other dimensions size 6? Of course I realize that I will have to undo what I’ve done to add the length but I’m not to far into it yet.
Hi Peggy. The finished length from shoulder to hem will be half of the length of the section made from Row 2. You can add length if you like. Let’s say you wanted to add 10 stitches to the finished length. In that case, you would add 20 stitches total, 10 for the front and 10 for the back. As long as you keep the added stitches in mind as you work through the pattern, it won’t be a problem to add the extra length. I hope this helps!
Love this video! Can you explain why on the cuff – one side you have as an example size 6-8 – 7 RHDC and the other side you have 6 RHDC.
Also, can you show how many inches each fron side panel should be. (not just how many rows to crochet) – in case we are using a slightly different yarn/gauge.
Thank YOu!!
Hi Randi. The cuff on both rows of the sleeve is actually the same number of total RHDC stitches. However, sizes 6 and 8 have a total of 5 RHDC sts at the sleeve cuff. (Sizes 6 and 8 are the 3rd and 4th sizes in the pattern.) On row 2, it says to RHDC in the same st AND in the next 4 sts, for a total of 5 RHDC sts. At the end of row 3, it says to RHDC in the last 5 sts. When you are working the body panel, the finished width of the back should measure half of the finished chest measurement of the cardigan. It’s okay to use a slightly different yarn (as long as it is #4 weight), but I highly recommend making sure you match the pattern gauge as closely as possible. I hope this helps!
Thanls for the very quick response!!
Just to summarize – my width of the back is total 13 inches. so each side panel will be 4 inches and the back piece 5 inches.(8+5)
The front two panels will be 4 inches each.. will this work??? Im using bernat baby softee as I wanted a warmer climate type sweater… thanks for your help. I’ll post a picture when its done.
If you’re making the size 6, the finished back width should be 14 inches. So if your piece is 13 inches, the finished chest measurement would be 26″, much closer to the size 4 measurements. If you’re altering the pattern to make it work with your yarn, you may need to add a couple of rows to make it an inch wider across the back. It may be best to add 2 extra rows to the center back portion of the body panel (by repeating rows 4-5 an extra time). I hope this helps!
Hi. Sorry – just one more question. I’m on to the sleeves…yay!! Can you tell me how many inches long the sleeve should be and how many inches the circumference of the upper arm. (size 8) I’m thinking your 53 loops is 14. 45 inches long.
Thanks!!
Yes, the sleeve length for size 8 should be 14.5 inches long, and the width at the top of the sleeve should be 12 inches. I hope this helps!
I made making a 13 year old but the chest is coming up a size 8 year old
Mary
Hi Mary. If the cardigan is coming out too small, did you check your yarn weight and gauge before beginning? Also, the neck edging around the fronts of the cardigan do add a few inches to the finished chest measurement, so the final measurement of the cardigan is measured after the edgings are finished. I would be better able to help if you could share more info on the issue. Thanks!
I am using Aran yarn, 5.5m hook. I have been crouching for 68 years with always having crochet on the go. The length seems to be ok. It is the chest.. you do row 4-5 7 more times. That comes up about age 8 years. I have carried on doing more rows until I get to width. Of 18 ins. Then work round the front some how. Thank you for your quick reply. My daugher will love this cardigan.
Very up to date. Mary
Hi Mary. If you continue working Rows 4-5 until your piece is 18 inches high, that will not include the other front section. Since the fronts and back of the cardigan are worked all in one piece, and the rows run vertically (piece worked sideways), if you want the finished back width to be 18 inches, you’ll need to allow room for the remaining rows of the body panel to fit into that 18 inches. The first section of rows up to row 3 is the front and back of one side, then the section from row 3 up to row 6 is the center back area. From row 6 to the end is the other front and back of the other side. So the entire height of all your rows in the body panel should finish at about 18 inches wide if you want the finished cardigan to be 18 inches wide laying flat. I hope this helps!
It’s so cozy! Love it! I never crochet cardigans before but I will love to make it!